Showing posts with label Sewaholic. Show all posts

Friday, 17 March 2017

Pink Floral Sweetheart

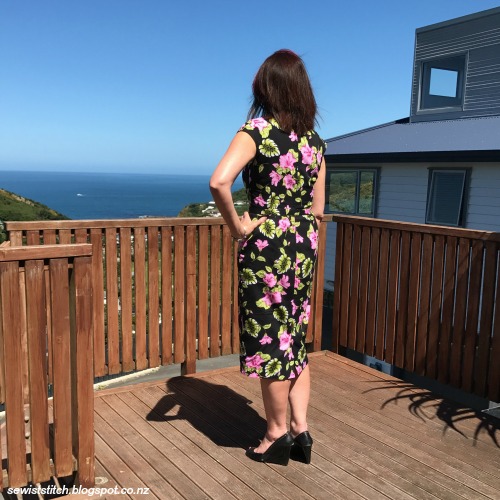
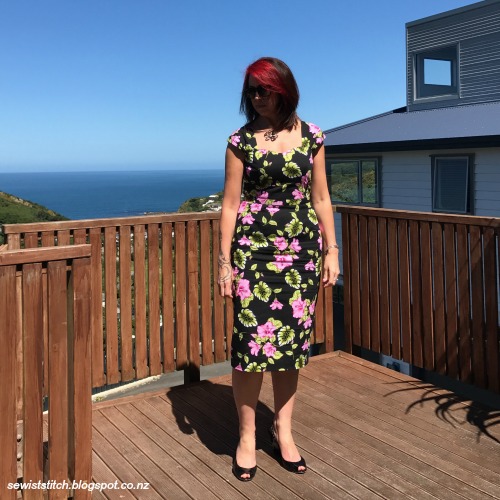
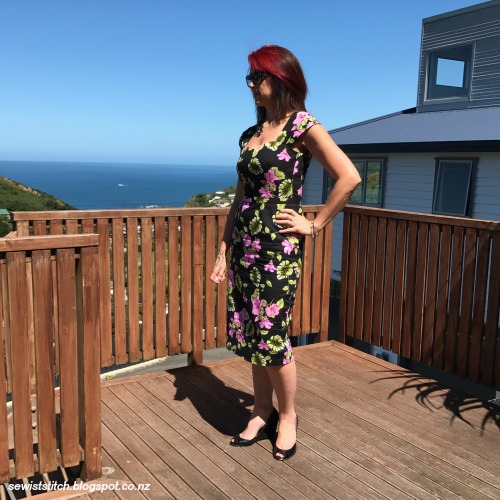
Pink Floral Dress

This dress was fun but challenging at the same time. First the fun ... I found this fabric by accident while on holiday in Rarotonga earlier this year, and immediately knew it would make a lovely summer dress while still keeping within my wardrobe comfort zone ... because it was black? probably!

The challenge ... to mash together two separate patterns into one dress that looked like it was meant to be. The top is the Sewaholic Cambie pattern and the bottom is the Billy Jean pattern by Bluegingerdoll.  Both dresses I've made before quite a while ago, and well, the body has changed a little since then.


Then came the cheating ... in theory, the side seams and dart legs of the top are meant to be in the same vertical line as the skirt, right?! Hmm, did I really need to fluff with getting that right if the skirt and top are separated by a waist band and the floral print would act as a camouflage ... NO! Can you tell? NO!  #winning

Pink Floral Dress

Pink Floral Dress

With this dress I experimented a bit with the underlining. I took my silk organsa and underlined all the front pieces and the top half of all the skirt pieces.

A couple of reasons really.  I didn't want the dress to be too heavy but I did want the front to have some structure. The top half of the skirt needed to fall over my hips without showing every curve but the bottom half really didn't need it. Unfortunately I can't find any of my 'work in progress' photos to share with you :(

The dress is also fully lined, but with separate fabrics for the top and bottom.  The top half is lined with some silk crepe de chine from The Fabric Store. Something I bought a wee while ago at a good price because of colour inconsistency. No one gets to see the lining, so not a problem. The skirt is lined with some 'new to me' lining from Hawes and Freer Ltd, from their Superwash range. It is heavier than the crepe de chine which helps give another layer of fabric over the hips and butt and helps the skirt fall really nicely. It skims over the body and moves so nicely, but doesn't look bulky, and so far no static! I think I'm sold on this as a lining for skirts!

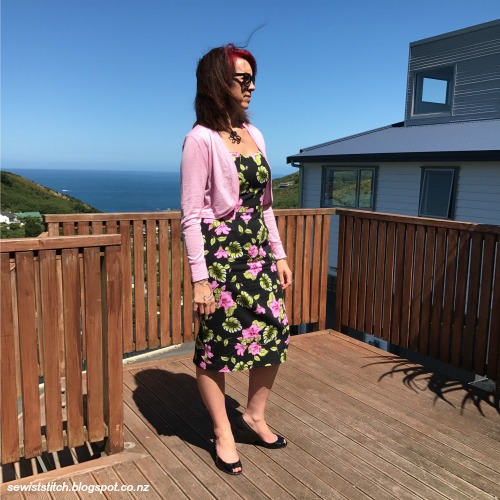
To finish the look I picked up some baby pink merino from Levana and whiped up this cute little bolero.

Pink Floral Dress


More photos in my Flickr album -->

Saturday, 26 September 2015

Refining the Granville

Third time lucky ... well so the saying goes anyway.

Untitled

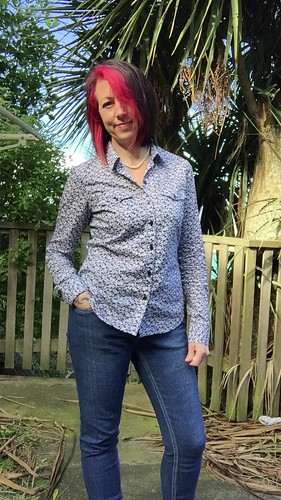
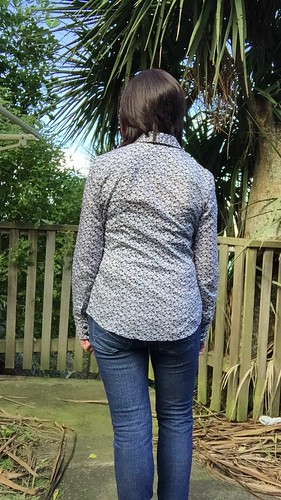
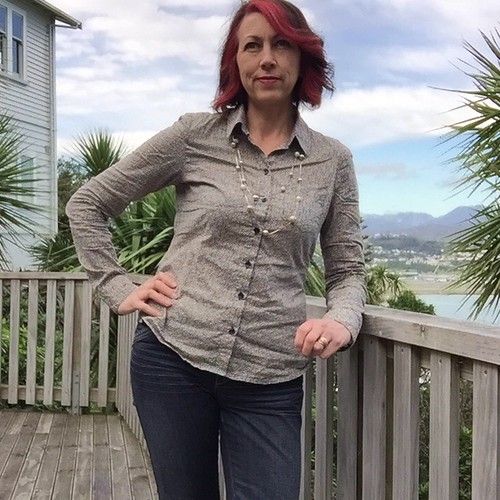
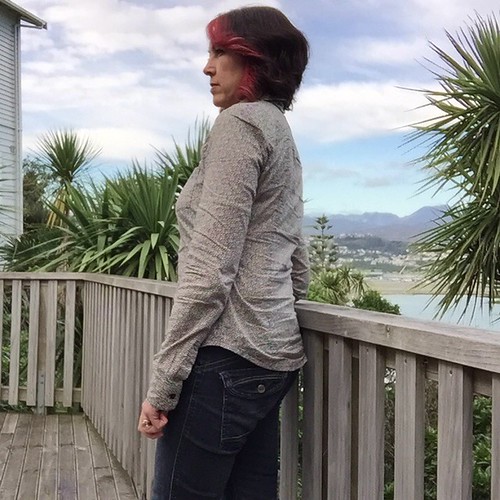
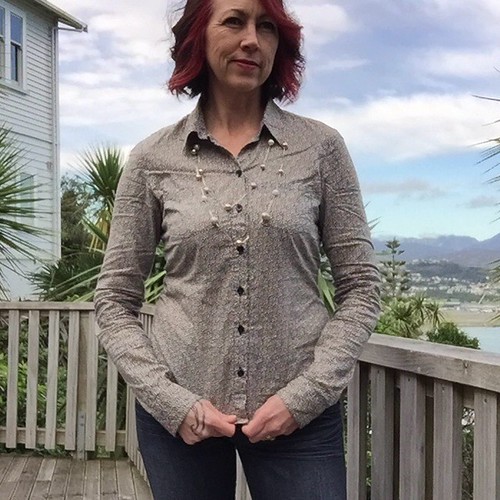
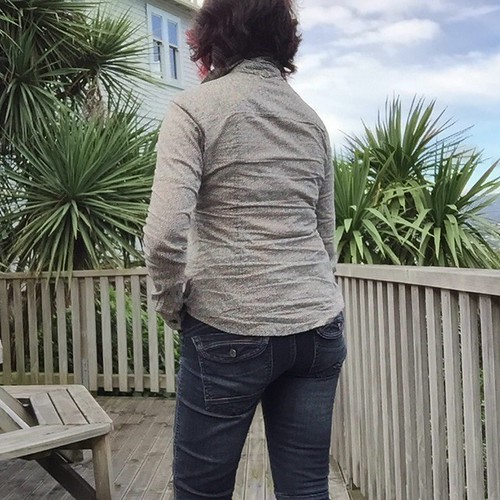
This is my third Granville Shirt. The first was HERE and the second HERE.  But even though this was the third I felt that there were still further adjustments I needed to make to refine the fit.

For this version I left all the previous adjustments in place, you can get that list here, and then made the following tweaks
  • Added 1/4" to front side seams
  • Added 1/4" to the side back side seam - both these adjustments were so I could get more room around the body.
  • Added 1/4" to each side of the sleeve under arm seam, tapered to existing wrist edge - again giving me more room around my arm.
  • Added 1/2" to the length above the waist.
  • this time I added 1" to the original pattern length of the sleeve.
Although minor, the fits feels better and I'm much happier with the length of the shirt.


Untitled

Untitled

For this version I included the pocket flaps - although this is the only tell tale sign that there is actually pockets there.  They are lost amongst this lovely cotton poplin I got from Blackbird Fabrics. Including postage it worked out to be NZ$18 p/m which I thought was very reasonable.

Untitled

Sadly I didn't take any photos of the inside, but I finished all the seams with a french seam finish, except for the armscye, which I finished with some Hug Snug binding.  I also applied Hug Snug to the hem and then turned it up and sewed it down.  It provided a much nicer finish to the hem rather than turning it up twice, especially around the curve.  It makes the inside look interesting as well.

I'm really lovin this shirt and it works well with my Ginger Jeans.

More photos available on my Flickr -->


Saturday, 22 August 2015

Channelling my inner Olivia Pope!

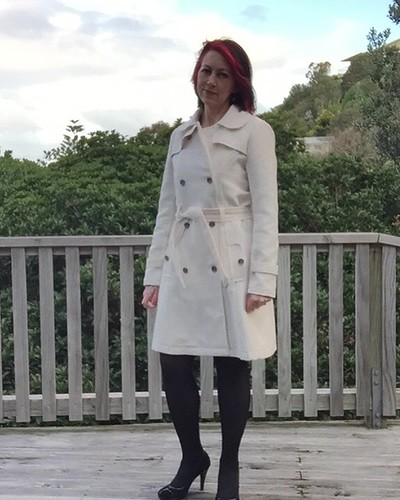
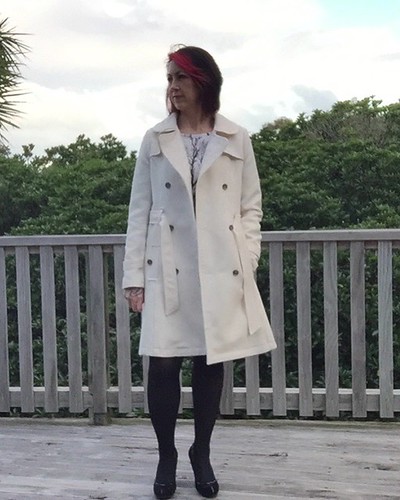
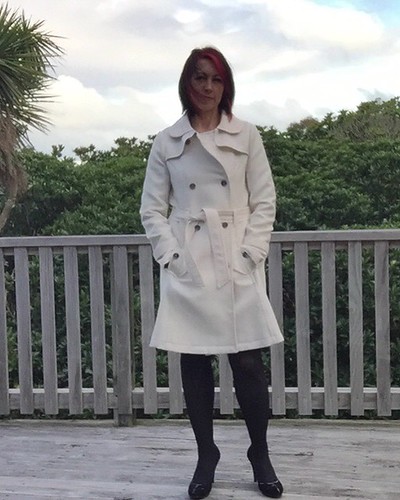
I'm not gonna lie, I was completely inspired by a winter white coat worn by Olivia Pope, while I was engrossed in a Scandal watching marathon!  Would it fit in my wardrobe and would I have anything to wear with it - who cared, I was making it anyway :-)

Winter White Trench

The coat itself has been a bit of a marathon make.  I already had the Robson Coat by Sewaholic Patterns in my stash. My first attempt at this pattern had been a complete disaster, for a couple of reasons but anyway if I was going to make this one work I needed to get a muslin sewn up and work out the fit issues. So that happened in February 2015.

Sorting out my fit issues took a while - I couldn't work out why I was getting putting on the front armscye where it joined the side front.  I tried adjusting the armscye itself, but to no avail. So I let it smoulder for a few months.  Then in May I had a brain wave and went back to the muslin to adjust the bust curve on the princes seam - letting it out to provide more room. That combined with a slight change in the armseye shape on the side front so it was less of a curve, provided that extra room that allowed freedom of movement.  Here is the list of adjustments I made in the order I made them:
  • I started with a size 10 (upper body through to waist), then tappered into a size 6 at the hips and the length of a size 0.
  • Lengthened the bodice by 1/2" at the high bust. This lowered the apex of the bust and the armpit, both which I need as I am much taller than the woman the pattern is designed for.
  • Removed 1" from the length of the coat - I did this 5" above the hem.
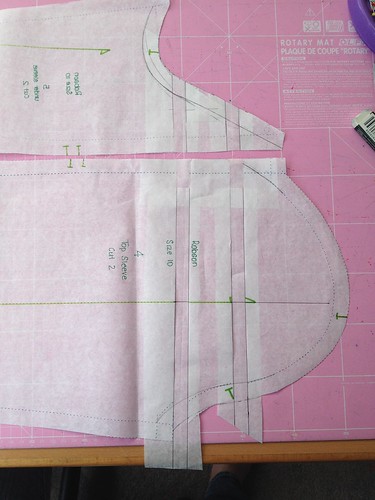
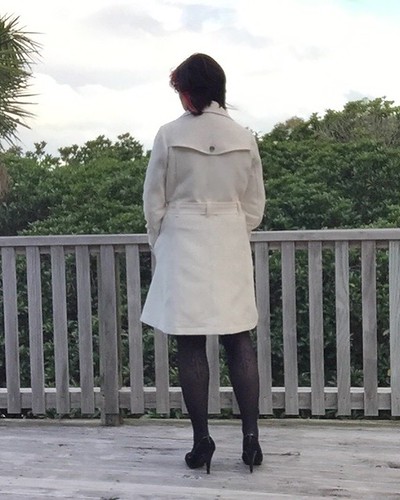
  • Added 1/4" to the armscye on the side back to provide more room for my broad back. I also had to make this adjustment to the back flap to ensure it would sit across the back and match the new cutting line of the side back.
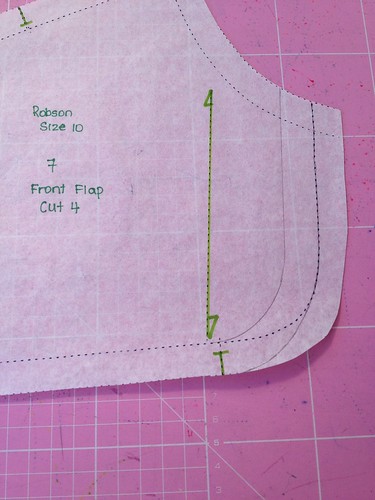
  • Removed 5/8" from the front flap at the centre front side. I wanted the front flaps to sit under the collar - something I had noticed from the first disaster attempt!
Robson coat in the making
  • Added 1/2" to the base of the armscye curve on the sleeve piece to provide for the extra length I had given to the bodice.
  • Added 1/2" to the cap of the sleeve to add more fullness.
Robson coat in the making
  • Omitted the epaulets on the shoulder to reduce the bulk.
So with the fitting solved, I set to and cut into my fashion fabric. Back in February (I think), or it could have been back in later 2014 when I got the inspiration for this project, I picked-up this beautiful winter white cotton jacquard from The Fabric Store. It was $28 p/m but well worth it. I hummed and harred over the binding, debating over all kinds of options, but in the end I went with this subtle neutral toned cotton, also from The Fabric Store - a little more pricey at $32 p/m but I only needed one metre.

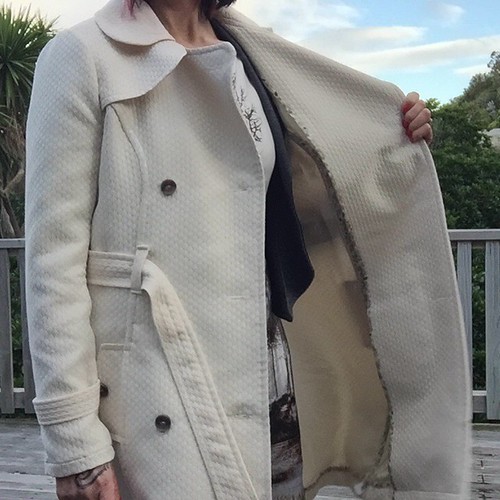
The cotton jacquard was really opaque, but I still thought it needed to be interlined - well for a couple of reasons really: one, to ensure that any dark colours I wore under the coat wouldn't taint the collar of the coat from the outside; and two, that the inside would be lined making it easy to put on over other clothing fabrics.  So on another one of my visits to The Fabric Warehouse I got this really lovely, light weight, shinny, polyester lining - oh yes I did say polyester, but it is just lovely and I figured that it would help keep the warmth of the coat in.

Work in Progress

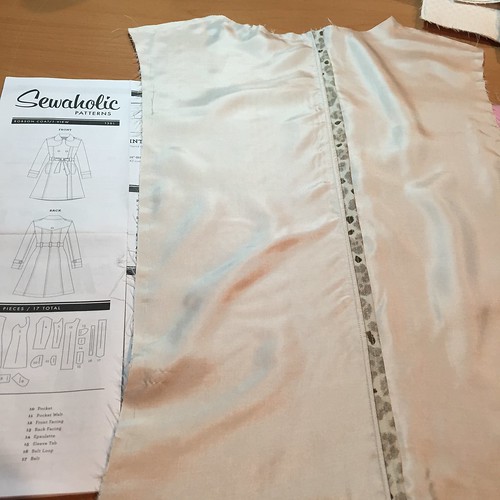
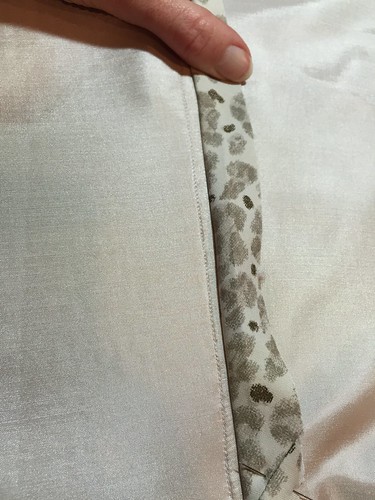
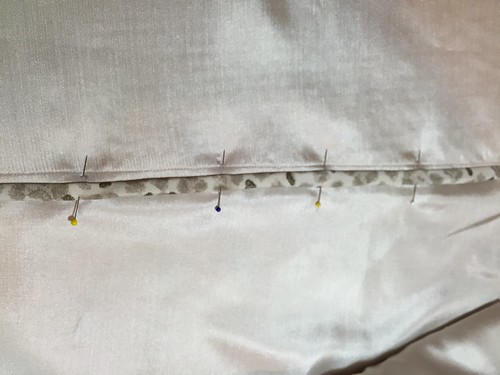
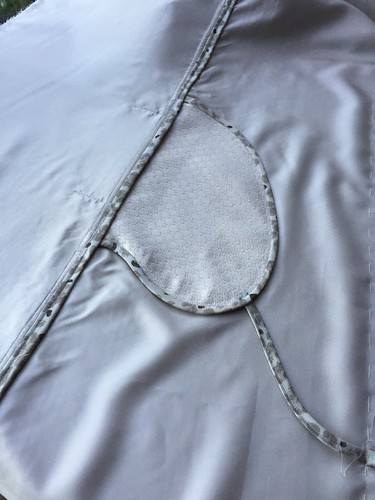
I hand basted all the lining pieces to the shell fabric pieces by hand, then sewed them as one. To avoid an additional row of stitching rather than binding the seams closed I used a hong kong finish, the raw edge of the bias tape was closed in when I top stitched the seam down.

Work in Progress

Work in Progress

Work in Progress

The exception was around the edges of the pocket.

Work in Progress

Overall, the inside of the coat looks soo nice. But attaching all that bias tape took forever, and I'd get fed-up with the process, so I'd treat myself by taking a break and sewing something completely different.

Winter White Trench

At first I wasn't quite sure what to wear with it, and because it's such a statement piece, the first few times I worn it I felt like the clown at the party. Now I've worn it with dresses and pants and am feeling a lot more comfortable.

Winter White Trench


Winter White Trench

Winter White Trench

I finished the look by added some mottle light brown buttons. I am totally happy with the final fit of the coat. I can comfortably wear two layers underneath without it feeling tight or uncomfortable. It is exactly as I imagined it would be!

More photos on my Flickr -->

Sunday, 28 June 2015

Granville Shirt Muslin

Shirts haven't really been a thing that I've been busting a boiler to make - not something I have in my wardrobe either. Maybe because I haven't really found one that fits comfortably. When the Sewaholic Granville shirt was released I was instantly drawn to the shape that it gave the body ... and the best thing about sewing is that there's the opportunity to tweak the fit if it's not working.

Rather than make a true muslin, I picked up 2.4m of cotton voile for $14.00 to make a wearable muslin.  To begin a took some measurements of the pattern, checking that the darts weren't too high, that the body length wasn't going to be short.  I did length the arms by 2".  I cut a size 8 and narrowed to a size 6 at the hip on the side seam.

Granville wearable muslin

I'm happily sewing along, following the instructions and feeling pretty pleased with myself and how fantastic the seam allowances looked on the inside with a french seam finish.
The yoke beautifully encases the seam finishes and is really easy to achieve. Then I got to the front and was all confused, coz I misses the note on the pattern piece where the cut line on the right side was different to the left. I had to cut off the band I had already attached and start again after I had cut the centre front in the right place. Luckily I had cut 2 of the front placket pattern piece anyway, instead of just one that was required. Must have known I was going to mess it up!

Granville wearable muslin


This was the first time I had sewn a sleeve placket... OMGosh how super fiddly these are.  I got there in the end but they're not super perfect.  The under piece doesn't quite fit is I had to fold it over slightly, but no one can see it anyway. The edge stitching needs some improvement, especially around the point. They are functional and the pattern of the fabric hides all :)

Granville wearable muslin

I also need to work on the curved corner of the collar stand in the front. They are passable but could be a whole lot better. I think I just need to work on the technique.

There are a lot of fussy fiddly bits on a shirt and I now have a new appreciation for this garment.

Granville wearable muslin
Lots of wrinkles from wearing it all morning!
The finished shirt isn't bad and I'll get away with wearing it over some jeans, but next time I need to look at:
  • shortening the sleeve by 1", so it is only 1" longer than the pattern itself.
  • move the side dart down by 1/2"
  • more room around the waist - I don't want to go out a whole size but a 1/8" on the front and back pattern pieces will give me an extra 1/2" all round.
  • moving the waist down about 1/2" as well. It's just a tad too high.
I bought some really lovely patterned silk from The Fabric Store that I've used for my real version.

Saturday, 23 May 2015

Belcarra Tunic

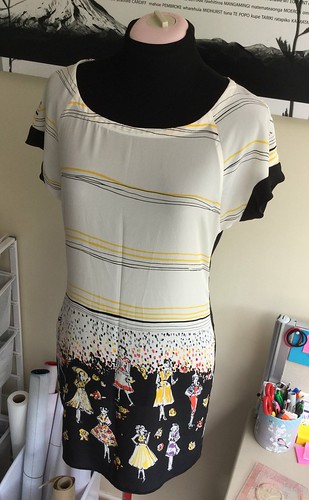
When I purchased the Belcarra from Sewaholic I knew that it would be such a versatile pattern that I could manipulate to get multiple looks. This is my third look from this pattern.

Belcarra Tunic

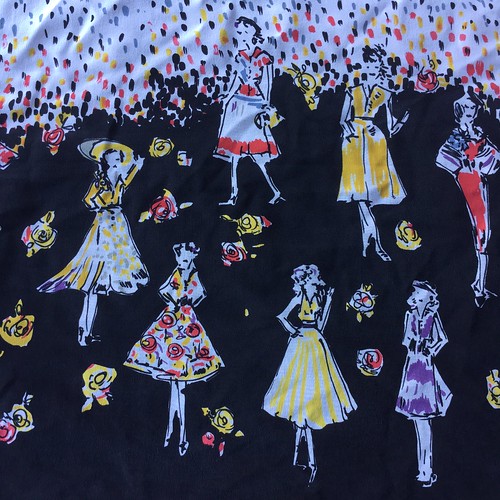
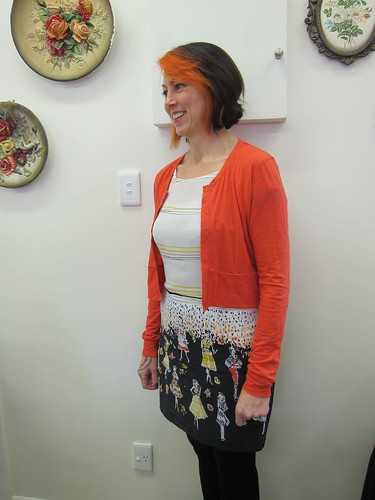
This time a tunic!  I walked into The Fabric Store on 12 September 2014 and immediately fell in love with this border print.  I was there for another quite specific purpose, that alludes me just as this moment - coz every trip to the fabric store is for a specific purpose right!!!

It wasn't cheap at $36 for 1 length which was 1m x .95cm, but it was crepe de chine and felt soooo nice. After wrestling for some time with my inner voice I gave in a bought a metre. The border print is filled with pretty dresses in pretty colours ....

Belcarra Tunic

It's been sitting in the cupboard for a wee while because I couldn't decide what to match it with, until a few weeks ago, when I was back at The Fabric Store, I found some black crepe de chine on special for $10p/m.

I used every little scrap of the boarder print on the front and sleeves.  I then used the black for the back and the sleeve bands.  Because I didn't have enough of the boarder print for the neck binding and the black would have shown right through the cream, I had to use some knit tricot that I had in the stash - oh the joys of having a stash!

Belcarra Tunic

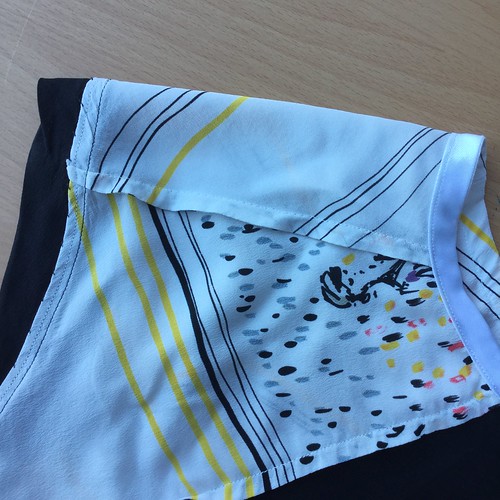
All the side seams and shoulder/sleeve seams are finished with a french seam. The sleeve cuffs where sewn as normal, right sides together, but then I graded the cuff seam allowance and turned the cream over and run another line of stitching around the seam allowance - the cream encasing the trimed raw edges of the black cuff.  The seam allowance had to be pressed towards the cuff so it wouldn't be seen through the cream sleeve. After a good press I tacked the seam allowance to the cuff by hand.

The bottom hem I used a hairline seam technique that is so easy and looks so great.

Belcarra Tunic

I fiddled with the pattern sizing a little more this time, after my dress version had way too much room around the waist and hips.  I traced the pattern off again, this time tracing a size 8 for the bust and graded it down to a size 6 at the waist and hips.  It's a little snug around the hips this time, which isn't the look I was going for, so somewhere in-between both sizes would be ideal for next time.

Belcarra Tunic

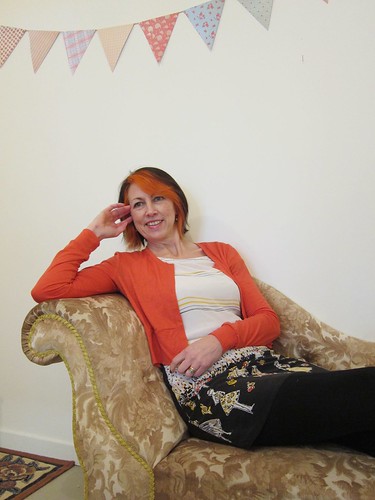
You may remember in my last post I talked about the WSBN 0 Degrees of  Sewing Separation Challenge... well this is my second link in the chain.  For the fabric I link to The Dreamstress who made a beautiful Dorothy Lara dress and for the pattern I link to The Crazy Gypsy Chronicles.  The full chain of links can be found in this post by The Dreamstress.

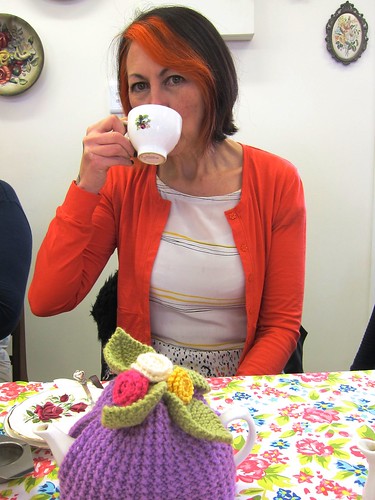
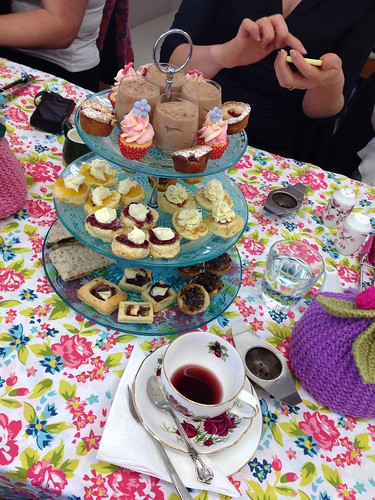
Thanks to The Dreamstress for taking some photos yesterday at our WSBN get together for High Tea.
Belcarra Tunic

WSBN High Tea 23 May 2015

More photos on my Flickr

Tuesday, 14 April 2015

Silk Granville Shirt

Silk Granville Shirt

After finishing my wearable muslin (which I haven't blogged yet, oops! but will explain more soon...) I immediately made the following changes to the pattern pieces of the Sewaholic Granville Shirt:
  • moved the side dart and waist down 1/2" using the cut and slash method above the bust on the front pieces and the two back pieces.
  • I didn't want to change the length of the shirt, so I removed 1/2" at the high hip on all three pattern pieces.
  • I added 1/8" at the waist by the front and side back pieces, created an additional 1/2" of ease all round.
  • I added 1" to the original sleeve pattern piece.
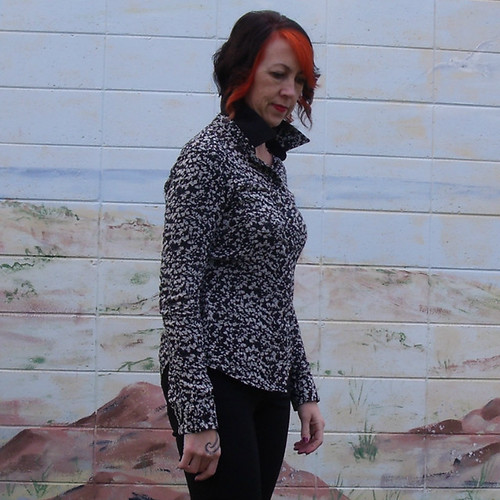
This shirt is a little difficult to get a true read on fit because the silk is so mobile, but it is feeling like the changes worked.

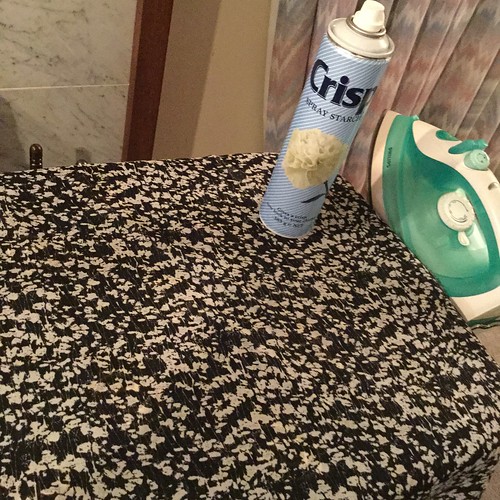
To keep the silk under control while sewing I used some starch spray, ironed it in and then left it overnight to set. Not sure that you need to let it set, but once it was dry the silk had a wee bit more control.
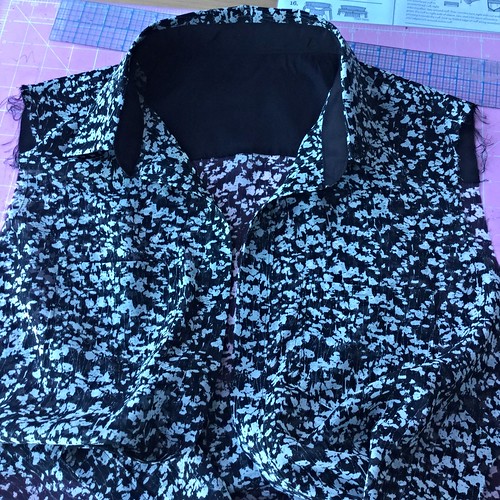
Makings of a silk Granville Shirt

I wanted to add some structure to the collar, collar stand and cuffs - so rather than using a really heaving interfacing I elected to use some silk crepe de chine on the underside of these pieces. I applied the interfacing to the crepe de chine pieces so the silk would move loosely over top . I love the end of result of this.

I think I should have used the crepe de chine for the sleeve plackets because constructing these with the silk was just a real pain in the arse! They are not pretty!!!

Makings of a silk Granville Shirt

Silk Granville Shirt

I finished all the seams with the french seam technique including setting in the sleeve. This is the first time I've used the french seam to set in the sleeve and I was so nervous about sewing it the wrong way I must have triple checked it twice over, each time.  It was relatively easy to do and the finish around the sleeve is now just as pretty as all the other seams.

Because the silk was so delicate I used a 70/10 needle in my machine and purchased some machine embroidery thread which is much finer than the standard polyester thread. I would definitely recommend it - I'll be using it again for other fine silk / chiffon fabrics. I also put my walking foot on my machine to minimise the movement of the fabric.  A combination of all these bits and pieces made sewing the silk very enjoyable.

I used the hairline hem technique which I've used more than once before, but this time it's a bit of a mess - not sure what I did wrong this time, but really wish I'd done a rolled hem by hand!!

You can't see in the pictures but there are pockets on both sides of the front. I probably didn't need to put them on because the fabric is so busy you can't see them, but I know they're there.

Silk Granville Shirt

This time round I made a much better job of the collar stand. I drafted a collar stand template like Tasia recommended in her tutorials, marked the stitching line on the fabric and then followed on the machine. The silk was easy to tuck out of the way, resulting in the ends of the collar stand looking identical. Whoop, whoop!

The sad part is that the weather in this part of the world has just turned terribly cold - you know coat and gloves cold!  So my lovely silk shirt will probably have to hang in the wardrobe until the end of the year then the warmer weather rolls around again.  I had to put a merino on underneath to take these photos!

Silk Granville Shirt

Anyway more about why I've blogged my lovely silk version before my muslin version of the Granville Shirt ... well you know that the Wellington Sewing Bloggers Network (WSBN) get up to all sorts of sewing fun that also includes fabric enabling and pattern shopping :-)  The Dreamstress put this idea to the group: "Could the Wellington Sewing Bloggers Network create a linking chain of sewing creations, where each person’s creation shares a fabric or pattern with the next person’s creation?"  And so the 0Degrees of Sewing Separation Challenge was born.

Sew Along

This was probably the hardest challenge we've had so far, it took a few months to sort out our connections and how they would link into a chain, but we got there in the end.  I am second in the chain matching the Granville Sewaholic pattern to Silly Billy Sewing who ended up being twinsees with Two Random Words.  The chain continues with Fifty Two Fancies using the same fabric as me to make a pattern shared with another.  You get the picture right!  For the month of April we are unraveling our 0Degrees of Sewing Separation with a blog tour.  If you are interested in reading about our antics head over to The Dreamstress who is updating her blog daily with each reveal.

Silk Granville Shirt

More photos of my Silk Chiffon Granville over on my Flickr -->

Monday, 17 November 2014

Inspiration Station

It's not often I copy a RTW look to the tee.  Usually I troll through Pinterest or designer websites for inspiration on styling and the detail that leads me to what I pull together.   On one of my 'internet window shopping' sessions I came across this dress...

Belcarra Dress Inspiration

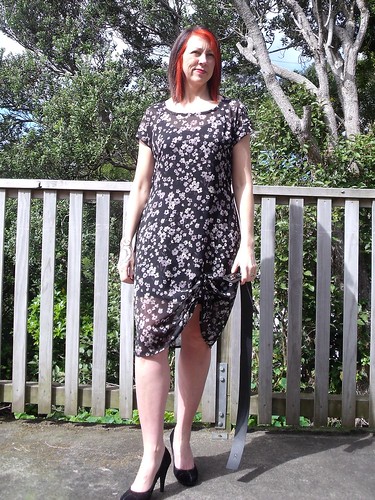
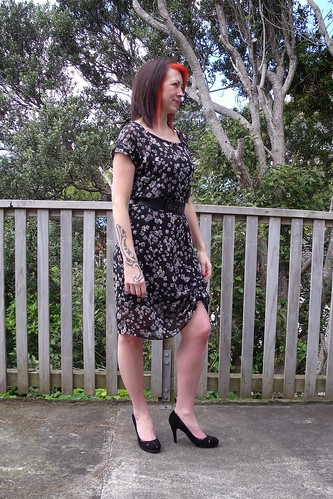
I thought this dress would be the ideal, easy wear, summer, work appropriate addition to my wardrobe - simple but classy.  Immediately the Belcarra top pattern came to mind - how easy would it be to simply add some length to make it a dress.

I went to the depths of my fabric stash and found this black crinkle chiffon (well that's what I'm gonna call it anyway) with a small floral print.  I bought this online a wee while ago and it wasn't what I expected when it arrived, so I figured that if the dress didn't work out then I wouldn't be too disappointed.

Belcarra Dress

When I made my first Belcarra top I selected a size 10 based on my bust and graded to a size 8 at the hip, resulting in a great fitting top.  I used exactly the same size selection for this dress and extended the bottom of the top straight down by 17".  However, the fit on this has a completely different result.

Belcarra Dress

It has way and I mean waaaay too much room around the waist and hip area.  I considered taking it in, but the seams have a french seam finish, which would mean unpicking the sleeves in order to get to the side seams and re-shape them.  The fabric is so fine, I was worried that I would cause more damage and render it completely unwearable, so no picking here.

My next thought was to add some elastic across the middle of the back at the waist.  I cut a 2" piece of 1/4" elastic and stretched this as much as I could while attaching it with a zig zag stitch.

Belcarra Dress

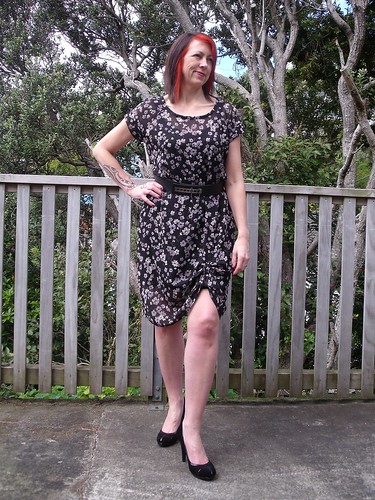
While that made a small improvement, I feel that it's still too big.  Thank goodness for a belt!

Belcarra Dress

There, that looks better already.  Okay, now we can move on to more of the details ...

I hoisted up the hem over the left leg ... I don't know why, but it just felt better, than on the right side.  Firstly I made a tab  3" wide by 7" long, folded it in half, sewed up two sides and turned right side out.  I then created a buttonhole in the dress, horizontal to the hem, 7" up from the hem - I applied a small amount of tailors fusible interfacing to stabilise  the fabric before sewing the buttonhole.  I threaded the tab through the buttonhole and hoisted up the hem then closed the tab using a few hand stitches.  Sorry, didn't take any photos of this process - brain was too busy working overtime trying to nut this out!

I decided that the lift in the hem wasn't dramatic enough, and the dress still looked like a sack, so promptly repeated the process making a second button hole and second tab, this time threading the tab through both button holes.

Belcarra Dress

Now that the fabric is made up into a dress, I actually don't mind it and will probably get loads of wear out of this dress over the coming summer months.

More photos on my Flickr -->


Saturday, 6 September 2014

The Great WSBN sewing room tour

It's probably really well known around the sewing bloggers that the WSBN are always up to something either in real life or in cyberland - gee I can barely keep up with the FB Group we have!  But then one of our lovely members (Gemma at 66stitches.wordpress.com) suggested we should do a sewing room tour to get us out of our winter slump and ready for spring - oh yeah, who wouldn't want to do this! 

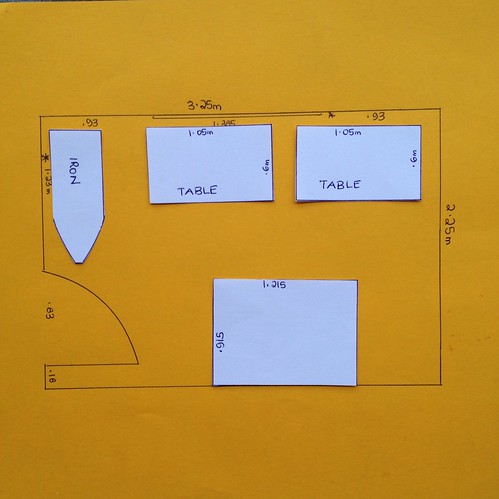
I think I've said before, that in March my eldest daughter moved to Australia which meant for the first time ever, I could have my own wee sewing room, and return the dining room to it's original purpose.  When I say wee, it is really wee compared to others I've seen on the WSBN sewing room tour.  Only 3.25m x 2.25m with a window on one long wall and the door on the short wall...
Sewing room plan

I started planning before my daughter had even left home (sad I know!), well this is what I had finally settled on.  I purchased the furniture second hand knowing the dimensions of the room were limiting - then they sat in the shed while I renovated the room.  Yep, I decided that if I was going to have a new sewing room then it needed to feel sparkly new.  Let me show you a picture of the pre-renovation room ...
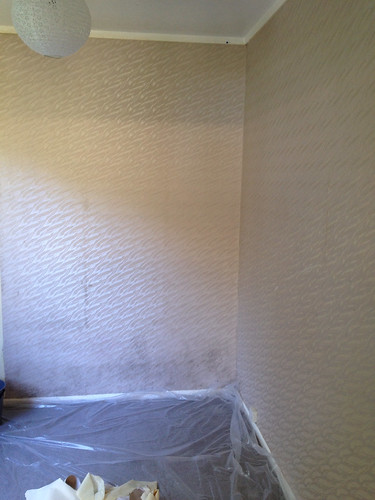
Renovate sewing room
This is not pretty!  Not for a sewing room.
Well, I could write a detailed book about my first ever renovation project (which I did all by my little self), but I won't bore you with that detail, so let me just wave my little magic Cinderella wand ... abbra-ka-dabbra  *poof* ...
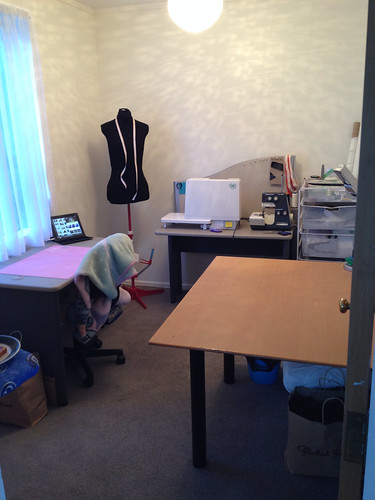
Sewing room
The prettiest little sewing room ever!
As you can see, it didn't go exactly accordingly to my original plans - I forgot to take into consideration the dress form (that doesn't have a name btw!) and the set of draws I inherited from daughter #2.  There is just enough room for me to scoot around on my re-purposed office chair (currently draped in a blanket, that I usually wrap around my legs, cause it's winter!).

Let's go around the room clockwise starting at the 9 - the ironing board is in the original location and you can see the blue end just in the photo, and just below that, the brown paper bag on the floor filled with fabric - I should be honest there is actually three bags, you just can't see them, hehehe!

Then at 10 is my hand work space with the ipad, cause I always like to watch things while I sew.  At 11 is my dress form, a Singer 150 which I bought a cover for - I don't think I could look at that bright red colour for too long.  I also like that I don't have to navigate the gaps when I'm using it.

At 12 are my sewing machines - my Janome DC6030 (purchased just 18 months ago) and overlocker Globelock M-4 which I inherited from my mother and had serviced.  It's okay but doesn't much like the sheer fabrics.  Next are the draws where I stash my patterns, muslins, interfacing, basket of threads, and the like.

Then at 3 you have my cutting table.  Yeah it's not very tall but I'm still trying to come up with a plan to elevate it more.  Then ... underneath the table are a few more bags spewing fabric!  Behind the door are my rolls of tracing paper, waxed tracing sheets and a roll of calico.

Day13 #mmmay14 today is lace dress day #Burda #sewcialist  Day27 #mmmay14 @victorypatterns #chloe dress and @papercutpatterns circle top  Day23 #memademay14 @cakeatwork #hummingbird tee and @papercutpatterns #Circletop and my fav RTW jeans #sewcialist
Most of my Me-Made-May photos where taken in this room

But sadly today I've moved out of my room so it can be converted back to a bedroom, and I'm taking up residence in the dining room again.  This time not on the dining room table!  I now have a corner of the room with all my furniture nicely arranged
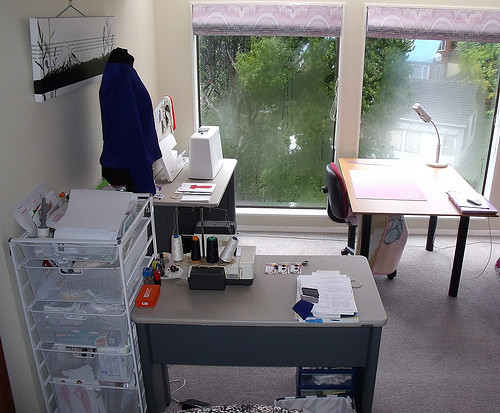
15131208066_3903a32a5b
Today was a bit cold so the dehumidifier is still working on clearing the condensation!
Being back in the dining room I can be right in front of the fire in winter and get the best view in summer.  The light in the new space isn't that great at night but loads of natural light during the day.  It will be perfect now that we are heading into summer and daylight savings :-)

14967557380_a5c032d469

What you didn't see in previous photos was my wee set of draws with my scissors, zipper stash, elastics, trims and other bits and pieces.

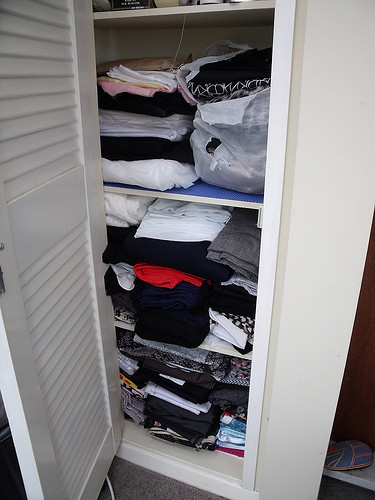
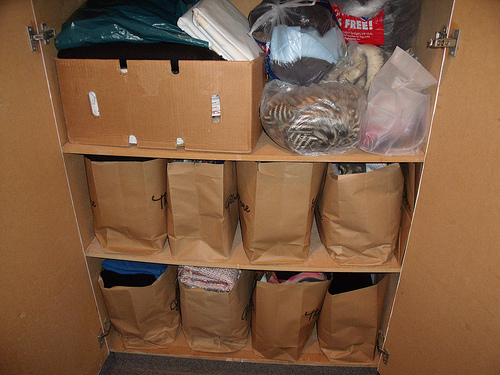
Where is her fabric stash I hear you say ... very valid question.  I never like to admit that I have a stash that keeps mutating, so it's hidden in a couple of places.  Here is cupboard one - originally the stash only took up two shelves in this cupboard (with room to breath); now it's stuffed into three!

14967662708_8b1f1225e9

Now let's take a walk downstairs and into my linen cupboards just outside the laundry ...

15154237425_4a44251bba

... hahaha you still cant' see any fabric.  Come on, a little hide-n-seek is always fun :-)  As you may have guessed those are all bags from The Fabric Store, cause that is seriously my favourite fabric shop!

You also may have noticed that there isn't any work-in-progress.  Right now I'm trying to decide what to make next.  On my dress form is my recently finished Pavot jacket that is awaiting a decision on buttons - luckily Pavot is patient :-)

I've also just finished a Marfy top as a wearable muslin.  I'm tempted to make some changes and sew it all over again, but I don't feel like doing that right now.

I've just purchased the new Jenna Cardi and could make that up is this pretty merino, but I have to go to the office to print the PDF, and well that's not gonna happen today.
DSCF7800

I've got some beautiful wool crepe to make this Marfy dress, but I will need to go buy some lining appropriate for the fabric.  I also have another Marfy jacket that I want to make - but these are serious time consuming projects.
Sewing room plan
Then I want to make a Belcarra dress with this as inspiration, but will also need to make the slip dress underneath.

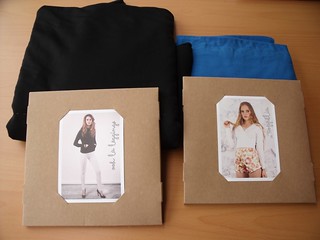
I have two Papercut Patterns that I'm keen to make a start on; the Coppelia wrap top from this pretty blue merino and some Ooh la Leggings from this shinny merino blend :-)

DSCF7799

Then I've got a master plan to sew a little something for the Pattern Review Frankenpattern contest, mainly because the contest master is Heather B, and morphing a couple of patterns together is always fun.  I'm undecided at the moment what exactly I'm gonna make.

So many options, so many decisions, so many patterns, so much fabric, I'm exhausted just thinking about it!  .... while sitting here looking out the window, at this little slice of heaven ...

15154240625_45b42689a5
Today was rather overcast and the ocean a bit rough, but on a good day, it is beautiful.
... it has come to me, so gotta go, got some frankening to work out *mwahaahaa*

PS. If you're interested in more photos of my sewing room 'that was' and 'that is now', head on over to my Flickr -->

Edit note:  hopefully you can see all the photos in this post - I've had some trouble with Flickr goggling my images.  Please email me if you can see them and I'll try and fix again xx  
Edit note 2:  Full list of the WSBN Tour
1st: Gemma at 66 Stitches
2nd: Laura at Laulipopnz
4th: Nikki at NikkiStitches
5th: Juliet at Crazy Gypsy Chronicles
6th: Sandra at SewistStitch
7th: Sophie-Lee at Two Random Words
8th: Kat at Macskakat
9th: Holly at Polycraftual
10th: MaryLouise at Thanks I made this myself
11th: Nina at Ninavirgo
12th: Sandra at FlossieFT
13th: Melissa at The Curous Kiwi
14th: Zara at Off-Grid Chic
15th: Crafty Mermaid
16th: Gillian at Sewing Down Under
17th: Leimomi at The Dreamstress
18th: Teresa at Adventures of a Girl from the Naki
19th: Joy at Acharmofmagpies
20th: Nicola at Silvern Swan
21st: Jenna at Ruby Dust
22nd: MrsC from Sent from my iRon
22nd: Elisabeth