Showing posts with label Summer. Show all posts

Tuesday, 9 December 2014

Smitten by Holly

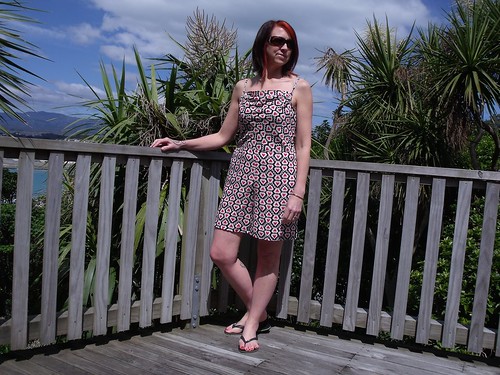
When By Hand London released the Holly Jumpsuit I was rather smitten by the wide legged, cowl neck version and every one I saw in the blogisphere convinced me it was a pattern I needed to sew this summer.

Holly Jumpsuit

While I agree a jumpsuit can leave you feeling rather vulnerable when you need to visit the loo, I figured that I would probably only wear it during the summer months and it wouldn't be any worse than going to the bathroom in a bikini!  Totally normal for summer right?

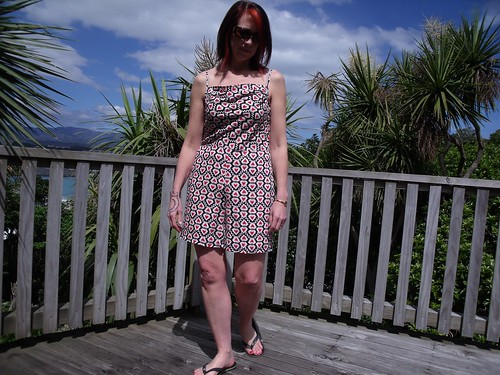
I decided that my first version needed to be beach/weekend wear, so went with the top of version 1 and the shorts from version 2 - lengthened to me more age appropriate for me.  I added 2" to the length of the pattern shorts.
Holly Jumpsuit

The real scary thing was the pant - cause I so haven't got my head around what part of the pant pattern needs to be adjusted when it doesn't fit properly/comfortably, arrrrgh!  The girls at By Hand London held a sew-along not long after the pattern was released.  I didn't sew along exactly but I was paying attention when they covered 'full and flat butt adjustments'. This is an interesting one, because while I don't have the outward curve of a 'young' butt I have really wide hips.

Holly Jumpsuit

I made a 1/2" flat butt adjustment, and then added 1/8" to the side seam at the high hip. The fit seemed to be good but the crotch felt a bit low, although I wasn't really sure where it should be!  So after wearing my muslin around for a little bit I thought I needed to remove 1/4" horizontally, which I did across both the front and back pattern pieces at the high hip.

Holly Jumpsuit

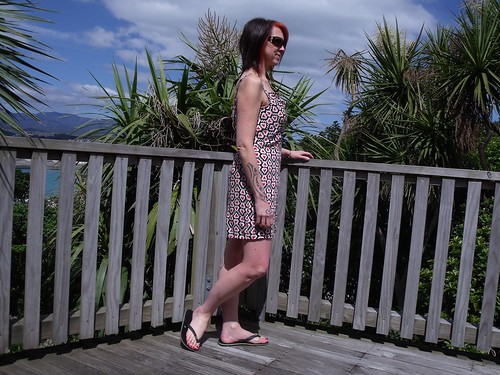
Is it weird to say 'look at my butt'?!? Maybe the more appropriate thing to say is 'look how well the pant falls over my backside', lol!  I'm pretty happy with the final fit, although I now realise that the back crotch could do with some more depth - I can feel it tighten when I bend over.

The flat butt adjustment also fixed the side seam which was leaning toward the front instead of staying perpendicular to the floor.  I still haven't got my head around the engineering of it all, but it worked for me and that is the main thing :-)
Holly Jumpsuit

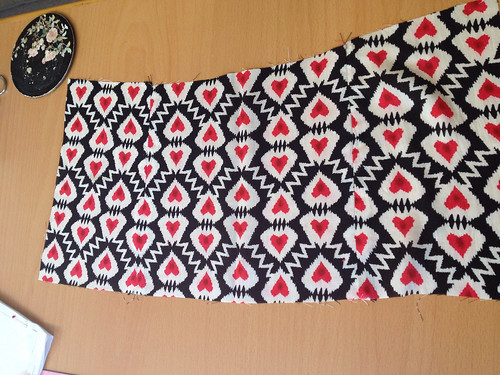
I chose this really dreamy rayon from my stash that I picked up at the Arthur Toye closing down sale earlier in the year - the drape is ideal.  I wasn't going for perfect pattern matching, but I did attempt to look at the pattern placement on the fabric before cutting.  As it turned out the pattern matching across the back three pieces was pretty bloody fantastic!
Holly Jumpsuit

The fabric was kinda transparent, especially if I stood in the sunlight, it almost became completely sheer - and given I'm planning on wearing this to the beach I opted to line the whole jumpsuit with a really light weight acetate I had in the cupboard.  As you can see from this picture you can almost see through the lining as well.  Together they provide just the right amount of modesty while remaining light weight.
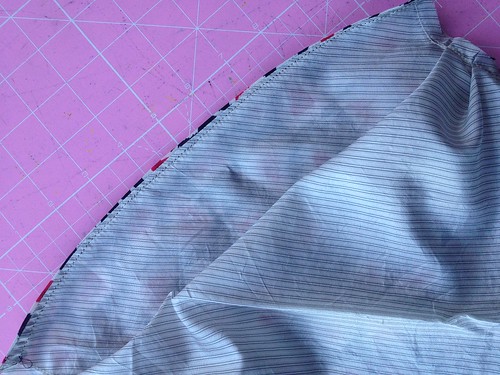
Holly Jumpsuit

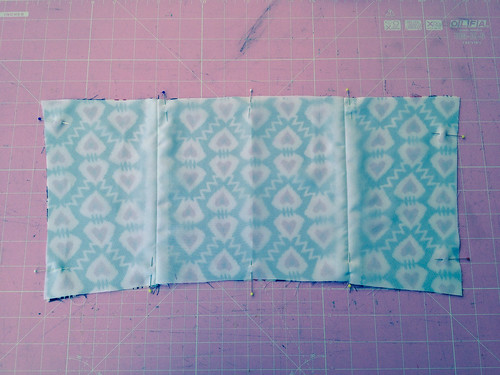
I constructed both the shell and the lining, then attached them across the neckline of the front piece, understitching on the inside.  The back and the armholes are encased in the bias binding, with the short lining is hemmed 1" shorter than the shell.

I interlined the back pieces with some poly/cotton scraps to give it a bit more structure.
Holly Jumpsuit

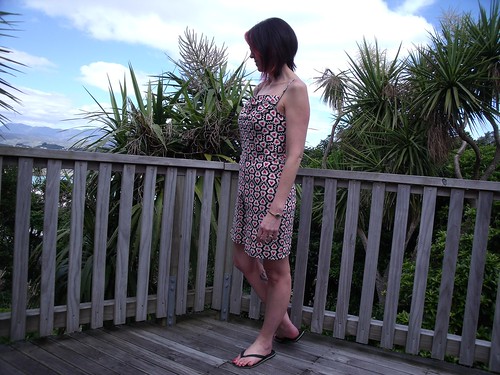
Overall, I am pretty happy with my first Holly playsuit.  I've already got a second one in the pipeline - this one will be the long pant version, staying true to version 1 of the pattern.
Holly Jumpsuit

More photos on my Flickr -->

Monday, 25 November 2013

Floral - Summer - Wiggle

Untitled

This cute little baby is my first ever full on floral dress (can you believe it!), and I am super in love with it.  Yay for the gorgeous summer days we've been having lately - no hanging around in the wardrobe for this dress.

Untitled

As some of you might know I'm a little obsessed with Instagram atm and this wee obsession allowed me to be one of three lucky people to get a discounted 'end of stock' pattern from Blueginerdoll.  Abbey had rebranded all her pattern packaging and was looking to off-load the last of the 'old' Billie Jean patterns.

Actually, I was sitting on the fence about the pattern cause I just wasn't sure about the shoulder straps. The discount was just enough to tip me over and I must say it hasn't disappointed.

Floral Billie Jean

While I was in Auckland earlier in the month I managed to get in a wee bit of fabric shopping.  This lovely cotton sateen just kept calling my name and I kept walking away saying 'I don't do floral', but in the end the colours just drew me in.  I actually bought three pieces of fabric that day and this is the only one that has made it to my sewing table.

Untitled

Billie Jean is described as a wiggle dress, but I actually have a heap of room to wiggle around in.  I think the pattern is very cleaver in that it looks super body hugging, but doesn't feel that way at all.   When walking it does call for small step, especially when paired with these shoes :).

Untitled

The construction methods are fabulous making it almost impossible not to be able to line up the bodice princess seams with the skirt darts.   I think I might adopt this method for other patterns now.

I lined this dress with a black cotton viole, the perfect choice for a summer dress.  I did debate with myself about the length, but went with the pattern recommendation and think that it adds to the charm of the dress.

If you are sitting on the fence about this dress, there is no reason to be any more.  I'm sure my Billie Jean will get loads of wear this summer.

More photos on my Flickr -->

Friday, 8 February 2013

Morphing patterns together

This was one of those projects that I began in 2012 but didn't finish until just recently.  Actually by recently I mean 3 weeks ago! It's a top that I morphed together from two patterns, and made some tweaks here and there to get exactly what I was looking for.
The base pattern is New Look 6713   The pattern provided for an a-symmetrical or cow-neck front, neither of which was what I wanted, so I took the a-symmetrical pattern piece and cut it on the fold at the centre front so both sides were the same.


On the back I didn't just want two straps which would look as if I was going to the beach instead of work, so I took a back pattern piece from another pattern and used it as a template to create the back, matching the side and shoulder seam pieces to the front piece.
On the back I inserted a zip and removed the need for elastic.  This meant I had to slightly alter the width of the pattern across the back so it wouldn't hang but would provide a snug fit.
The fabric is gorgeous, a very light weight cotton (could even be bamboo??) which I've fully lined.  It was a piece that I had in my stash - I think I originally brought it to make a dress, but then changed my mind!  I have already worn it a few times, either on it's own with a simple straight skirt (as you see in the photos) or just yesterday with black skinny pants and a jacket.
Haha! this isn't exactly the most flattering of photos but all the same is a good shot of the full front of the top.  I would probably make this pattern again as it is a versatile piece for my work wardrobe, but next time I would lower the neck line in the front and take about half an inch off from around the empire line so it has a firmer fit.

I'm interested to hear from others on their success with morphing patterns to get what you want rather than looking for a whole new pattern.

Monday, 28 January 2013

Smart Casual Mila

Yesterday I finished sewing the hooks & eyes, as the finishing touch, to my Mila dress.  After a wash 'n dry I was able to wear it to work today.  What do you think?

(excuse the no shoes - I couldn't wait to get them off my feet after a day at the office!)


You can most certainly tell I've been in the office today - the crinkles in the front, noticeable in the lighter solid colour, are a definite give away.


As mentioned in my earlier Mila post, this was the first time I had downloaded a pattern from www.burdastyle.com for printing at home.  It felt quite strange working from a heavier photocopier paper rather than the usual pattern tissue.  I almost felt like I was damaging my pins.

It was a bit of a funny pattern really.  Usually I just choose a pattern size according to my bust measurement and make an adjustment for my hips and I am good to go.  So I did the same with this pattern, but after the first fitting I had to remove at least 4 inches evenly from the two side seams and back seam (as I had already constructed the front panel).   I also removed about 1 inch from the should seams.  

The front has a inner layer, which you can't see in my pictures, but this inner layer was really, really low - so much so that you could see my bra in my first fitting.  I wasn't able to change this too much but I did manage to raise it so it is a little bit more respectable for the office.  The pattern concept was a good one, but it didn't really pull it off.

I went back to the pattern website to revisit the pictures of the sample dress, and I now see that the front bust area on the this dress (below) are the same as mine - see how her black bra is peeking out the top of the dress.  Luckily I have managed to close the outer layer of my dress more than the picture below so as not to have too much cleavage showing.

After much wiggling and fitting I have a fit that I am happy with.  If I got to do the front all over again I would reconsider the placement of the darts and perhaps separate the front bust pattern piece from the placket so I didn't have to sew a 90 degree angle into the dress, didn't enjoy that part at all.

After wearing the dress for a day I am feeling better about it than when I first tried it on.  I can definitely see this dress being worn over and over and over this summer.

Tuesday, 15 January 2013

Open source sewing: The Mila Dress

For my next project I have chosen an independent pattern from Mila Fashion on the Burda website.  This is the first time I have downloaded a pattern from the website, printed and assembled it.  I was pleasantly surprised how easy this exercise was; something I would definitely do again.

It is meant to be mid summer, despite that I am sitting here writing this with a blanket wrapped around my legs and a sweatshirt on.  So in preparation for the return of those long summer days I'm going fabric shopping tomorrow, specifically looking for a fun summer cotton.  I'm not sure yet whether I'll go for a contrast in colours (as per the pattern images) or a variation of the same tone - it will come to me when I get to the fabric shop I am sure.

I've already decided that I won't be putting the pockets into the side of the dress - I think this makes my hips look bigger than they need to.  I quite like the hook'n'eye detail down the front of the dress but instead of sewing each individually I'm going to look for a strip of pre-sewn hooks and eyes ... I know this might be slightly cheating but I'm okay with that.  As with all slim fitting dresses I will need to adjust the pattern to allow for my hips, which usually works just fine when I make that adjustment directly to the pattern before cutting.

I think for this dress I won't make a muslin, but I'll allow for a rather large seam allowance and baste the dress together for a fitting before I machine sew it.  This way I can make any fitting adjustments directly onto the dress without too much hassle, and hopefully save a bit of time. 

I always want to wear the garment before I've even cut it out!  My aim for 2013 is to take a bit more time with my projects to improve my fitting skills, which will hopefully give an overall more professional finish to my garments.  Here goes .....