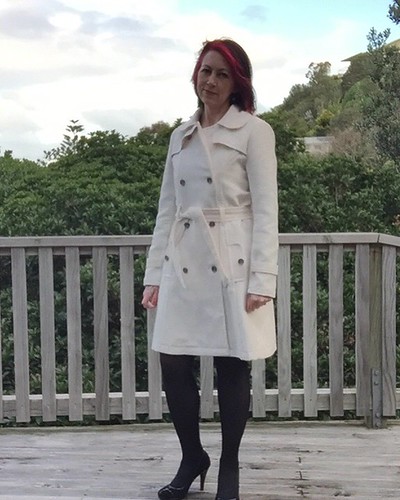
The coat itself has been a bit of a marathon make. I already had the Robson Coat by Sewaholic Patterns in my stash. My first attempt at this pattern had been a complete disaster, for a couple of reasons but anyway if I was going to make this one work I needed to get a muslin sewn up and work out the fit issues. So that happened in February 2015.
Sorting out my fit issues took a while - I couldn't work out why I was getting putting on the front armscye where it joined the side front. I tried adjusting the armscye itself, but to no avail. So I let it smoulder for a few months. Then in May I had a brain wave and went back to the muslin to adjust the bust curve on the princes seam - letting it out to provide more room. That combined with a slight change in the armseye shape on the side front so it was less of a curve, provided that extra room that allowed freedom of movement. Here is the list of adjustments I made in the order I made them:
- I started with a size 10 (upper body through to waist), then tappered into a size 6 at the hips and the length of a size 0.
- Lengthened the bodice by 1/2" at the high bust. This lowered the apex of the bust and the armpit, both which I need as I am much taller than the woman the pattern is designed for.
- Removed 1" from the length of the coat - I did this 5" above the hem.
- Added 1/4" to the armscye on the side back to provide more room for my broad back. I also had to make this adjustment to the back flap to ensure it would sit across the back and match the new cutting line of the side back.
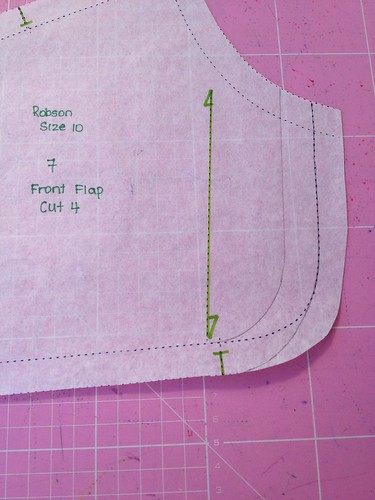
- Removed 5/8" from the front flap at the centre front side. I wanted the front flaps to sit under the collar - something I had noticed from the first disaster attempt!
- Added 1/2" to the base of the armscye curve on the sleeve piece to provide for the extra length I had given to the bodice.
- Added 1/2" to the cap of the sleeve to add more fullness.
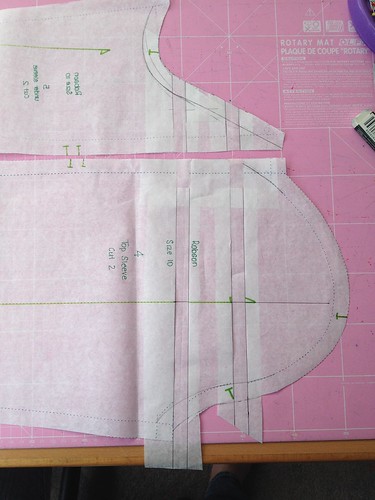
- Omitted the epaulets on the shoulder to reduce the bulk.
The cotton jacquard was really opaque, but I still thought it needed to be interlined - well for a couple of reasons really: one, to ensure that any dark colours I wore under the coat wouldn't taint the collar of the coat from the outside; and two, that the inside would be lined making it easy to put on over other clothing fabrics. So on another one of my visits to The Fabric Warehouse I got this really lovely, light weight, shinny, polyester lining - oh yes I did say polyester, but it is just lovely and I figured that it would help keep the warmth of the coat in.
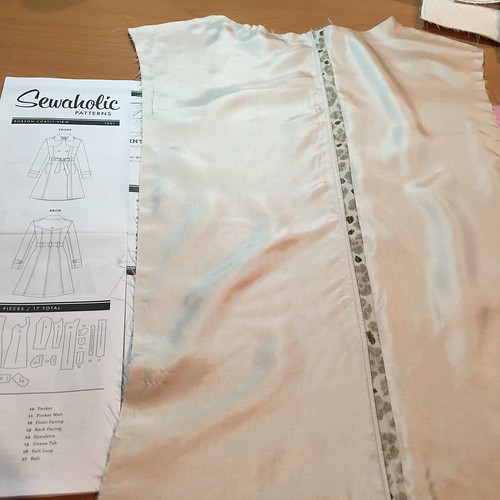
I hand basted all the lining pieces to the shell fabric pieces by hand, then sewed them as one. To avoid an additional row of stitching rather than binding the seams closed I used a hong kong finish, the raw edge of the bias tape was closed in when I top stitched the seam down.

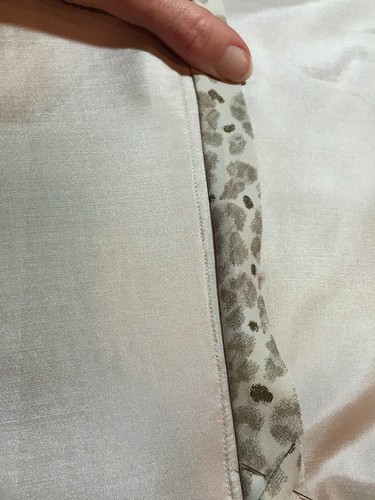
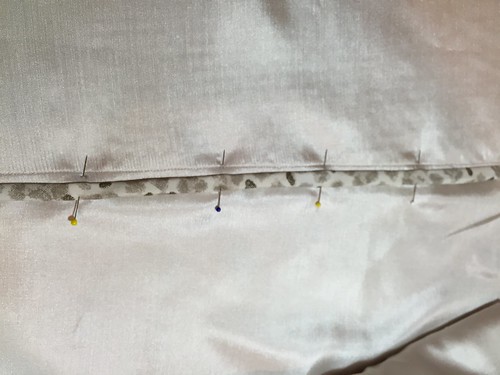
The exception was around the edges of the pocket.
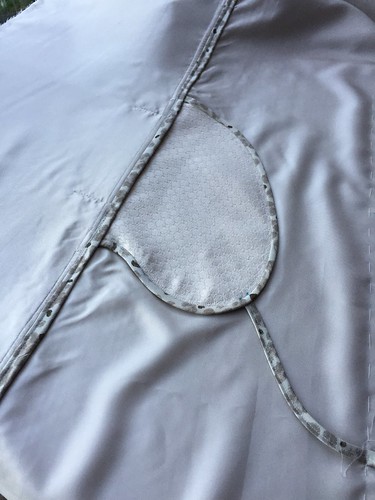
Overall, the inside of the coat looks soo nice. But attaching all that bias tape took forever, and I'd get fed-up with the process, so I'd treat myself by taking a break and sewing something completely different.
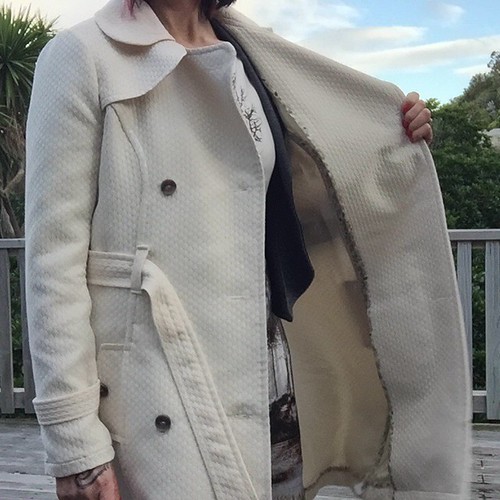
At first I wasn't quite sure what to wear with it, and because it's such a statement piece, the first few times I worn it I felt like the clown at the party. Now I've worn it with dresses and pants and am feeling a lot more comfortable.
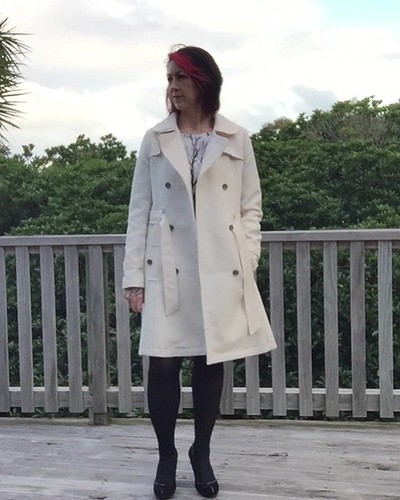
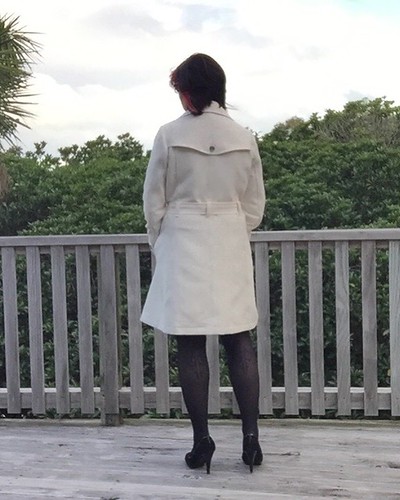
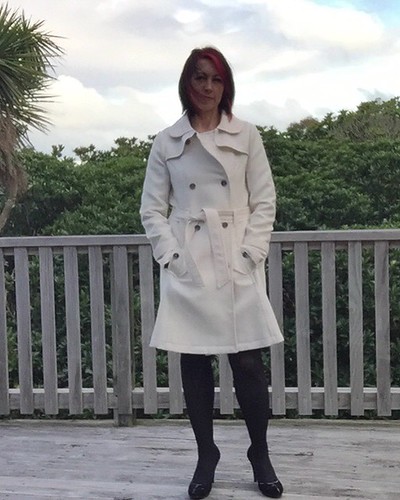
I finished the look by added some mottle light brown buttons. I am totally happy with the final fit of the coat. I can comfortably wear two layers underneath without it feeling tight or uncomfortable. It is exactly as I imagined it would be!
More photos on my Flickr -->


