Showing posts with label cotton voile. Show all posts

Saturday, 3 October 2015

The Adventures of B5882 (Part 1)

A wee interweb search of B5882 will quickly reveal the challenges that this pattern has provided - but who doesn't like a challenge right!  However, I didn't realise this until after I had committed to making two of them for daughter #1.

B5882 B5882

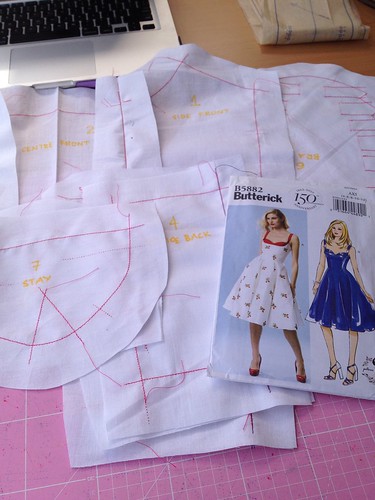
As always I started with a muslin anyway, so no biggie, I would just work out all the fit issues at that stage and then enjoy the construction.
B5882

I started by cutting out a size 12, but reduced seam allowances down to 3/8" rather than the recommend 5/8".  It all went together pretty well, except for where the cup hit the top of the side front. The pattern says "turn down upper end of bra along fold line, as shown, baste."  The picture below mimics what the pattern illustration shows - but how bloody weird is that!
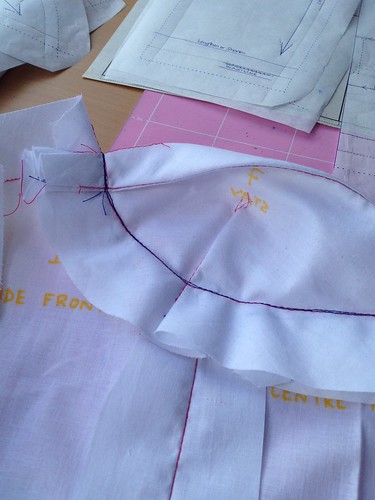
B5882

So I pretty much ignored that part of the instructions - although in truth I only used the instructions as a general guide rather than following them step by step.  So rather than turning the bra/cup under I extended the side front up to the top of the bra/cup - as you can see in the photo below, the red line was the original stitch line.
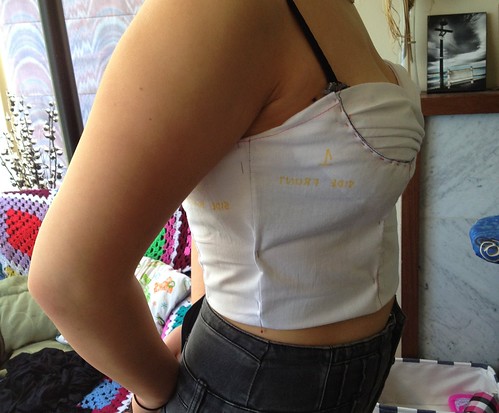
B5882

Actually the lifting of the side front to meet the top of the bra/cup side gives a much better look, and snugs up under the arm for a better fit as well.

B5882

I had to make a bunch of adjustments to the front pieces to get better portions and have the princess seams hit the apex, as they should.

Please note that I always work with the stitching line rather than the cutting line of a pattern - for all these adjustments I've identified the stitch line by working from the cut line. So the blue dotted line is the cutting line of the original pattern (size 12) and the pencil/pink pen indicate the stitching line that I will be sewing along (sorry if this is a bit confusing - it all made perfect sense at the time!)

Let's start with the centre front ...
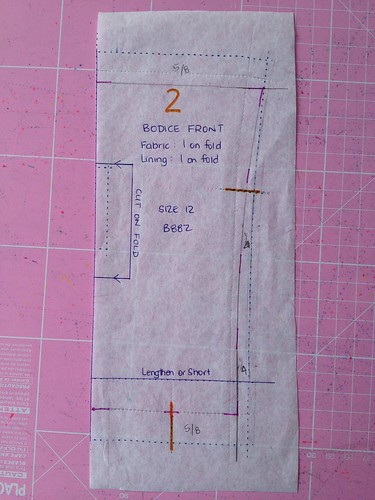
B5882
  • The stitch line for the top and bottom are 5/8" in from the cut line.
  • Only came in 1/4" from the cut line at the bottom and curved it up to the existing cut line at the top - meaning that I had to add a full 5/8" to the top. This resulted in moving the princess seam out towards the armhole, to be more in line with the apex.
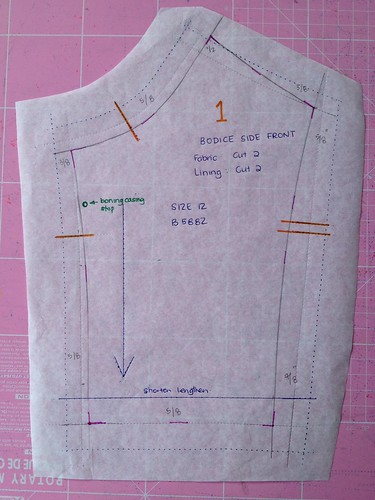
Next the side front ...
B5882
  • Added the 1/2" to the top side of the bra/cup, from the previous stitch line.
  • Reworked the side seam by adjusting where the stitch line would be from the original cut line - at the top of the side seam I allowed for a 5/8" seam allowance and at the bottom is moved the stitch line in by 7/8".
  • Reworked the princess seam to also have a 3/8" seam allowance at the apex end and a 5/8" seam allowance at the bottom.
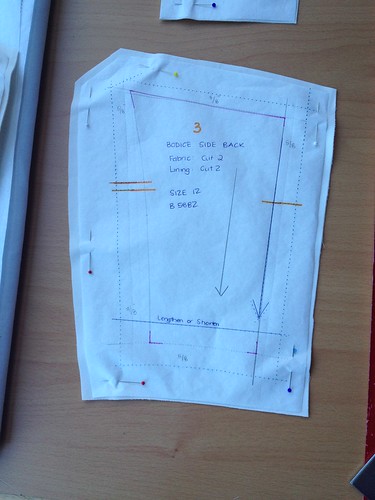
The side back also needed quite a bit of adjusting at the side seam ...

B5882
  • reworked the side seam so the stitch line would be in 5/8" from the cut line at the top and 7/8" at the bottom.  
  • The back princess seam stitch line would also be 5/8" in from the cut line.
  • The bottom would be same as the front with 5/8" seam allowance and 3/8" at top.
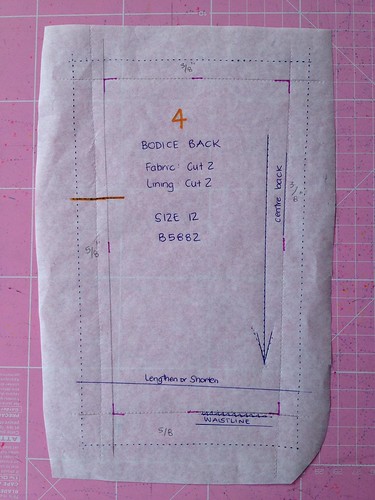
The centre back pattern piece also had to have the seam allowances adjusted.

B5882

  • The princess seam stitch line would come in 5/8" form the cut line
  • The centre back would only come in 3/8" from the cut line
Once all the stitch lines for each piece were identified I was away!

After the adjustments the back was a much better fit and the straps that would be attached at the princess seam mark pretty much fell in line with bra straps. Yay!
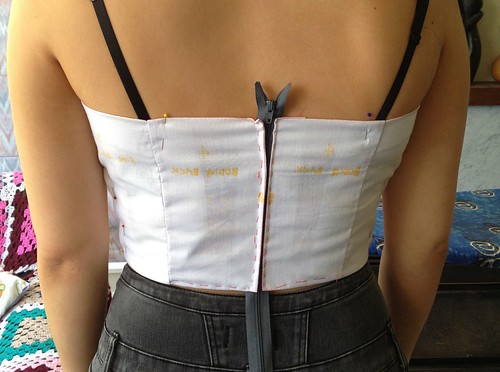
B5882

All adjustments done and muslin fitting nicely it was time to start with the real fabric :-)  I started with the red and white version first.  The outer shell fabric was a cotton voile that required an interfacing as well as the lining.  The interlining and the lining would be the same fabric - a cotton lycra in an off-white.  This is the same fabric that we'd planned to the be contrast colour for the second dress.

I pinned each pattern piece to the interlining and traced off the STITCH LINE, and the grainline plus all notches.  All these trace marks would end up on the inside, hidden by the lining, so it didn't matter that I did this with red tracing paper.
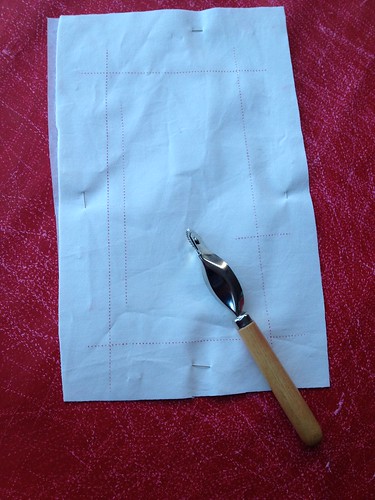
B5882

I cut the outer shell fabric in a single layer, as the outer layer and the interfacing would all be hand basted together.
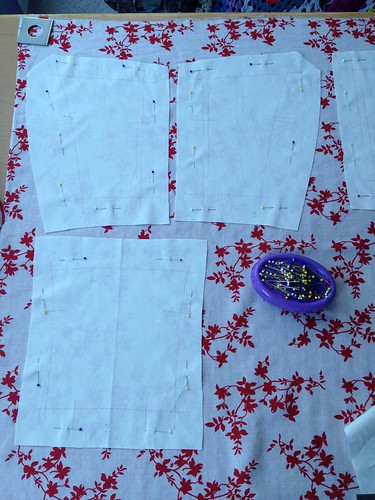
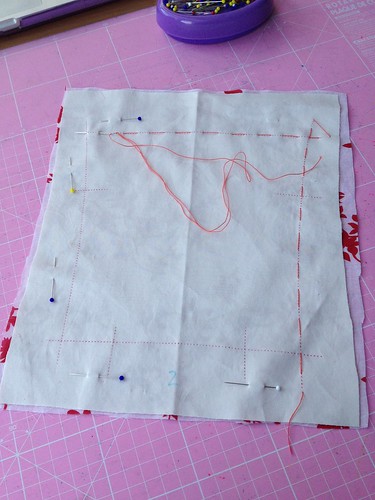
B5882

B5882

With the construction - the basted line on each pattern piece is where the two pieces will be sewn together. For me this provides a much more accurate fit in the end and is well worth all the additional work.  As you can see the seam allowances are big and random, they really no longer matter.

Well I think that's enough reading for one post - I'll continue on in my next with the construction, where it will start to look like a dress :-)  Hopefully this is helpful if you are considering making this dress.

More soon -->


Sunday, 28 June 2015

Granville Shirt Muslin

Shirts haven't really been a thing that I've been busting a boiler to make - not something I have in my wardrobe either. Maybe because I haven't really found one that fits comfortably. When the Sewaholic Granville shirt was released I was instantly drawn to the shape that it gave the body ... and the best thing about sewing is that there's the opportunity to tweak the fit if it's not working.

Rather than make a true muslin, I picked up 2.4m of cotton voile for $14.00 to make a wearable muslin.  To begin a took some measurements of the pattern, checking that the darts weren't too high, that the body length wasn't going to be short.  I did length the arms by 2".  I cut a size 8 and narrowed to a size 6 at the hip on the side seam.

Granville wearable muslin

I'm happily sewing along, following the instructions and feeling pretty pleased with myself and how fantastic the seam allowances looked on the inside with a french seam finish.
The yoke beautifully encases the seam finishes and is really easy to achieve. Then I got to the front and was all confused, coz I misses the note on the pattern piece where the cut line on the right side was different to the left. I had to cut off the band I had already attached and start again after I had cut the centre front in the right place. Luckily I had cut 2 of the front placket pattern piece anyway, instead of just one that was required. Must have known I was going to mess it up!

Granville wearable muslin


This was the first time I had sewn a sleeve placket... OMGosh how super fiddly these are.  I got there in the end but they're not super perfect.  The under piece doesn't quite fit is I had to fold it over slightly, but no one can see it anyway. The edge stitching needs some improvement, especially around the point. They are functional and the pattern of the fabric hides all :)

Granville wearable muslin

I also need to work on the curved corner of the collar stand in the front. They are passable but could be a whole lot better. I think I just need to work on the technique.

There are a lot of fussy fiddly bits on a shirt and I now have a new appreciation for this garment.

Granville wearable muslin
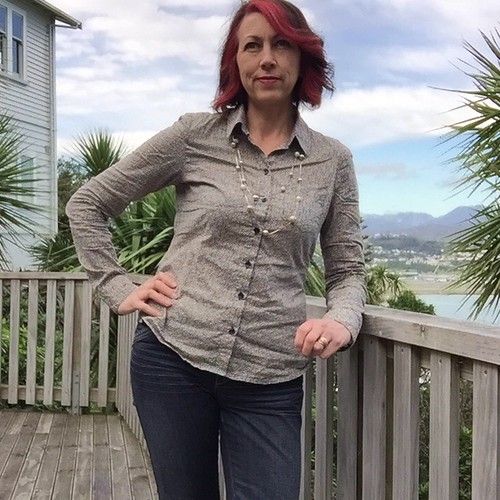
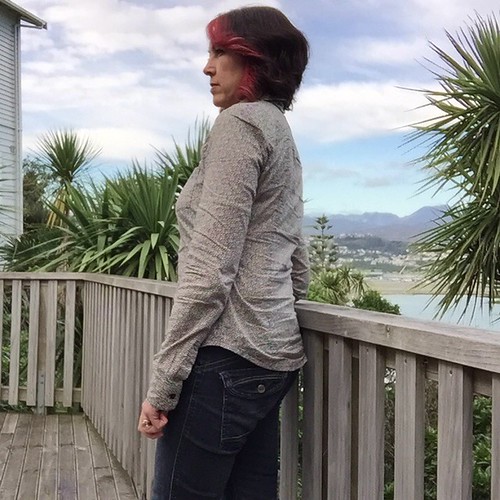
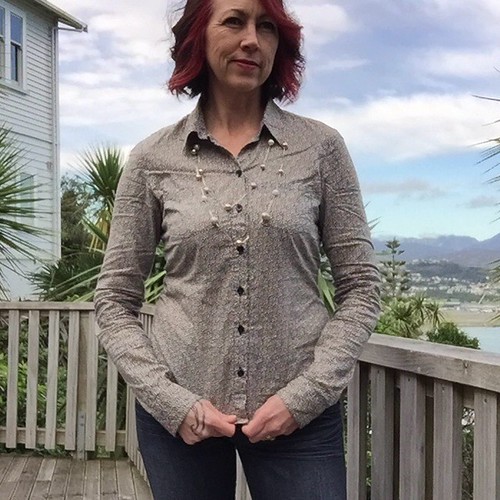
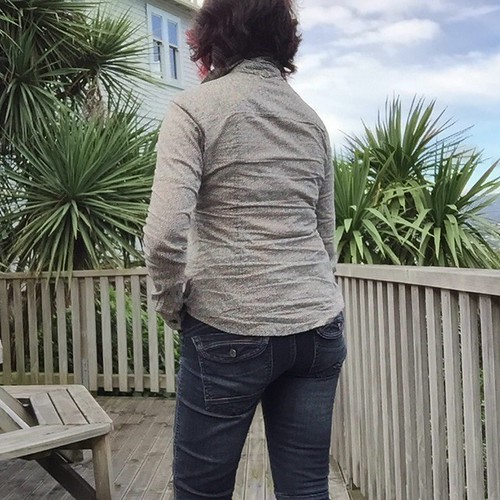
Lots of wrinkles from wearing it all morning!
The finished shirt isn't bad and I'll get away with wearing it over some jeans, but next time I need to look at:
  • shortening the sleeve by 1", so it is only 1" longer than the pattern itself.
  • move the side dart down by 1/2"
  • more room around the waist - I don't want to go out a whole size but a 1/8" on the front and back pattern pieces will give me an extra 1/2" all round.
  • moving the waist down about 1/2" as well. It's just a tad too high.
I bought some really lovely patterned silk from The Fabric Store that I've used for my real version.

Saturday, 14 March 2015

Maxi Shirt Dress

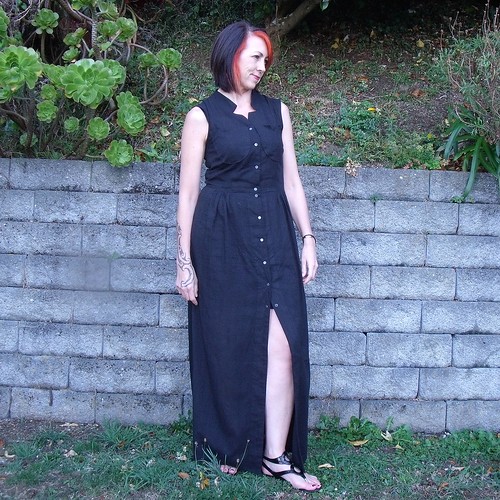
I didn't think a shirt dress was really my thing but when the Wellington Sewing Bloggers Network (WSBN) started throwing ideas around about a shirt dress challenge, some of the patterns really got me inspired.  I did look at a few patterns, but kept coming back to one already in my stash.

Butterick B5920
Butterick B5920

However this pattern needed some modifications to replicate my vision....

I really like the neckline on this pattern and the front gathers that don't extend around the hips - uh-hm I don't need to make them any bigger than they are! I wanted the front placket to extend the full length of the skirt so I could wear it unbuttoned to just above the knee. I also wanted the back of the skirt to replicated the front by having gathers that didn't extend to the side seam, rather than the full skirt the pattern provides.

I'm pretty happy with the final look ... that neckline is just so pretty!

Maxi Shirt Dress

Why BLACK??? The February challenge over at The Monthly Stitch was solid colours, and of course it had a twist.  Miss Bossy said we had to use a colour that the initials of our first name or last name  matched to in the colour chart and both my initials matched to black!

I had this black voile in my stash that has a checkered pattern running through it, also in black but not so obvious in the photos. I picked it up at the Arthur Toye closing down sale for just $5p/m. I had 2.3m which wasn't quite enough, so had to use some solid black voile (from the stash) for the facing and the arm bindings.

Maxi Shirt Dress

Lengthening and manipulating the skirt was pretty easy ... I look the skirt pieces from the Ama Dress as a template (the length and fullness have made that dress a real pleasure to wear).  I kept the shaping at the hips in the original Butterick pattern piece and transferred this to the back pattern piece as well.  The gathers at the back were a bit of a guess and in the end I just used the width of the Ama Dress back pattern piece - I measured the front pattern piece to know how far away from the side seam to begin the gathers.

Maxi Shirt Dress

To finish I hammered on some antique brass snaps and to add some colour I wear it with my orange Jenna Cardi.

Maxi Shirt Dress

As we move into Autumn this is the perfect transition dress.

More photos on my Flickr -->

Sunday, 22 September 2013

Sewing Retro

Taking a step right outside my comfort zone and for that matter my style zone!  I have completed my very first vintage sewing project - which I would never have attempted if it wasn't for the online sewing community.  Earlier in the month I revealed the pattern and fabric (read here) as my Fall for Cotton project.

Retro7384

I am really smitten by the bodice of this dress and in particular the neckline, which was really easy to sew BTW, just had to make a triangle when sewing the facing on to the dress and cut it out!

Retro7387
Don't you just love the stand-up collar!
I am SUPER happy with the dress and it's construction.  It feels fabulous to wear - fit and fabric.  Whilst the front and back sit directly on my waist I could have hitched up the sides a little more which would have  taken away the downward pulls you see.  My muslin was perfect, but I think my seams might have been out on the dress 'cause I used a french seam instead of the overlocker and I was a little afraid to overdo the seam as there wasn't much wiggle room in my muslin.

Retro_2468
Soooo pretty!
The pattern didn't provide for a lining - it was a dress and a separate slip.  That didn't make sense to me because the dress was very fitting through to the waist but the slip was just straight up and down???  So I went about making my own lining (as ya do!).  The bodice has a sweetheart neckline in the front and straight across, just above the bra line in the back.

Retro_2429
I love the purple lining :)
I inserted the lining before attaching the pockets so it is stabilised well in the front, caught by the armhole binding under the arm pit and tacked at the top of the darts in the back.  I didn't want any obvious stitch lines around the top of the lining to be visible from the outer shell of the dress.

Retro7378
Retro7386
can you faintly see the bottom of the lining?
The skirt lining, well that is just a duplicate of the skirt, but shorter!  I shortened the skirt pattern by a good 5".  I really like the finished length - both skirt hems are hand sewn with a catch-stitch.  Actually there is quite a bit of hand stitching: I hand basted the lining to the dress and continued as one; I hand stitched the sleeve bindings on the inside - I think machine stitching would have been too heavy; the bottom of the button placard is hand stitched down; I understitched the facing by hand, it would have been too fiddly with the machine, and I think it looks better by hand anyway.

Retro7391

Well, this isn't a dress that I see myself wearing, mainly because the fabric just isn't me, and I'm not sold on the skirt on me either.  I'll finish setting up my Esty store and sell it, so at least someone will appreciate and wear it.

More photos on my Flickr -->


Sunday, 1 September 2013

Spring calls for Group Sewing

Today is the first day of spring and to kick it off I am participating in a couple of group sewing activities.  Luckily I can sew one garment for both - oh year love that!


I love sewing dresses and who doesn't like a good cotton fabric, but I don't usually sew vintage!  Athough now vintage includes the 1980s I probably have a few patterns from that era in my statsh!  Anyway my intuition must have known something I didn't, because about three months ago when sewingpatterns.com had a Butterick sale I acquired this Butterick Retro '51 pattern.  The dress to the left particularly caught my eye.


This pattern wasn't even on my sewing 'to do' list, then all of a sudden it is first out of the box for September - don't you love how a good group activity changes things :-)

Last week I took a wee detour to The Fabric Store hoping to get some inspiration for fabric.  I was hoping to find a cotton voile or similar light weight cotton that would have a transparent nature.  Next thing I knew I was at the counter with this fabric!

Fabric for Vintage
The pin in the centre will give you a sense of the size of the pattern.

Now this is sooooo far removed from my comfort zone, but the purple and blue combination found a soft spot and intuition said 'BUY IT'.   So what is a girl to do ... follow her intuition of course!

To keep inspired and gain some confidence in my selection I joined the Fall for Cotton Flickr group - check it out there are some great patterns and amazing fabrics to google over.

Check out this fabric!   I ordered this from Spoonflower, not long after I discovered the awesomeness of custom made fabric. 


Two yards of cotton sateen - devine!  At the time I ordered it all I knew was that I wanted to make a dress with it, one with a fullish skirt.  Then along came this pattern from Kay Unger in the Vogue collection, the perfect combination. 


On my way past the Fabric Warehouse yesterday I called in to pick up some lining, 100% cotton batiste, which is lovely and soft to match the cotton sateen, knowing that this pattern would be at the top of my sewing list soon now that it is Spring ;-)

It feels like Spring is my permission to start sewing summer dresses - well that's what I'm telling myself anyway.  That's not to say that I've finished my winter sewing list yet - still two pairs of jeans to make and a nice wool blazer!  There is no doubt that they will get loads of wear before summer is truly here.