Showing posts with label Grainline Stuido. Show all posts

Wednesday, 1 July 2015

Ponte Morris Blazer

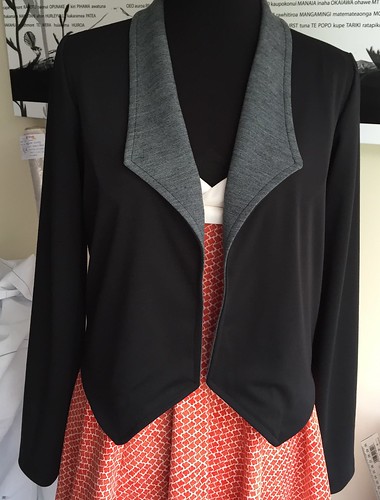
The Grainline Studio Morris Blazer is the ideal casual smart clothing item that fits perfectly into my wardrobe. The appeal of this pattern is that it is intended for a knit fabric (or a stretch woven). I imagine that it would wear like a cardigan in a knit.

I downloaded the PDF pattern from the Grainline Studio website, dug out some black ponte from the stash and set to.

Ponte Morris Blazer

I traced off a size 10 and made just one alteration.  I'm not really a 3/4 length sleeve kinda girl, so I lengthen the arms by 6 1/2", allowing for a 1" hem.  I did away with the sleeve facing because I thought the ponte would behave better with a turned up hem.


For the facing I used a merino remnant from my Gillian Wrap Dress, a very fine stripe in a grey. This was much much lighter than the ponte so I used an equally heavy knit fusible interfacing - that worked a treat.
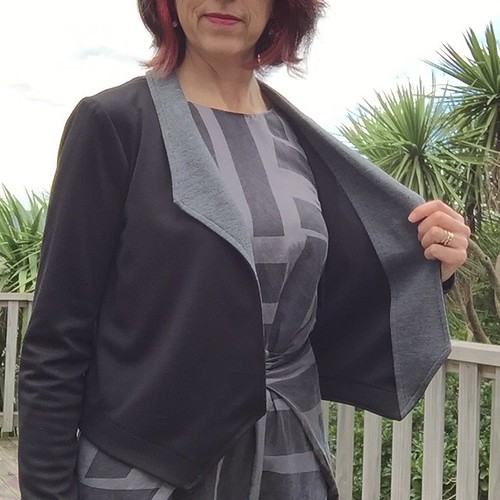
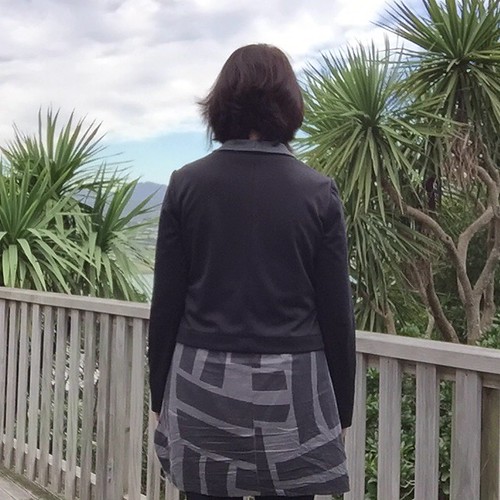
Ponte Morris Blazer

I stitched all the seams on the sewing machine using a zig zag 1.5 1.5 stitch and finished each seam on the overlocker (serger).  Nothing usually makes it off the sewing table without a touch of hand sewing - this Blazer was no exception, I used a catch stitch to tack the collar facing to the back neck seam.

Ponte Morris Blazer

Now ... See those annoying wee bubbles  at the bottom of the front in the photo below - I wasn't sure whether I'd done something or whether it's a result of the knit fabric???  I did a bit of a search of other blogs and noticed it on some other knit versions as well, so figured that it wasn't just me.  But it could be that the facing is a tad shorter than the front piece caused by either incorrect cutting or that the interfacing slightly shrunk the facing piece.  Anyway the knit fabric moves and wiggles in every direction when I'm wearing it so I figured it doesn't really matter that much - I'm probably the only one noticing!!
Work in Progress

The Blazer wears beautifully.  The only thing that I would change next time would be to lower the side seam at the under the arm; it's a tad high which restricts what I can wear under it and creates pulling when I look at photos of the back.


Sunday, 11 January 2015

Denim skirts never get old

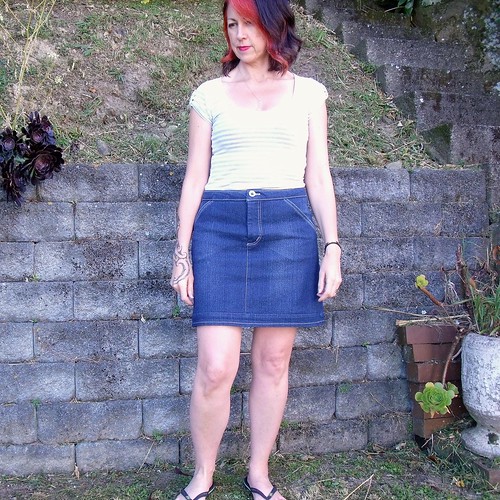
Denim Moss Mini

The denim mini skirt never dies! Although believe it or not, this is the first denim skirt that I've ever owned, but it's never too late, right!

Why now then? Two reasons: 1. the monthly stitch challenge for January is "denim never dies" and 2. I previously made the Moss Mini which was a perfect fit straight out of the packet - gotta love that!

I have major jean making plans, with three jean patterns lined up in an effort to find the perfect pattern for me. Trying to find appropriate weight denim with a 2% lycra content in a colour that I like is a bit of a mission, even with all the fabric shops in Wellington! All three of the patterns call for a small lycra content, which I'm happy with cause they aren't so restricting.

About mid December I stopped into Spotlight on my way passed (I'm not even sure what I went there for) but while cuing to get to the counter I was standing in front of the denim, so of course had to check them all out.  What do ya know - this decent weight, dark denim with 2% lycra was just sitting there waiting for me... and only $10 p/m, bargain! I didn't buy just one metre, oh no I bought 8 metres!  That would allow me to make three pair of, wearable muslin, jeans with some to spare.

A denim Moss Mini was the perfect, quick make, to test how it sews up.

Denim Moss Mini

I also wanted to try distressing the denim to give it a worn look, and see how that would work. So it wasn't that I actually wanted a denim skirt, I thought I would start small with something that was tried and true to test out the fabric with some sand paper and different colour top stitching. Maybe I should call this my test everything skirt!

I went to Bunnings (hardware store) and picked up a 150grit 'sanding sponge', yes it is exactly what you are thinking, a sponge with sand paper on the outside, similar to this one on Amazon.

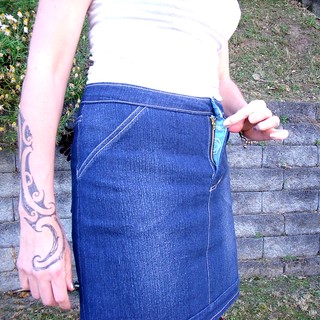
I took it easy on the distressing - didn't want to put a hole in the fabric first time. The front is probably the most obvious.

Denim Moss Mini

I also distress the front pocket facing, the back pockets, the seam allowances after folding them over but before top stitching. All distressing is done before applying the topstitching.

Denim Moss Mini

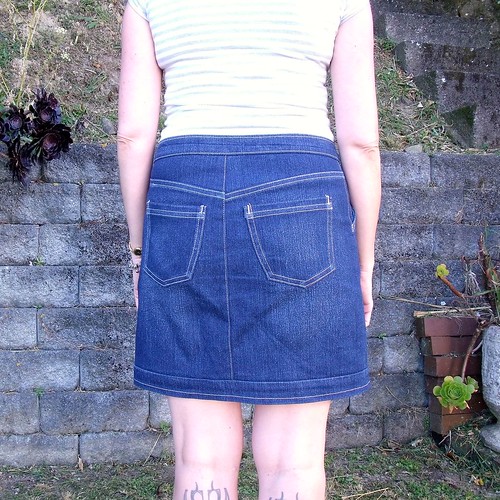
The Moss Mini doesn't have back pockets, but a person (moi) with no butt needs to add detail in this area. This time I took the back pockets from the Ginger Jeans, I'm lovin the shape of these pockets, top stitched slightly down from the pocket top and added bar tacks to the corners.


Denim Moss Mini

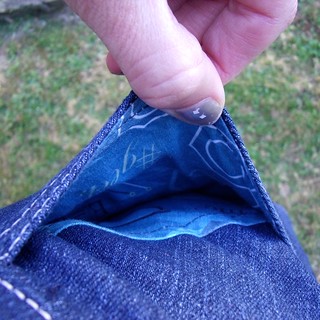
'Cause you have to have a bit of a 'fun factor' I used some scrap fabric for the pocket lining and fly facing :-) This is the Geektastic Spoonflower fabric I made this dress with.

Denim Moss Mini Denim Moss Mini

This skirt is so comfy and easy to wear. I'm gonna call my distressing a win and have already bought more of the grey top stitching thread for the first pair of jeans.

More photos on my Flickr -->

Sunday, 11 May 2014

Moss Mini - for the fun of it!

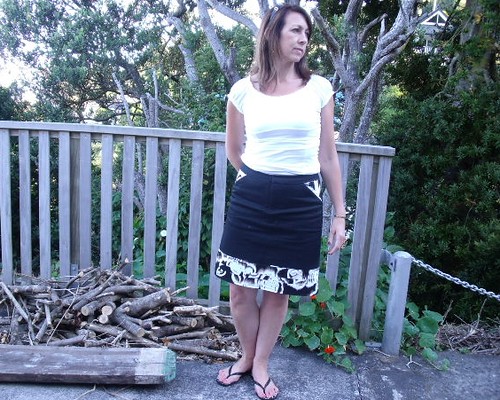
Back in February when the weather was still warm, I thought I needed an easy to wear skirt for the weekends rather than just going for shorts all the time.  I came across the Grainline Studio Moss Mini while stalking the Flickr Group.  The measurements where perfect for my body shape, so immediately clicked the buy button and downloaded the PDF pattern!

Moss Mini Muslin

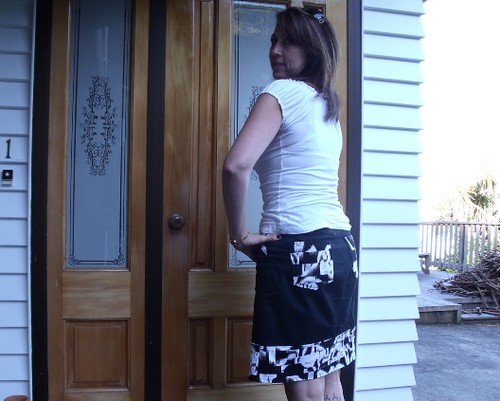
I didn't want to bother making a muslin, so though I would use fabric recently left over from my Wolfies (stretch cotton twill) and Brasilia Dress (cotton sateen stretch) to make a wearable muslin.  Here is what I got with only one minor adjustment to the length.

Moss Mini Muslin

I added 1" to the length of the skirt, at the recommended place on the pattern. 

Moss Mini Muslin

Whilst the skirt is comfy it could hug my waist a little more.  I think I could easily remove 1/4" from the centre front pattern piece to reduce the total circumference of the skirt by 1/2" just at the waist.  I also used the skirt fabric to for the fly lining, which has made the fly a bit bulkier than desired.  Note to self for next time - use a stiff interfacing!

The back of the skirt is a good fit.  For a bit of interest I added some patch pockets from my jeans pattern.

Moss Mini Muslin

I really like the back yoke of the skirt - it's got a real 'jean' feel to it.  I have a nice piece of denim in my stash and just might have to make a jean version - perhaps lined for winter so I can wear stockings without it clinging.

A really great little pattern that I can see replacing my shorts in the summer.

More photos on my Flickr -->