This is my most recent make, because blogging about things in the order I make them just isn't the done thing!
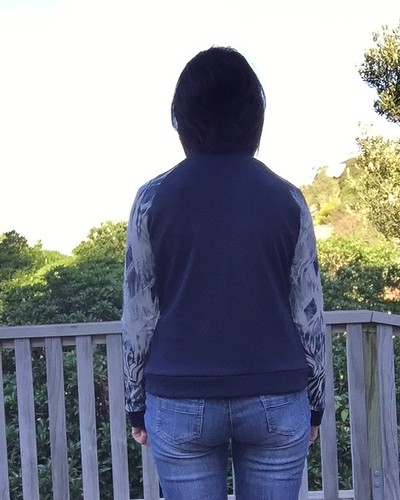
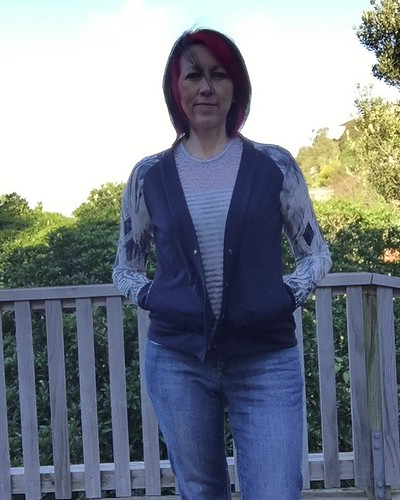
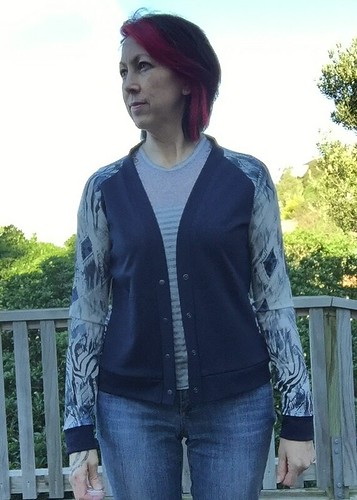
Sophie is the new pattern release by Muse Patterns. Sophie is a cute, sporty cardigan - a fitted style, which curves gently in at the waist and flares out again over your hips. Raglan sleeves add a casual touch and also give great opportunities for mixing fabric, which is exactly what I did.
I was lucky enough to be one of the testers for this pattern. I cut a size 36. BTW I love the sizing of Muse Patterns - they are designed for the taller woman with a slightly bigger bottom half than top half, so I pretty much fit straight into a 36.
This pattern comes with so many collar options and front closure options that every version I've seen so far looks completely unique. I chose to make the v-neck button up version, but as you can see I applied domes instead of buttons.
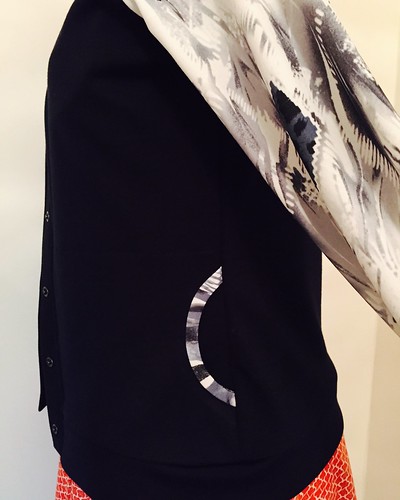
Oh, and there are two different pocket options. I was really taken by the half circle at the side seam.
The entrance is just enough to fit my hand into, and spans the entire front of the jacket.
You could have so much fun with these pockets. Not only the trim but the pocket lining could be a third contrast colour.
The sleeves are nice and long, as you would expect for the taller woman, and are perfect for me without having to lengthen at all - whoop whoop! I know not everyone has long arms, and it's not the most complicated adjustment to make, but just not having to worry is a bonus.
Okay, enough about my Sophie, you should get on over to Muse Patterns and check out the lovely cherry red version with a collar and zip-up front. It is delicious!
A few more photos on my Flickr -->
Showing posts with label Pattern Testing. Show all posts
Thursday, 23 July 2015
Monday, 27 October 2014
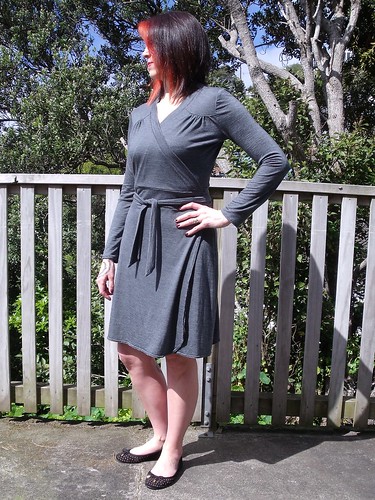
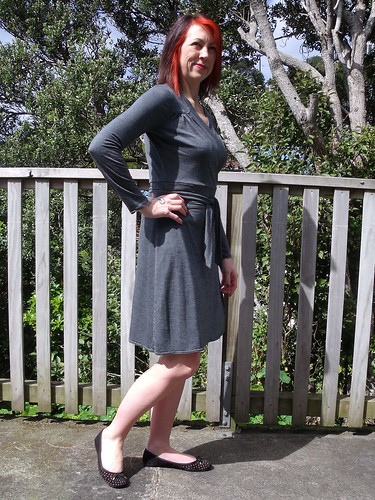
Meet Gillian - THE. Wrap Dress
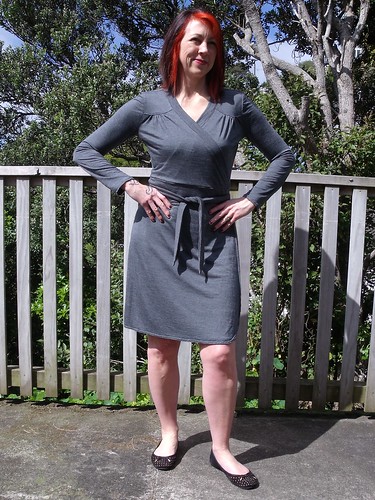
This is Gillian! She is the new release from Muse Patterns. When Kat asked our local sewing group if we were keen to test her new pattern, I was keen as mustard. At that stage I had planned and cut my frankenpattern wrap dress the "Midnight Dream Coppelia", so I really wanted to sew an actual wrap dress pattern for a comparison.
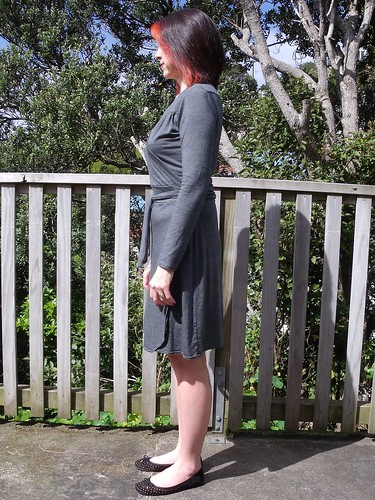
The detail on this dress is well thought out and very figure flattering (in my opinion). The front yoke provides just the right amount of space for the bust and the waist band provides a region for your waist to be, without being exact. I love that, coz usually I have to lengthen the bodice of most patterns by 1/2". The curve to the bottom corner of the skirt provides a good visual balance to the curve of the yokes.
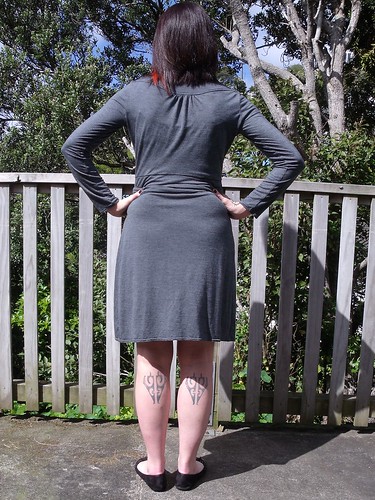
The back also has a yoke detail without making the back of the dress too wide. I think it provides interest to the back of the dress, when otherwise all you would get is butt hugging knit fabric!
![]() |
| excuse the (unflattering) butt photo!!! |
The pattern is like seven patterns in one: a wrap skirt with two length options, a wrap top with two sleeve options and then but them both together for dress options. I only tested the long sleeve dress, but I've definitely got plans to make a short sleeve wrap top.
Testing was most interesting for me ... I actually had to stop and read the pattern instructions. My usual process is to skim read the pattern instructions, I may stop and actual read things that are new to me or sound complicated, then just get on with it, briefly referring to the illustrations as I go :-)
This time I did my skim reading first, but then followed each and every step of the pattern exactly as the instructions said. Oh boy was I challenged!
The hole construction on the waist band of this dress is so genius, but do you think I could work it out ... simply the waist band folds back on itself to completely enclose the hole which the waist tie passes through - no raw edge or wee slit in the seam. This method also provides some structure to the waist band from which the skirt can hang. Look, at least I didn't put the hole on the wrong side like I did with the Midnight Summer Coppelia!
I went fabric shopping for this make ... I know you would have thought I would've had something in amongst the stash, now that you've seen photos of it! I picked up this very fine stripe merino from The Fabric Store. I would describe it as a medium weight, which gives just the amount of structure to hold the details but drape as a wrap dress should. I used 2.25m to make the long sleeve, above the knee dress version. I bought 2.5m, but measured exactly how much I actually used.
Anyway - I've worn this dress every week since I've made it, which is always a good testament to a pattern for me, otherwise it just hangs in my wardrobe.
If you are interested you can check out all the other variations over on the Muse Patterns website.
More (not so great, shadow struck) photos on my Flickr -->
Fine print stuff: you know ... I volunteered to pattern test, these opinions are my own and I was not paid in any way to write this post - other than to receive the free pattern for the purpose of testing.
Sunday, 17 November 2013
Oh to be like Jackie O!
This is the Brasilia Dress by House of Pinheiro. A Jackie O inspired sheath dress that Rachel produced for the Fall for Cotton sew-along.
When I first saw Rachel's dress I thought it was to die for. The inward darts at the bust are so unique - don't they just give the best shape to the dress.
I found this cotton sateen at the Fabric Barn in Lower Hutt. I really wasn't sure about fabric until this one jumped off the shelf and into my arms! I've used a solid black cotton to highlight the side insets, and to balance it up I've used the solid black along the hem as well. I love the result, it gives my rectangular body shape the illusion of a curvy waist - yay me.
| please ignore my sunburn lines - too much sun wearing my t-shirt. |
Because Rachel is so tall I had to remove some length from the torso area. This felt a little strange because usually I have to add in length on most other patterns because of my height. Anyway I removed 1.5" from the torso in addition to the .5" that was removed with the SBA.
I over complicated things a little trying to get the side insert correct after the SBA and removal of length and I've ended up with the front of the armhole looking a bit weird. To overcome this I applied the bias binding so it formed a visable band around the armhole. The weirdness is only noticeable when I move my arms backwards or stick my boobs out too far!
| a weird armhole shape goin on! |
The black band around the bottom was cut 2" deep and folded in half and applied to the hem as you would a bias binding. This gives the dress an appropriate length that I could wear to the office without feeling like I was bearing too much leg!
The pattern recommended an invisible zipper but I thought for my fabric and blocking of colour it would be nice to do an exposed zipper - I love this feature, although I can't see it once I've got the dress on.
Usually I line ALL my dresses, but I decided not to line the Brasilia. It is very comfy and fits like a glove. It will be ideal for those hot summer days in the office.
I was a bit late to the pattern testing party (yay instagram), but I am so pleased Rachel allowed me to test her pattern. Overall I love it and would definitely consider making another one.
If you are interested in stitching up this dress, it is due to be released on Christmas Day. Keep an eye on Rachel's blog
More photos on my Flickr -->
Subscribe to:
Posts (Atom)