This is my most recent make, because blogging about things in the order I make them just isn't the done thing!
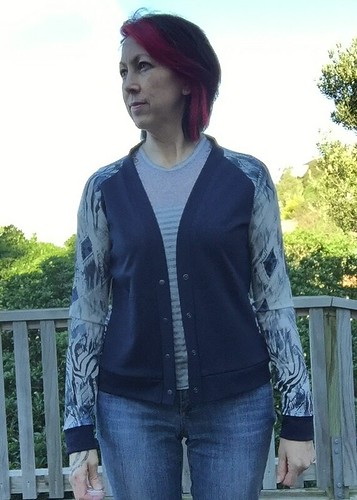
Sophie is the new pattern release by Muse Patterns. Sophie is a cute, sporty cardigan - a fitted style, which curves gently in at the waist and flares out again over your hips. Raglan sleeves add a casual touch and also give great opportunities for mixing fabric, which is exactly what I did.
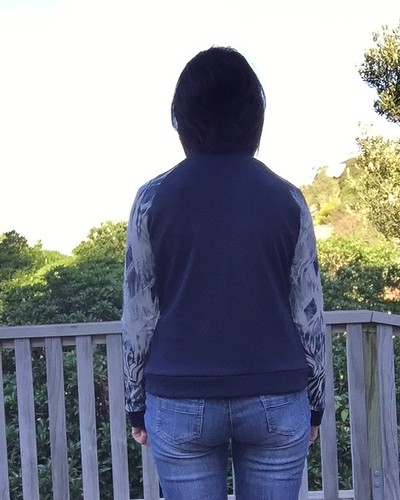
I was lucky enough to be one of the testers for this pattern. I cut a size 36. BTW I love the sizing of Muse Patterns - they are designed for the taller woman with a slightly bigger bottom half than top half, so I pretty much fit straight into a 36.
This pattern comes with so many collar options and front closure options that every version I've seen so far looks completely unique. I chose to make the v-neck button up version, but as you can see I applied domes instead of buttons.
Oh, and there are two different pocket options. I was really taken by the half circle at the side seam.
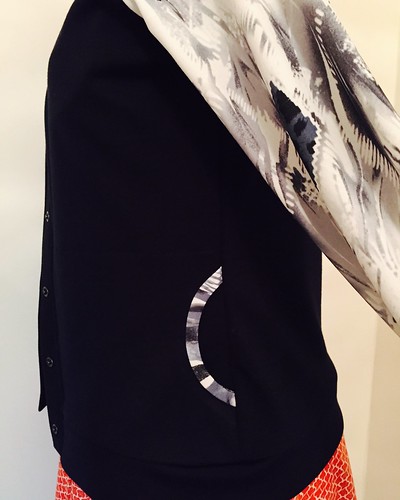
The entrance is just enough to fit my hand into, and spans the entire front of the jacket.
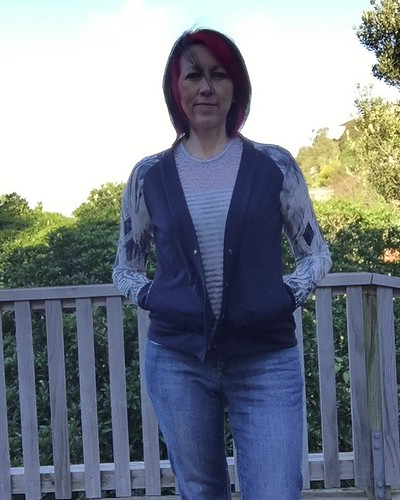
You could have so much fun with these pockets. Not only the trim but the pocket lining could be a third contrast colour.
The sleeves are nice and long, as you would expect for the taller woman, and are perfect for me without having to lengthen at all - whoop whoop! I know not everyone has long arms, and it's not the most complicated adjustment to make, but just not having to worry is a bonus.
Okay, enough about my Sophie, you should get on over to Muse Patterns and check out the lovely cherry red version with a collar and zip-up front. It is delicious!
A few more photos on my Flickr -->
Showing posts with label cardigan. Show all posts
Thursday, 23 July 2015
Sunday, 25 January 2015
Wonders happen overnight ... sometimes!
I must say that I've never done this before ... cut and sewn a new garment, literally overnight! (no sewing fairies were available during the making of this edition, due to holidays)
I think it was Wednesday evening, when I arrived home from work I was at a bit of a loss ... I didn't have to cook dinner and kids were all taken care of, so that just left me and my sewing corner :-) But I couldn't carry on with my current labour of love (B5882) because it needed a fitting and the body needed for said fitting wasn't home. What to do??? Pull out a quick and easy project on the to do list, of course!
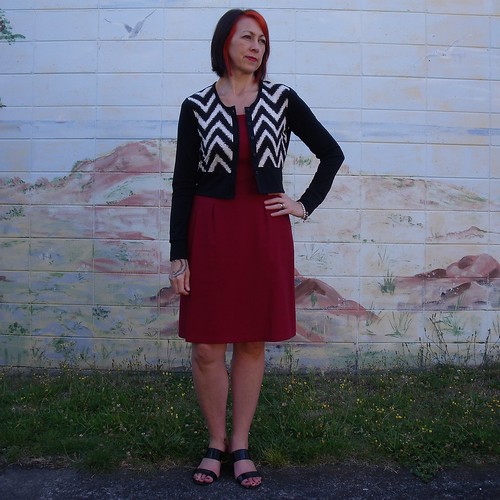
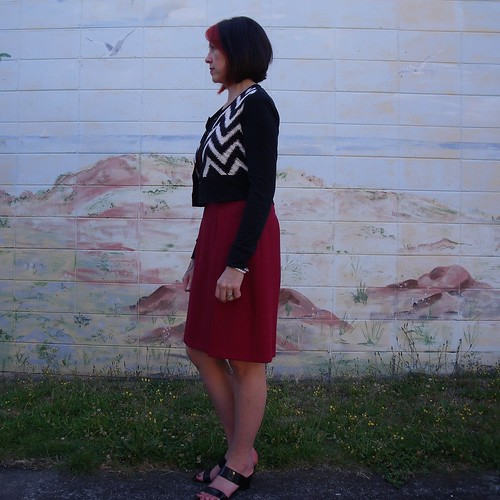
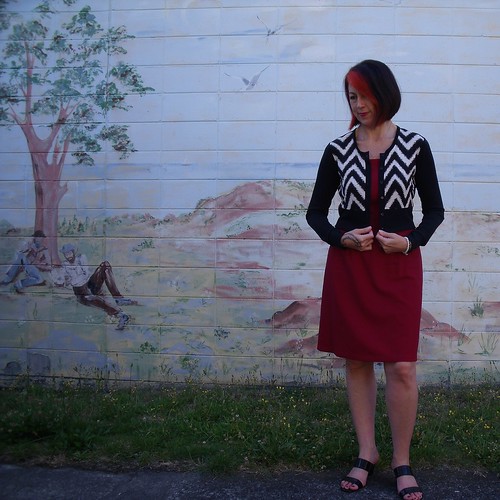
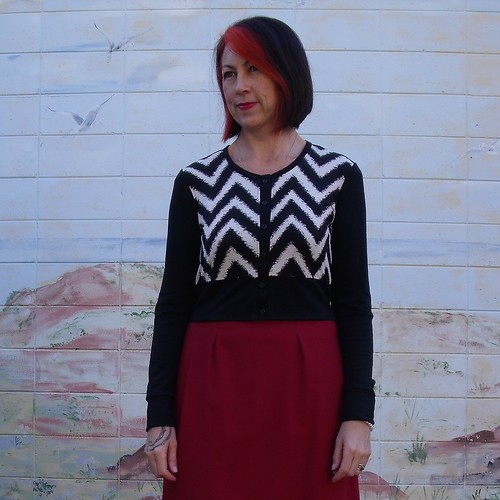
This is the Jenna Cardi that I first made back in September and have worn endlessly ever since. The cropped version with long sleeves is spot on for me.
It sits bang on my waist and is perfect for wearing with just about everything in my wardrobe, but it works well with a dress.
I hadn't transferred any of the adjustments from my first cardi over to the pattern, so first things first I made the following changes to the original size 36 I'd traced off:
The fabric was maturing in the cupboard... the sold black is merino (not the best btw) that I picked up from the Arthur Toye closing down sale for $15 p/m. At the time I thought it was a bargain, but when I got it home to discover that it was all off grain and with a few flaws, well it then wasn't such a bargain!
I ignored the selvage matching and just tried to lay the fabric out on-grain as much as I could. That seemed to work pretty well because it doesn't feel 'all wiggly' when I wear it.
The chevron is a poly knit that I previously used to make an Ensis Tee (that I don't wear that often because the cuffs are too tight and I can't be assed fixing them).
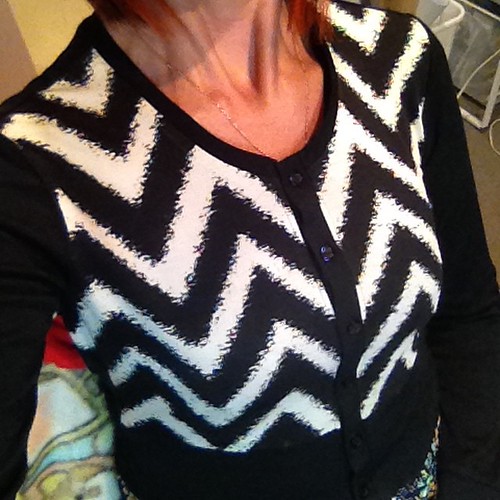
The chevrons!!! I cut both front pieces on a single layer so I could match the chevrons exactly where I wanted - and I'm pretty darn happy with dem chevrons :-) I'm pretty much floating away on the happy matching cloud right now!
I'll leave you with more photos on my Flickr while I revel in this happy sewing high...
I think it was Wednesday evening, when I arrived home from work I was at a bit of a loss ... I didn't have to cook dinner and kids were all taken care of, so that just left me and my sewing corner :-) But I couldn't carry on with my current labour of love (B5882) because it needed a fitting and the body needed for said fitting wasn't home. What to do??? Pull out a quick and easy project on the to do list, of course!
This is the Jenna Cardi that I first made back in September and have worn endlessly ever since. The cropped version with long sleeves is spot on for me.
It sits bang on my waist and is perfect for wearing with just about everything in my wardrobe, but it works well with a dress.
I hadn't transferred any of the adjustments from my first cardi over to the pattern, so first things first I made the following changes to the original size 36 I'd traced off:
- shaved 1/4" off the shoulder seam, at the sleeve edge, blending into the curve of the armscye about half way down.
- removed 1" from the length of the sleeve
- added 1" to the length of the sleeve cuff - just cause I prefer a deep cuff.
- removed 1" from the sleeve cuff pattern piece, reducing the circumference of the cuff by 2".
- removed 1" from each side of the sleeve hem, tapering to zero about 2" below the underarm, providing me with a more fitting sleeve - again personal preference.
The fabric was maturing in the cupboard... the sold black is merino (not the best btw) that I picked up from the Arthur Toye closing down sale for $15 p/m. At the time I thought it was a bargain, but when I got it home to discover that it was all off grain and with a few flaws, well it then wasn't such a bargain!
I ignored the selvage matching and just tried to lay the fabric out on-grain as much as I could. That seemed to work pretty well because it doesn't feel 'all wiggly' when I wear it.
The chevron is a poly knit that I previously used to make an Ensis Tee (that I don't wear that often because the cuffs are too tight and I can't be assed fixing them).
The chevrons!!! I cut both front pieces on a single layer so I could match the chevrons exactly where I wanted - and I'm pretty darn happy with dem chevrons :-) I'm pretty much floating away on the happy matching cloud right now!
I'll leave you with more photos on my Flickr while I revel in this happy sewing high...
Tuesday, 5 November 2013
Custom Made Bolero
I've made a few dresses lately and felt I was missing the one garment that would compliment them while keeping me warm as we transition through spring into summer. Introducing the little black bolero!
This is a bit of a mis-mash of patterns. First I started with the Sewaholic Renfrew which forms the base of the garment. I reduced the length of the front and back pieces to 15.5" from base of neck to waist. Then I took McCalls 5006 to shape the front, which I had previously used to make THIS tie front cardie. Lastly I used the band technique from the Papercut Patterns Circle Top I made HERE and HERE
I inserted the sleeves flat, just 'cos it's easier, then whipped the machine up the side and sleeve on both sides.
I flat measured the curved edges of the front, the bottom edge of the back and the neckline to determine how long to cut the band. This is applied as you would bias tape.
I cut the Renfew in a size 4. I removed 2" from the middle of the front, as I didn't want the fronts to meet but to just sit over my bust. I made this with a cotton lycra, which I had bought to make multiple Renfrew's for the winter to wear under stuff as an extra layer - but didn't actually get there. So the fabric still made it to a Renfrew but just not as initially planned.
I'm pretty happy with this. Next time I want to make it in a lovely NZ merino but will re-draft with some adjustments: cut a size 6 Renfrew, lengthen the shoulder seam toward the neck which will also give me more height in the back neck and front high chest, so it has just a little more coverage. I think another 3/4" would do the trick!
I can see many more of these versatile little babies being made in a range of colours :-) Far quicker to make one of these than actually use my knitting needles (sad to say).
More photos on my Flickr -->
This is a bit of a mis-mash of patterns. First I started with the Sewaholic Renfrew which forms the base of the garment. I reduced the length of the front and back pieces to 15.5" from base of neck to waist. Then I took McCalls 5006 to shape the front, which I had previously used to make THIS tie front cardie. Lastly I used the band technique from the Papercut Patterns Circle Top I made HERE and HERE
I inserted the sleeves flat, just 'cos it's easier, then whipped the machine up the side and sleeve on both sides.
I flat measured the curved edges of the front, the bottom edge of the back and the neckline to determine how long to cut the band. This is applied as you would bias tape.
I cut the Renfew in a size 4. I removed 2" from the middle of the front, as I didn't want the fronts to meet but to just sit over my bust. I made this with a cotton lycra, which I had bought to make multiple Renfrew's for the winter to wear under stuff as an extra layer - but didn't actually get there. So the fabric still made it to a Renfrew but just not as initially planned.
I'm pretty happy with this. Next time I want to make it in a lovely NZ merino but will re-draft with some adjustments: cut a size 6 Renfrew, lengthen the shoulder seam toward the neck which will also give me more height in the back neck and front high chest, so it has just a little more coverage. I think another 3/4" would do the trick!
I can see many more of these versatile little babies being made in a range of colours :-) Far quicker to make one of these than actually use my knitting needles (sad to say).
More photos on my Flickr -->
Subscribe to:
Posts (Atom)