Showing posts with label Jacket. Show all posts

Sunday, 23 April 2017

When one bomber is just not enough!

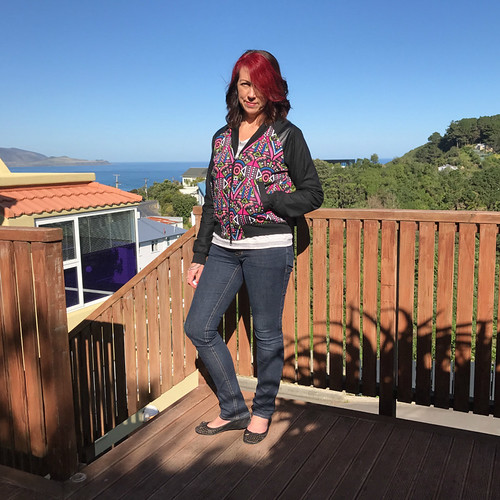
Kia ora! I know it's April but I want to take you back six months to October last year. The weather was beginning to get warmer, daylight savings was about to start and I felt that I needed more casual clothes in my wardrobe.  Or was it I was just looking for a quick fix, instant gratification kinda project?!? This is when I decided that I needed another bomber jacket in my life.

Aztec Rigel Bomber

I had previously made the Rigel Bomber by Papercut Patterns but at that time I forgot to check the sleeve length, and every time I wear it, it annoys the sh*t out of me. This time I made exactly the same size as my previous jacket, adding 3" to the sleeve length. I made just one other adjustment this time, removing 1/2" from the centre back of the collar piece.


I also wanted to try this pattern using the insets at the top of the raglan sleeve, for that extra effect.  I had purchased this aztec cotton lycra online a little while ago and when it arrived I was really surprised at how bright it was - I probably would never have bought it if I had been shopping in a bricks and mortar shop. At the time I had no idea what on earth I would ever use it for, but it turned out perfect for this jacket. I also some faux leather in the stash that I'd bought for something else and used that for the sleeve insets.
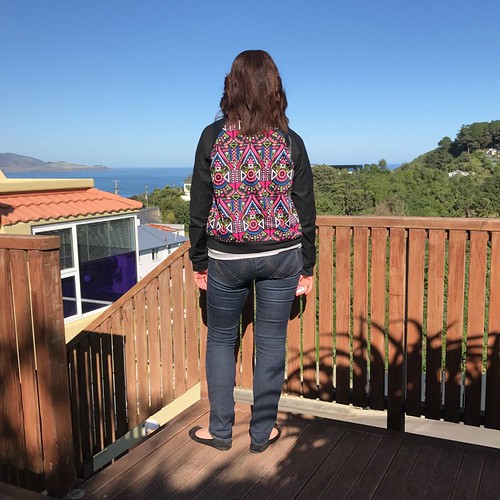
Aztec Rigel Bomber

This version is fully lined with silk crepe de chine.
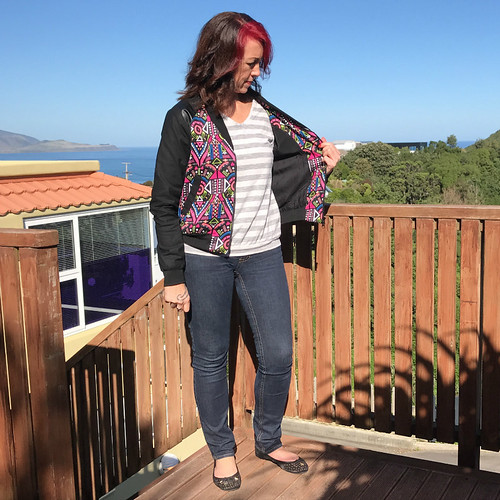
Aztec Rigel Bomber

When my daughter found out what I was making, she also decided she wanted one - a cream one of all colours!  I was in the zone, it was her birthday, so I didn't put up any objections to making another. Although I was getting rather jealous while making her one, that it was so much better than mine. I selected this honey comb cotton fabric with a gold foil, both from The Fabric Store.
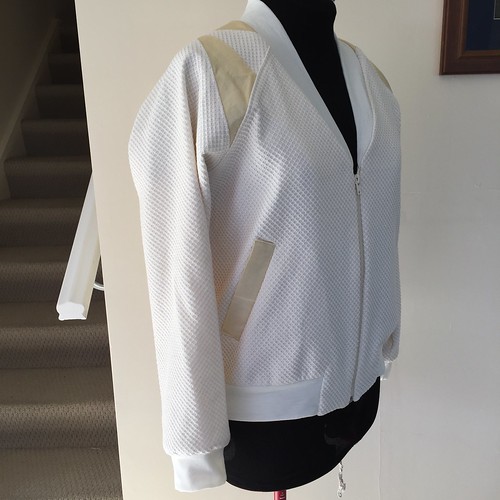
Rigel bomber jacket 2016

The gold foil was very light weight so I had to interface all of the pieces to get it to a similar weight as the main fabric, well stable enough to hold its own.
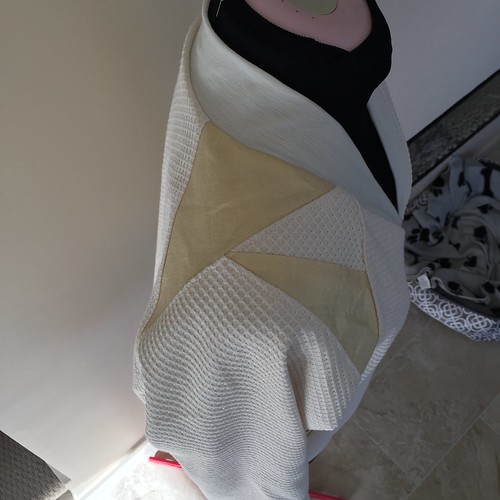
Rigel bomber jacket 2016

For the ribbing, I settled for a merino knit to get the colour match as close as possible. I just have one regret - that I didn't double the layers in the collar. For the sleeve cuffs and the hem band, I cut two so when it's folded on itself it is four layers thick. It works perfectly with really good recovery. The collar on the other hand feels a bit flimsy.
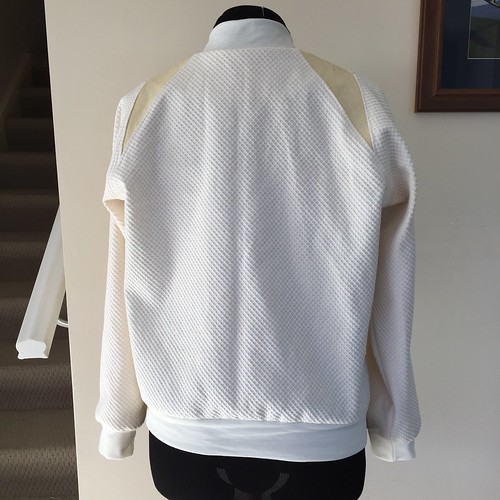
Rigel bomber jacket 2016

I fully liked this version as well, this time with a cream satin - it feels amazing to wear. Unfortunately this is one size too big for me and the sleeves are short, so wearing it isn't that great. Darn!!!
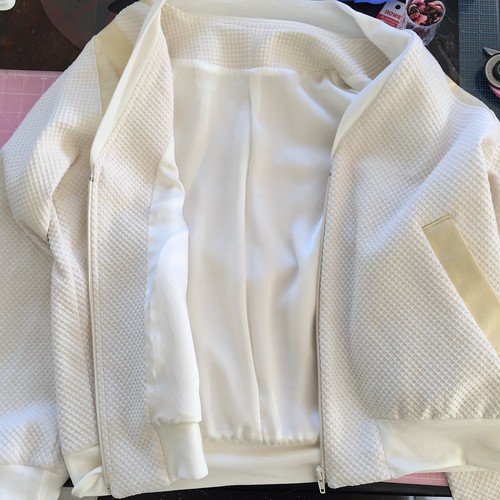
Rigel bomber jacket 2016


It is so luxurious! It was definitely not cheap - I added up all the fabric and lining and it came out at $110.00!  So you can image my reaction when I see it lying on the floor of her room....

Anyway, I had total fun making both these jackets. I wouldn't hesitate to put more of them in my wardrobe. Although next time I might try raising the collar and go for the traditional round neck rather than this V-neck version.

More photos on my Flickr --->


Tuesday, 29 September 2015

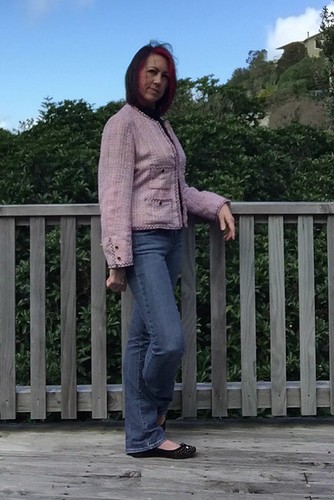
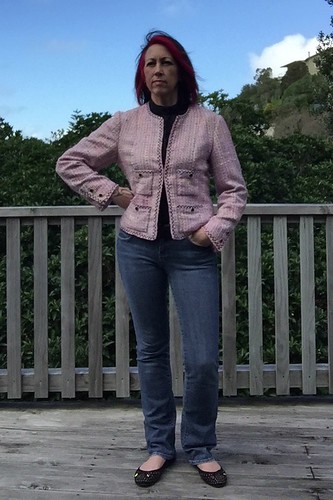
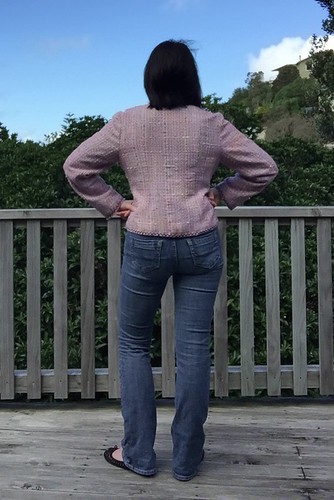
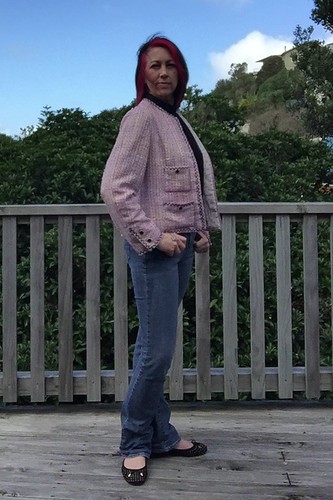
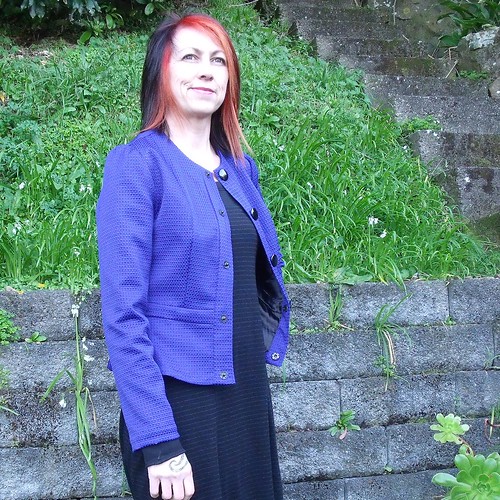
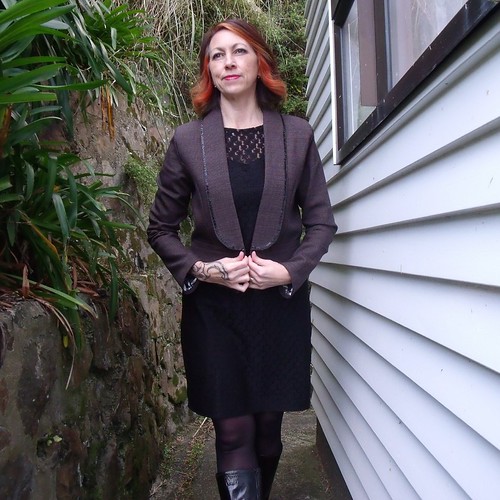
Finally Wearable - French Jacket #2

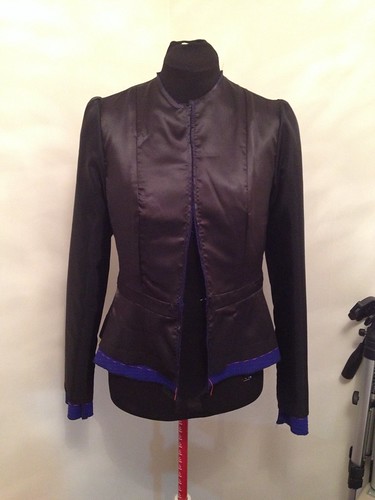
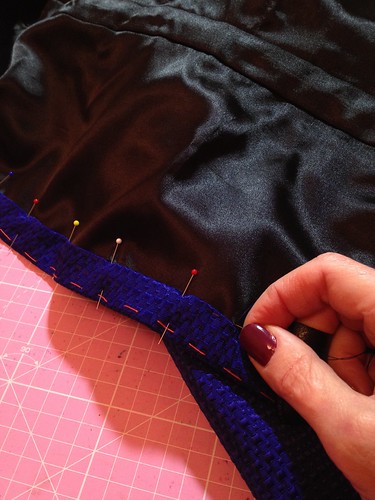
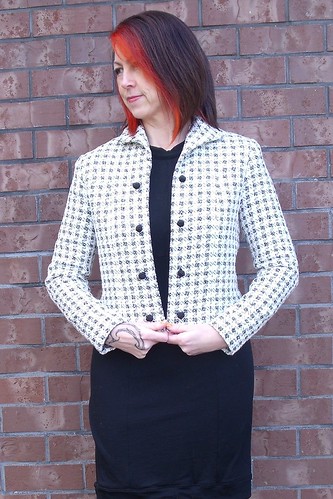
I didn't realise how long it has taken me to finish this and get pictures.... back in December 2014 I shared my progress with my second French Jacket here. It was 99% finished back in December, but it look me forever to put the buttons and the chain onto it.

Untitled

Untitled

Untitled


To be honest I was a bit disappointed with it once I finished putting the jacket itself together.  Mainly because of the sleeves.  This jacket was a mash together of two patterns - V7975 for the body and V8804 for the sleeves.  I cut a size 12 from both patterns.

I had used V7975 for my first Jacket so knew that the fit would be fine. I just needed to make a couple of adjustments to provide more room across my back.  I add 1/4" to the shoulder blade on the side back piece, added 1/8" to the shoulder seam on the side back and another 1/8" to the shoulder seam at the armhole edge on the side front pattern piece.

Now, the sleeve on V7975 is a two piece pattern and I really wanted to try and three piece sleeve. So I took the pattern pieces from V8804, checked the armscye measurements on the sleeve and the jacket to make sure they would fit together - no problem, no adjustment needed.  I also checked the bicep measurement of the sleeve.  The only adjustment I needed to make was to the sleeve length, to which I added 3".

LFJ 2

It all came together real well, but the final finished look of the sleeve left me deflated.  There was just too much ease around the arm, which makes the jacket look all sleeves!

Untitled

Untitled

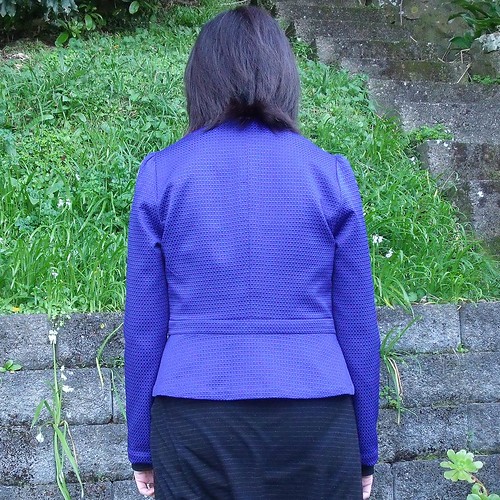
The slight adjustment across the back has given the jacket just that little bit more freedom of movement that my first one doesn't quite have.

Untitled

I also think that I fluffed around finishing it because I really wasn't sure how I was going to wear it without it ageing me 20 years (thanks to some very frank observations from my daughter)!  Hopefully the jeans and black Marfy top keep the look fresh and now.

Untitled


More photos on my Flickr -->


Saturday, 28 February 2015

Electric Blue Pavot

I made this soooo long ago that I almost don't know where to start.... hmmm...

Pavot Jacket

The pattern, let me start there.  No, let's start with "these photos are s**t", which is why it has taken me so long to post this, but taking new photos just ... well just! 

Back to the pattern, this is the Pavot Jacket by the French designer Deer & Doe.  I ordered this pattern over a year ago, I think, with every intention of making the full length version.  I knew I needed to make a muslin to check the fit - just as well I did because there were a number of changes I needed to make.  At the muslin point I decided that the full length jacket looked all wrong and wasn't working for me.

Pavot Jacket

I traced off a size 40 which I graded out to a size 42 at the waist and hip.  I cut 4" from the length of the jacket skirt, so the short version sat on my hip.  As with all other patterns the bust curve in the princess seam was too high and the bodice too short, so I lengthened the bodice at the high bust by 1" and added 5/8" to the bottom of the bodice.  This is the most that I have ever had to add to the bodice of a pattern. I also removed some excess fabric from the centre back along the seam line.  I didn't think it was necessary to have a seam on the centre back of the skirt piece so place that on the fold when cutting the fabric.

Pavot Jacket

I also didn't following the instructions step by step and decided it would be easier to sew the waistband to the bodice and then the skirt to the waist band, off before sewing the shoulder seams together and inserting the sleeves.  The more I get to work in the flat the better I recon!

This pretty blue fabric is a poly/cotton/lycra blend which is just lovely, but it was a bit of a biarch to sew when it came to the front placket - slight stretching under the sewing machine foot.  I think I unpicked twice!

The pattern is an unlined jacket, but it's no secret that I like to line everything!  So instead of drafting a lining for the jacket thinking about how it would attach to the facings, oh no, I just cut lining exactly the same as the bodice pieces, and then tacked the facings down on the lining by hand.  It looks perfectly fine and because it is so lightweight it didn't really add any extra bulk to the jacket.

Pavot Jacket


Pavot Jacket

Given the amount of problems I had with the front placket due to the lycra content I was really scared to go anywhere near it with buttonholes.  My buttonhole foot and I don't get along at the best of times.  I picked up some large domes/snaps for the closure and then added some big black shank buttons to the outside for decoration.  I think they look fabulous!

Pavot Jacket

I wasn't too sure about the Peter Pan Collar so took the vote to Instagram and my gut feeling of no collar won out.
Pavot Jacket

Pavot Jacket

More photos on my Flickr -->


Wednesday, 17 December 2014

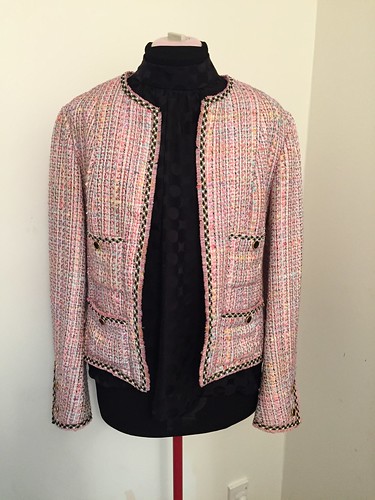
Little French Jacket No.2 (and a big fat fail)

I've been beavering away at my second Little French Jacket for the past couple of months...
LFJ 2

and I was making good progress until I was side-tracked by the release of the Holly Jumpsuit, which jumped to the front of the blog (here), before my other finished projects.

I was so pleased with the first Holly, I made the wee adjustment to the back crotch curve, went fabric shopping especially and picked up this lovely viscose for a long pant version.  In the weekend just gone, I got it all stitched up enough for a quick fitting .... and then this


That my friends is my freshly created UFO! There is just too much wrong with this #viscose #hollyjumpsuit that I don't know if I can be bothered #sewcialist

This pile, my friends, is my first UFO in a long time!  I believe it has got everything to do with the fabric choice.  It is too big, the crotch almost hangs down to my knees and it looks like a sack!  So for now I'm gonna consider this a big fat 'fail' and move on with my Little French jacket.

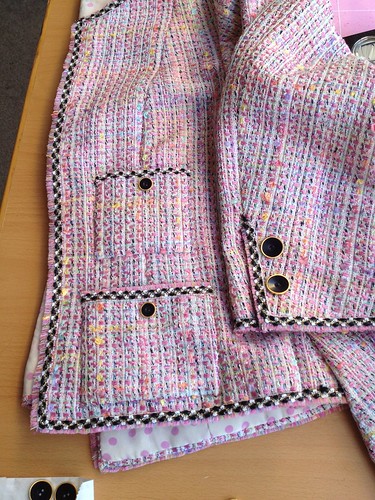
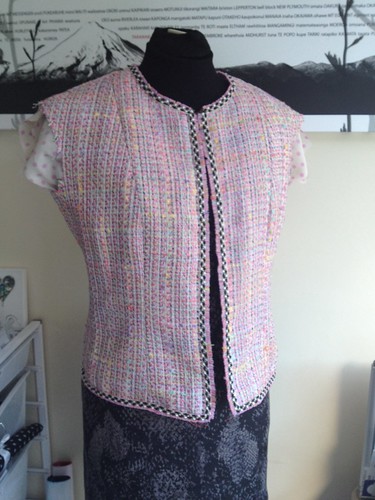
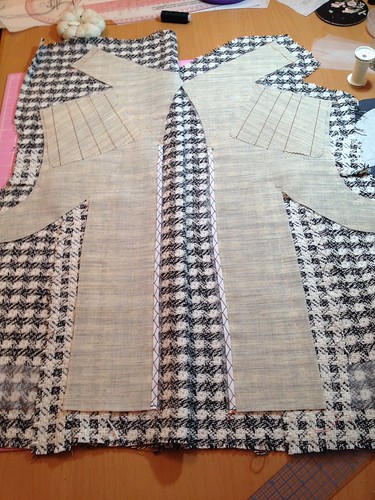
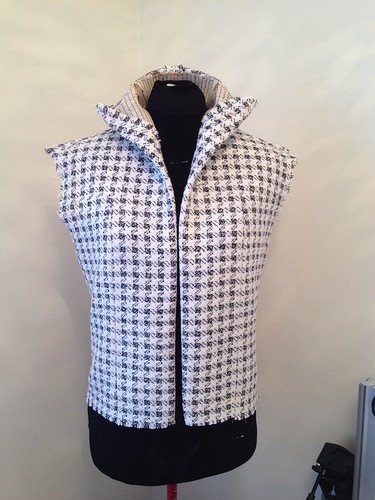
I'm not far away from finishing - I've just got the pockets to attached and the sleeves to set in.  With this Jacket I've decided to put four pockets on, like this ... the bottom pockets need bringing up by about 1/4 inch.

LFJ 2

LFJ 2

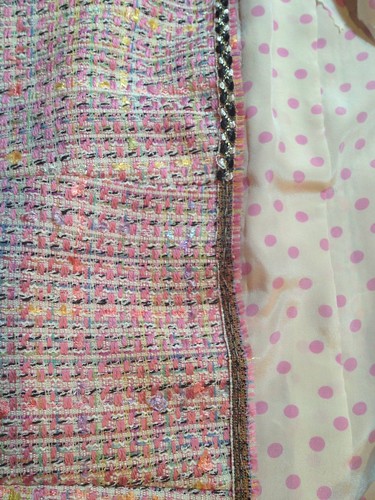
The fabric is like a cotton boucle, that I picked up off Trade Me (NZ version of eBay) from a sewer that was having a clean out.  When it arrived I really wasn't sure if I liked it or not, so I put it away in the stash and never thought much more about it. 

When I was ready to attempt my second Chanel inspired jacket, I still didn't think I was ready to cut into my really nice wool boucle, summer was coming and this cotton jumped to the top of the 'reasons why' list.  If it didn't work out then I wouldn't cry for days! 

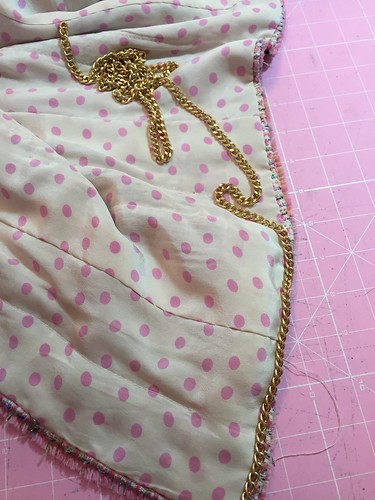
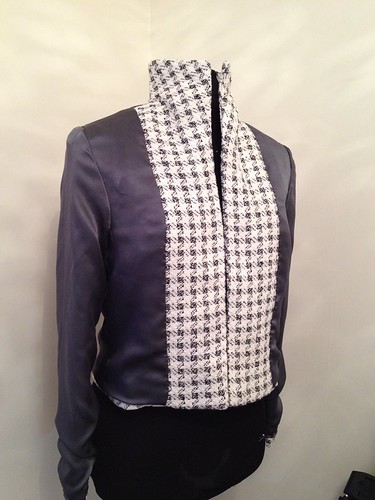
What do ya know, it has actually begun to grow on me... when I started I didn't have the lining or the trim so I didn't really have a clear vision in my head of what it would look like.  When it was time for the lining, I must have looked at every possible lining option in The Fabric Store before it became obvious that this pink polka dot crepe de chine was perfect.  I'm not a polka dot person, so mentally I think I counted it out before I actual picked it up and placed it with the swatch I took with me.  It was the perfect match - don't you just love it when you surprise yourself with fabric choice!

LFJ 2

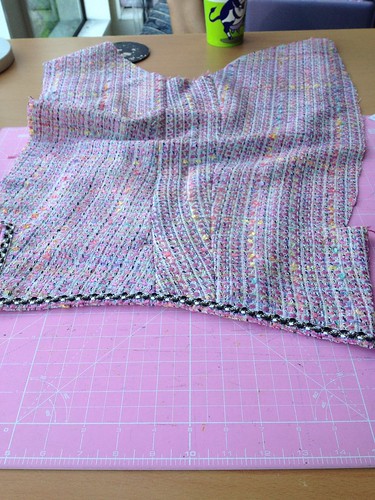
I cut all the selvage from the fabric to use as trim ... note to self: cut off all trim after placing pattern on fabric and before cutting them out.  Why you may ask, because instead of two long continuous pieces of trim I had a few odd lengths and had to look at joining them in discrete places on the jacket.  Finding trim was another major shopping expedition with fabric swatch in hand.  I picked up this lovely black, white and gold trim, that was the perfect width to go over the selvage, from Made Marion 

So at this stage I'm feeling a lot happier about this jacket than I am about Holly the sack!  I think it will be the perfect colour to wear with a nice pair of jeans ... hmmm I can see it fitting into my wardrobe now :-)


Monday, 1 September 2014

Marfy Free Jacket Pattern - The End!

Back in April this year I wrote Part 1 of the Marfy Free Jacket Pattern.  It is now officially Spring and I'm finally at the end - writing the blog post!

After I got the muslin fit to where I was comfortable - that alone was a 5 week journey, on 25 April I got to cut my real fabric.  While that sounds quite straight forward, sadly not because of my fabric choice.  I bought this lovely wool coating from The Fabric Store - it's so soft and bouncy with a medium weave - so it easily frayed but not so much that it was uncontrollable.

Begin thread tracing

I cut all pieces on a single layer, carefully ensuring I had all the squares in the right places for each piece.  While this was a little time consuming it wasn't too hard - the pattern pieces didn't have any seam allowances, so where the pattern piece fell was indeed the stitching seam.

Untitled
Pattern matching at centre back

After I thread traced and cut the fabric it then sat on the shelf for weeks while I tried to decide how I was going to construct it.  I couldn't decided to make a quilted Chanel inspired jacket (LFJ) or whether to take a more tailored approach.  This was my too hard point - I couldn't see how my fabric could be tailored but I could see how it would work as a LFJ; but I couldn't see how the collar would work if it wan't tailored ... *brain explode*

Finally, I decided to wait for the sew-along to get to this point, and take some wise direction from Leisa.  There it was, tailor the jacket!  Part of me was jumping up and down because I could sew the lining together using the machine and then insert, rather than having to hand-stitch each seam of the lining as is required for a LFJ; another part of me was still unsure how the pile of this fabric would behave.  What the hell ... just do it!

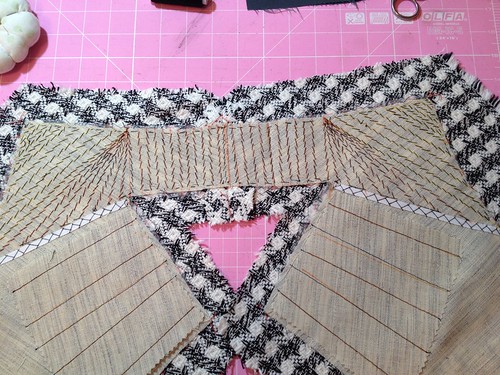
Leisa wrote this amazing post about pad stitching the collar.  This was like a light bulb moment!  The collar would behave differently depending on the direction of the stitches.  I decided that I wanted the back of my collar to stand up and the front to have a beautiful soft roll.

Untitled
Pad stitching a stand up collar
The rest of the jacket came together pretty nicely from here.  I used a medium weight hair canvas for the front and collar which followed through to the bottom of the arm pit.  The shoulders are reinforced with a second layer of hair canvas and the bottom of the jacket has a 2" lining of silk organza.  I also draft a back stay from some scrap cotton lawn that I had lying around (sorry no pictures of that one).

Untitled

Untitled

The sleeve of the jacket is a one piece, which is okay, but next time I would definitely convert to a two piece and add some elbow ease.

Untitled
inside of jacket
For the lining I chose this lovely silk satin from The Fabric Store - yeah it was pricey but the weight of the lining matched the jacket beautifully.  I constructed the lining using the sewing machine but then inserted it into the jacket by hand - a lovely wee fell stitch :-)

Now it is 29 June and I'm finished the construction of the jacket, only to be faced with my next dilemma ... what trim to use.  I initially thought I would use a sold black grossgain or satin ribbon and attach very close to the edge.  I bought enough of both to try, but once I pinned it in place I didn't like it - it was just too heavy for the jacket.  So once more, the jacket just hung around waiting for me to make the next decision.  Finally I settled on these small round fabric bobble buttons  - they're just giant knots really.  I was going to place a loop on one side so the jacket would close, but couldn't get that to work.  I ditched the loops and just went with the buttons, so for now the jacket doesn't close and I'm okay with that.

Untitled

I also decided that the jacket didn't need the patch pockets - less is more!  I love it :-)

Untitled

I finally finished the jacket on 19 July and have worn it a few times since - I never really know how I feel about anything until I've worn it a few times.  It is super warm - most definitely a winter jacket.

Would I make this pattern again - you bet I would.  Next time I would:

  • add a wee bit more ease to the back, possibly return the princess seams on the back to the original size 46
  • widen the arm at the bicep and convert the sleeve to a two piece pattern
  • lengthen jacket to original length of pattern - this version is 3" shorter

I've never owned a jacket even remotely similar to this, so I feel real grown up when I wear it!

Way more photos over on my Flickr -->

Sunday, 29 June 2014

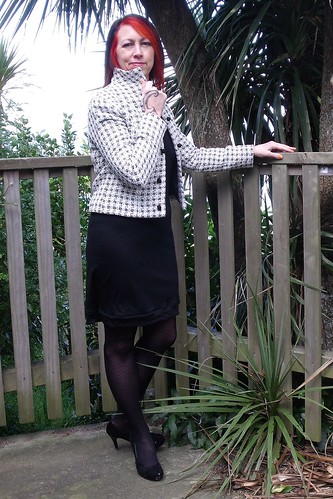
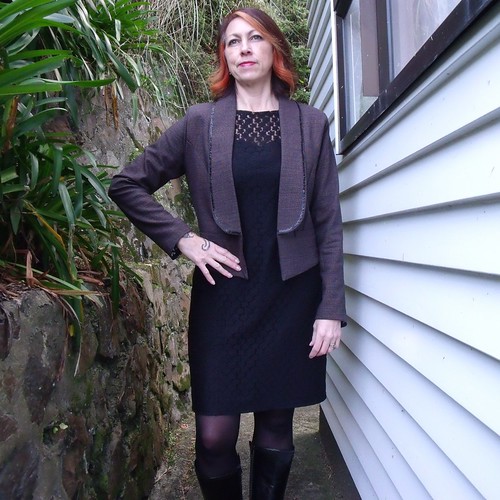
Office Warrior - Bellatrix

Did you know the name Bellatrix is Latin for "female warrior" which is a pretty good description of my first Bellatrix Blazer!  This time however, yes a second Bellatrix, it's a bit more "office warrior".

Untitled

I wear my first Bellatrix Blazer all the time.  It's such an easy jacket to wear, over a dress or with pants ... and in all reality an easy make.  This one I made in one weekend.  For this particular jacket my favourite part is ... the lining.

Untitled
Just look at those pretty faces!

The lining is just a simple acetate that I purchased from Back Street Bargins on Trade Me.  It just went together perfectly with the wool blend suiting fabric I used for the shell of the blazer.  I've got no idea where I purchased the wool blend suiting fabric from - it's been in my stash for a while, before I started keeping track of the fabric stash!  I think it was always destined to be made into a jacket, and it's the perfect office warrior attire.

Untitled

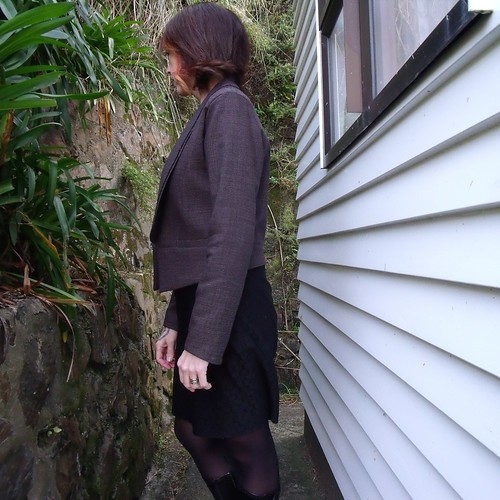
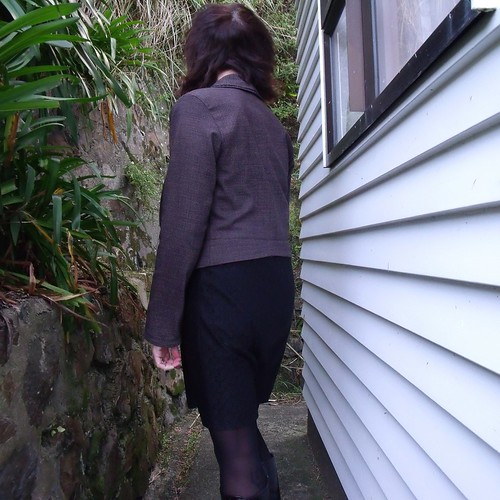
I made this version exactly the same as my first, but this time I followed the instructions and used fusible interfacing for the entire centre front panel and then overlaid that with another piece of fusible interfacing for the lapel/collar.  I also placed some fusible interfacing on the side front panels and the upper back, for added structure.  I purchased some tailors fusible interfacing from Spotlight - it was just the perfect weight for the fabric.  I also inserted a small shoulder pad, same as last time, to add that subtle structure to the upper jacket.  Very happy!

Untitled
It was just a tad windy on photo day!
To give the overall look a bit of a lift, given I hadn't used a contrast for the lapels, I've hand stitched some lizard sequin trim around the outside edge of the lapel.  I couldn't find an appropriate button, so for now have decided to go without.  I've thought about a decorative hook and eye, but haven't had time to look that hard for anything.  I never wear it buttoned anyway, so haven't missed it at all.

Untitled

I made this jacket from the exact same pattern (with alterations) as my first, but this one feels bigger; it feels like it's got more ease, although in the photos you can't really tell.  I think its the wool suiting fabric that has more 'give' than the synthetic used for my first jacket.  It is really light weight to wear and warm!

The "office warrior" is on regular rotation in my wardrobe :-)

More photos on my Flickr-->


Saturday, 5 April 2014

Marfy Free Jacket Pattern - Part 1

This is the garment that I've been most looking forward to, the Marfy Jacket 1756 - one of the three free patterns made available this year.

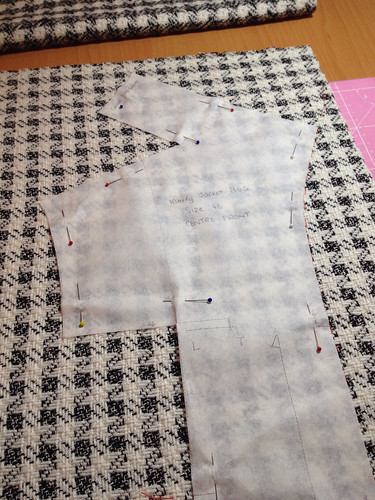
I began by selecting a size 46.  Traced the pattern and cut my muslin.  Now here's were it get's interesting as there are no construction instructions.  The only thing that you have to go on is the artist impression and markings on the pattern pieces.


I started by sewing up the centre back seam and then attached the side back pieces to give me a complete back - easy!

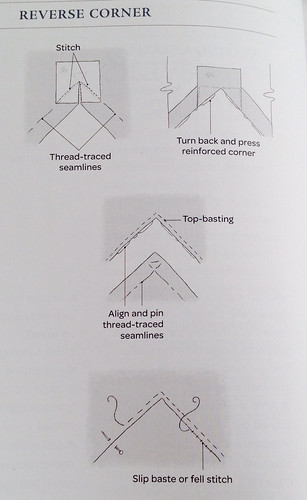
Then I thought, attach side front to centre front.  This would be straight forward if they were princess seams, but not!  The side front is an inset corner ... I've only ever sewn one of these before on my Mila Dress, and while it worked out okay, it was a bit of hit and miss.  I went to the trusty internet looking for a technique, this is what I found - Shirley Smith is a goddess!


This is so easy and the end result is, OMG, perfection! There is also a wee section in the book "Couture Sewing Techniques" by Claire Shaeffer on seams with reverse corners.  This is a very similar technique to that demonstrated by Shirley in the video but using hand stitches instead of machine stitching.

Reverse corner technique

Next, I sewed the shoulder seams, then the centre back of the collar before attaching that to the back - tricky little corners, and actually I might try the above technique on those corners as well. I sewed the centre back collar of the front facing then pinned and sewed the front lining to the jacket in one continuous sewing line.

I learnt a good tip from Stephanie Lincecum ... about sewing in the corner of collars to avoid the 'blow-out' ... stop about one stitch before the corner, place the foot at a 45 degree angle to the line of stitching just sewn, sew one or two stitches, turn again to sew the next  seam.  It's the little things that matter!

Finish muslin, deciding length
Make-up free face of concentration!!
I'm pretty happy with the final muslin fit - it only took me 5 weeks!  The first muslin fit was too big around my body, but shoulder width and waist location all seemed to be okay, so I tore the first muslin apart and reduced all vertical seams down to a size 44.  There is room to move and enough room to wear some winter layers of clothing underneath. 

I was surprised at how long the jacket is given the description of the pattern reads "This short, tight-fitting jacket closes edge-to-edge with hooks".  I've removed 3inches from the length so it will sit on my high hip.

Now I need to think about the construction of the actual jacket.  I think it might be a combination of a tailored blazer and a french jacket.  Thinking, thinking ....


Sunday, 23 February 2014

Shinny Bellatrix

When Papercut Patterns released the new Constellation Collection I fell in love with the Bellatrix Blazer and immediately placed an order.  It has taken me a wee while to actually sew it up, but I'm pleased to say the first iteration is now in my wardrobe.

Untitled

I dithered a bit about the fabric, but when I pulled this from the depths of my stash, it was obvious.  This shiny PVC/polytester blend that has a kinda suede feel was a little acquisition from The Fabric Store at one of their sales last year at something ridiculous like $6 p/m.

The black lapel and welt pockets are actually the reverse of the fabric.  I've got no idea where I got the button from, it was a solitary find in my button jar.  The match is so perfect you might think that I made a self-covered button, but no!

Untitled

My inner self battled over whether or not to make a muslin - but the voice of reason spoke and the muslin was made.  Just as well, because changes were most definitely required for a better fit.  Well actually, it wouldn't have fit at all if I had made it direct from the packet.

Untitled

I had quiet a battle with the princess seams, fluffing with the curve for a small and lower bust.  Anyway it finally worked out after ripping the muslin apart and sewing it up again, about three times!
I also had to move the shoulder seam (at the arms edge) forward by 1.5".  In hindsight I should have also moved it forward at the neck edge about 1/2"!  I lengthened the sleeves by 2" and lengthened the body 1/2" about 3/4" up from the under arm.  Whilst that doesn't seem to be a long list of alterations I'm still trying to get my head around interpreting the adjustment that might be required.

Untitled

I didn't use interfacing in front of the jacket (as per the instructions), but rather just placed the interfacing in the lapel.  Given the stability of the fabric this was an okay decision.

Untitled

I wasn't sure about whether I would need shoulder pads, but after a final fitting before closing the lining I decided that the shoulders could do with some structure to help the blazer maintain it's shape.

For a touch of fun I used this pretty pink plaid for the pocket lining, left over from my peek-a-boo dress.   This is also a really good close-up of the fabric.
Untitled

Now I just got to make some black skinny jeans to wear the jacket with - although my "me made" jeans in this photo worked.  It's not one of those garments that will go with everything - I'll have to be quite selective about what I can wear it with.  Maybe a black dress would work also?

Untitled

More photos on my Flickr -->