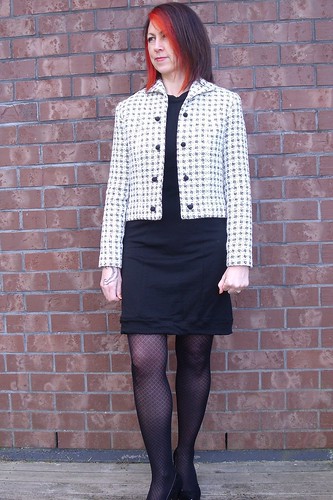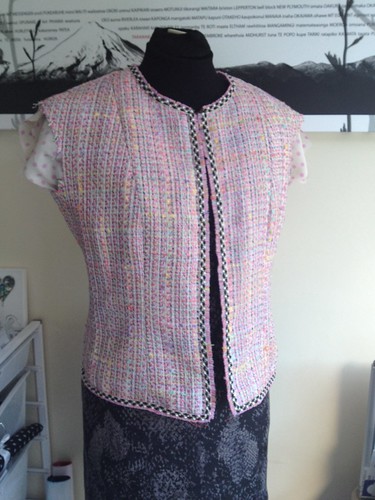
I've been beavering away at my second Little French Jacket for the past couple of months...
and I was making good progress until I was side-tracked by the release of the Holly Jumpsuit, which jumped to the front of the blog (here), before my other finished projects.
I was so pleased with the first Holly, I made the wee adjustment to the back crotch curve, went fabric shopping especially and picked up this lovely viscose for a long pant version. In the weekend just gone, I got it all stitched up enough for a quick fitting .... and then this
This pile, my friends, is my first UFO in a long time! I believe it has got everything to do with the fabric choice. It is too big, the crotch almost hangs down to my knees and it looks like a sack! So for now I'm gonna consider this a big fat 'fail' and move on with my Little French jacket.
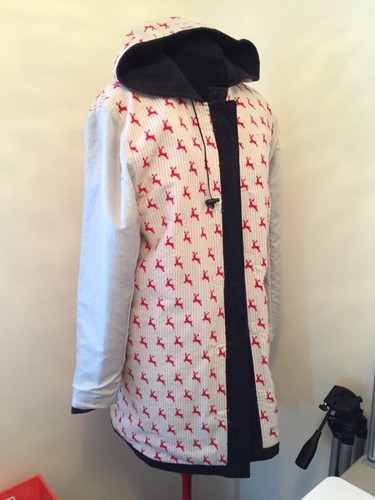
I'm not far away from finishing - I've just got the pockets to attached and the sleeves to set in. With this Jacket I've decided to put four pockets on, like this ... the bottom pockets need bringing up by about 1/4 inch.
The fabric is like a cotton boucle, that I picked up off Trade Me (NZ version of eBay) from a sewer that was having a clean out. When it arrived I really wasn't sure if I liked it or not, so I put it away in the stash and never thought much more about it.
When I was ready to attempt my second Chanel inspired jacket, I still didn't think I was ready to cut into my really nice wool boucle, summer was coming and this cotton jumped to the top of the 'reasons why' list. If it didn't work out then I wouldn't cry for days!
What do ya know, it has actually begun to grow on me... when I started I didn't have the lining or the trim so I didn't really have a clear vision in my head of what it would look like. When it was time for the lining, I must have looked at every possible lining option in The Fabric Store before it became obvious that this pink polka dot crepe de chine was perfect. I'm not a polka dot person, so mentally I think I counted it out before I actual picked it up and placed it with the swatch I took with me. It was the perfect match - don't you just love it when you surprise yourself with fabric choice!
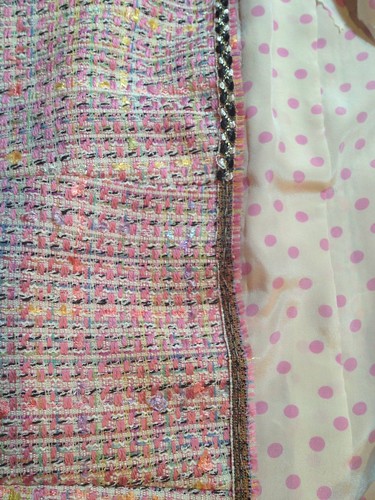
I cut all the selvage from the fabric to use as trim ... note to self: cut off all trim after placing pattern on fabric and before cutting them out. Why you may ask, because instead of two long continuous pieces of trim I had a few odd lengths and had to look at joining them in discrete places on the jacket. Finding trim was another major shopping expedition with fabric swatch in hand. I picked up this lovely black, white and gold trim, that was the perfect width to go over the selvage, from Made Marion
So at this stage I'm feeling a lot happier about this jacket than I am about Holly the sack! I think it will be the perfect colour to wear with a nice pair of jeans ... hmmm I can see it fitting into my wardrobe now :-)
Wednesday, 17 December 2014
Tuesday, 9 December 2014
Smitten by Holly
When By Hand London released the Holly Jumpsuit I was rather smitten by the wide legged, cowl neck version and every one I saw in the blogisphere convinced me it was a pattern I needed to sew this summer.
While I agree a jumpsuit can leave you feeling rather vulnerable when you need to visit the loo, I figured that I would probably only wear it during the summer months and it wouldn't be any worse than going to the bathroom in a bikini! Totally normal for summer right?
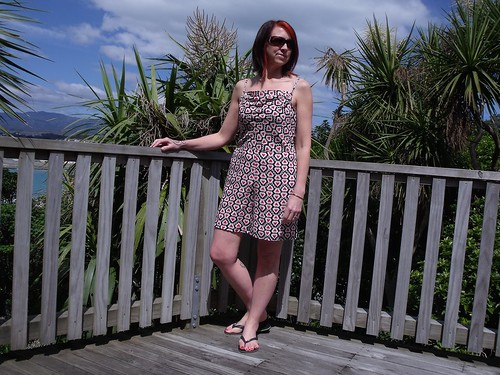
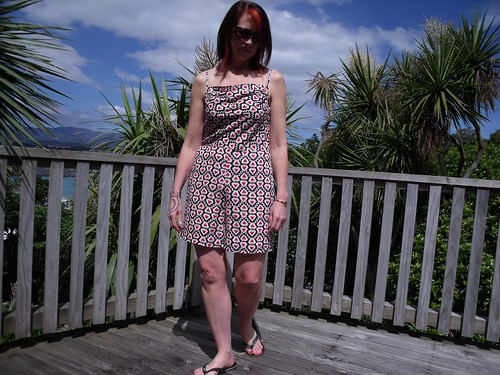
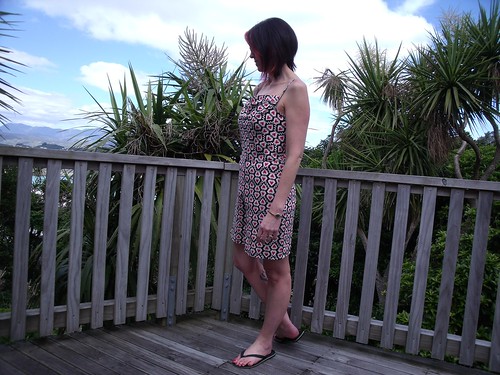
I decided that my first version needed to be beach/weekend wear, so went with the top of version 1 and the shorts from version 2 - lengthened to me more age appropriate for me. I added 2" to the length of the pattern shorts.
The real scary thing was the pant - cause I so haven't got my head around what part of the pant pattern needs to be adjusted when it doesn't fit properly/comfortably, arrrrgh! The girls at By Hand London held a sew-along not long after the pattern was released. I didn't sew along exactly but I was paying attention when they covered 'full and flat butt adjustments'. This is an interesting one, because while I don't have the outward curve of a 'young' butt I have really wide hips.
I made a 1/2" flat butt adjustment, and then added 1/8" to the side seam at the high hip. The fit seemed to be good but the crotch felt a bit low, although I wasn't really sure where it should be! So after wearing my muslin around for a little bit I thought I needed to remove 1/4" horizontally, which I did across both the front and back pattern pieces at the high hip.
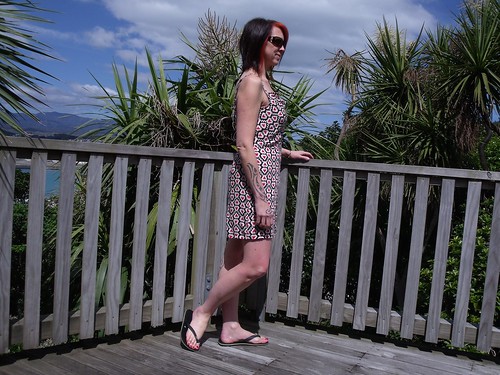
Is it weird to say 'look at my butt'?!? Maybe the more appropriate thing to say is 'look how well the pant falls over my backside', lol! I'm pretty happy with the final fit, although I now realise that the back crotch could do with some more depth - I can feel it tighten when I bend over.
The flat butt adjustment also fixed the side seam which was leaning toward the front instead of staying perpendicular to the floor. I still haven't got my head around the engineering of it all, but it worked for me and that is the main thing :-)
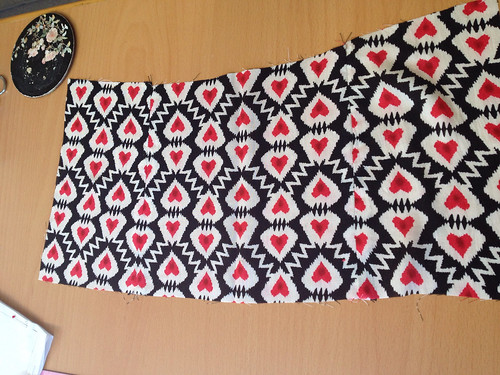
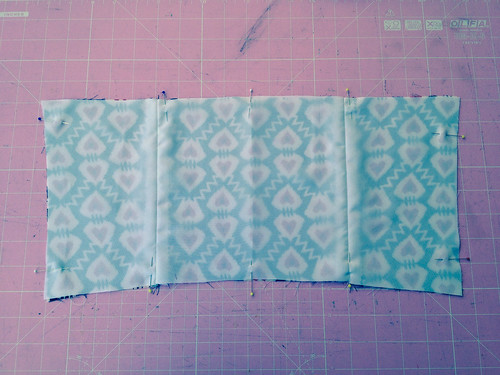
I chose this really dreamy rayon from my stash that I picked up at the Arthur Toye closing down sale earlier in the year - the drape is ideal. I wasn't going for perfect pattern matching, but I did attempt to look at the pattern placement on the fabric before cutting. As it turned out the pattern matching across the back three pieces was pretty bloody fantastic!
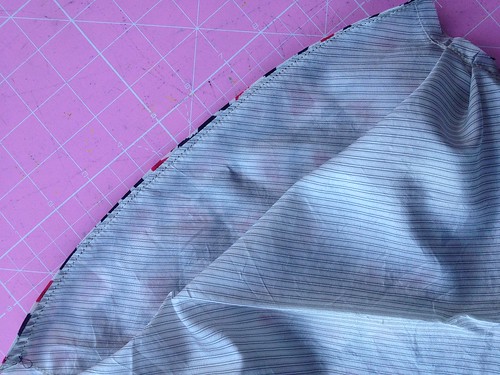
The fabric was kinda transparent, especially if I stood in the sunlight, it almost became completely sheer - and given I'm planning on wearing this to the beach I opted to line the whole jumpsuit with a really light weight acetate I had in the cupboard. As you can see from this picture you can almost see through the lining as well. Together they provide just the right amount of modesty while remaining light weight.
I constructed both the shell and the lining, then attached them across the neckline of the front piece, understitching on the inside. The back and the armholes are encased in the bias binding, with the short lining is hemmed 1" shorter than the shell.
I interlined the back pieces with some poly/cotton scraps to give it a bit more structure.
Overall, I am pretty happy with my first Holly playsuit. I've already got a second one in the pipeline - this one will be the long pant version, staying true to version 1 of the pattern.
More photos on my Flickr -->
While I agree a jumpsuit can leave you feeling rather vulnerable when you need to visit the loo, I figured that I would probably only wear it during the summer months and it wouldn't be any worse than going to the bathroom in a bikini! Totally normal for summer right?
I decided that my first version needed to be beach/weekend wear, so went with the top of version 1 and the shorts from version 2 - lengthened to me more age appropriate for me. I added 2" to the length of the pattern shorts.
The real scary thing was the pant - cause I so haven't got my head around what part of the pant pattern needs to be adjusted when it doesn't fit properly/comfortably, arrrrgh! The girls at By Hand London held a sew-along not long after the pattern was released. I didn't sew along exactly but I was paying attention when they covered 'full and flat butt adjustments'. This is an interesting one, because while I don't have the outward curve of a 'young' butt I have really wide hips.
I made a 1/2" flat butt adjustment, and then added 1/8" to the side seam at the high hip. The fit seemed to be good but the crotch felt a bit low, although I wasn't really sure where it should be! So after wearing my muslin around for a little bit I thought I needed to remove 1/4" horizontally, which I did across both the front and back pattern pieces at the high hip.
Is it weird to say 'look at my butt'?!? Maybe the more appropriate thing to say is 'look how well the pant falls over my backside', lol! I'm pretty happy with the final fit, although I now realise that the back crotch could do with some more depth - I can feel it tighten when I bend over.
The flat butt adjustment also fixed the side seam which was leaning toward the front instead of staying perpendicular to the floor. I still haven't got my head around the engineering of it all, but it worked for me and that is the main thing :-)
I chose this really dreamy rayon from my stash that I picked up at the Arthur Toye closing down sale earlier in the year - the drape is ideal. I wasn't going for perfect pattern matching, but I did attempt to look at the pattern placement on the fabric before cutting. As it turned out the pattern matching across the back three pieces was pretty bloody fantastic!
The fabric was kinda transparent, especially if I stood in the sunlight, it almost became completely sheer - and given I'm planning on wearing this to the beach I opted to line the whole jumpsuit with a really light weight acetate I had in the cupboard. As you can see from this picture you can almost see through the lining as well. Together they provide just the right amount of modesty while remaining light weight.
I constructed both the shell and the lining, then attached them across the neckline of the front piece, understitching on the inside. The back and the armholes are encased in the bias binding, with the short lining is hemmed 1" shorter than the shell.
I interlined the back pieces with some poly/cotton scraps to give it a bit more structure.
Overall, I am pretty happy with my first Holly playsuit. I've already got a second one in the pipeline - this one will be the long pant version, staying true to version 1 of the pattern.
More photos on my Flickr -->
Monday, 17 November 2014
Inspiration Station
It's not often I copy a RTW look to the tee. Usually I troll through Pinterest or designer websites for inspiration on styling and the detail that leads me to what I pull together. On one of my 'internet window shopping' sessions I came across this dress...
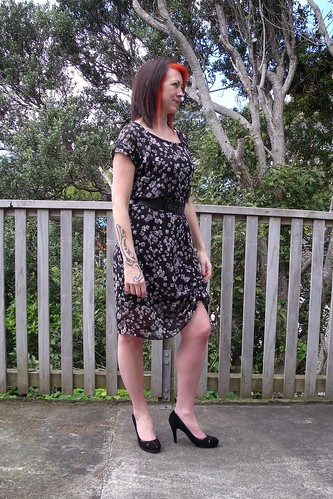
I thought this dress would be the ideal, easy wear, summer, work appropriate addition to my wardrobe - simple but classy. Immediately the Belcarra top pattern came to mind - how easy would it be to simply add some length to make it a dress.
I went to the depths of my fabric stash and found this black crinkle chiffon (well that's what I'm gonna call it anyway) with a small floral print. I bought this online a wee while ago and it wasn't what I expected when it arrived, so I figured that if the dress didn't work out then I wouldn't be too disappointed.
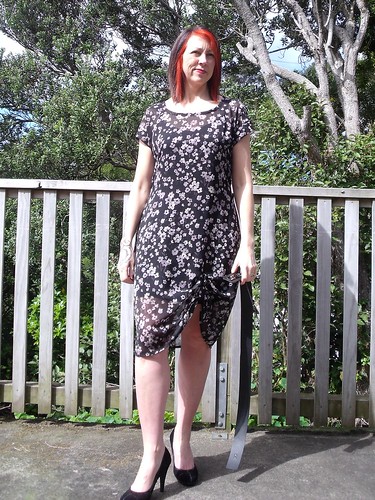
When I made my first Belcarra top I selected a size 10 based on my bust and graded to a size 8 at the hip, resulting in a great fitting top. I used exactly the same size selection for this dress and extended the bottom of the top straight down by 17". However, the fit on this has a completely different result.
It has way and I mean waaaay too much room around the waist and hip area. I considered taking it in, but the seams have a french seam finish, which would mean unpicking the sleeves in order to get to the side seams and re-shape them. The fabric is so fine, I was worried that I would cause more damage and render it completely unwearable, so no picking here.
My next thought was to add some elastic across the middle of the back at the waist. I cut a 2" piece of 1/4" elastic and stretched this as much as I could while attaching it with a zig zag stitch.
While that made a small improvement, I feel that it's still too big. Thank goodness for a belt!
There, that looks better already. Okay, now we can move on to more of the details ...
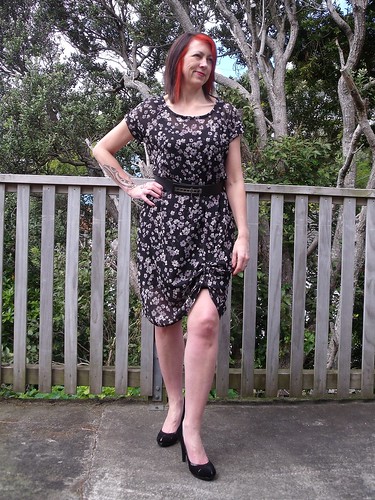
I hoisted up the hem over the left leg ... I don't know why, but it just felt better, than on the right side. Firstly I made a tab 3" wide by 7" long, folded it in half, sewed up two sides and turned right side out. I then created a buttonhole in the dress, horizontal to the hem, 7" up from the hem - I applied a small amount of tailors fusible interfacing to stabilise the fabric before sewing the buttonhole. I threaded the tab through the buttonhole and hoisted up the hem then closed the tab using a few hand stitches. Sorry, didn't take any photos of this process - brain was too busy working overtime trying to nut this out!
I decided that the lift in the hem wasn't dramatic enough, and the dress still looked like a sack, so promptly repeated the process making a second button hole and second tab, this time threading the tab through both button holes.
Now that the fabric is made up into a dress, I actually don't mind it and will probably get loads of wear out of this dress over the coming summer months.
More photos on my Flickr -->
I thought this dress would be the ideal, easy wear, summer, work appropriate addition to my wardrobe - simple but classy. Immediately the Belcarra top pattern came to mind - how easy would it be to simply add some length to make it a dress.
I went to the depths of my fabric stash and found this black crinkle chiffon (well that's what I'm gonna call it anyway) with a small floral print. I bought this online a wee while ago and it wasn't what I expected when it arrived, so I figured that if the dress didn't work out then I wouldn't be too disappointed.
When I made my first Belcarra top I selected a size 10 based on my bust and graded to a size 8 at the hip, resulting in a great fitting top. I used exactly the same size selection for this dress and extended the bottom of the top straight down by 17". However, the fit on this has a completely different result.
It has way and I mean waaaay too much room around the waist and hip area. I considered taking it in, but the seams have a french seam finish, which would mean unpicking the sleeves in order to get to the side seams and re-shape them. The fabric is so fine, I was worried that I would cause more damage and render it completely unwearable, so no picking here.
My next thought was to add some elastic across the middle of the back at the waist. I cut a 2" piece of 1/4" elastic and stretched this as much as I could while attaching it with a zig zag stitch.
While that made a small improvement, I feel that it's still too big. Thank goodness for a belt!
There, that looks better already. Okay, now we can move on to more of the details ...
I hoisted up the hem over the left leg ... I don't know why, but it just felt better, than on the right side. Firstly I made a tab 3" wide by 7" long, folded it in half, sewed up two sides and turned right side out. I then created a buttonhole in the dress, horizontal to the hem, 7" up from the hem - I applied a small amount of tailors fusible interfacing to stabilise the fabric before sewing the buttonhole. I threaded the tab through the buttonhole and hoisted up the hem then closed the tab using a few hand stitches. Sorry, didn't take any photos of this process - brain was too busy working overtime trying to nut this out!
I decided that the lift in the hem wasn't dramatic enough, and the dress still looked like a sack, so promptly repeated the process making a second button hole and second tab, this time threading the tab through both button holes.
Now that the fabric is made up into a dress, I actually don't mind it and will probably get loads of wear out of this dress over the coming summer months.
More photos on my Flickr -->
Saturday, 1 November 2014
Take Two Lola!
I don't know about you, but I have developed a habit of making everything twice! I haven't made any pattern more than twice, so I don't think I can say I have a TNT pattern, but I'm not sure what's up with this little ritual I have of putting everything in the wardrobe two by two???
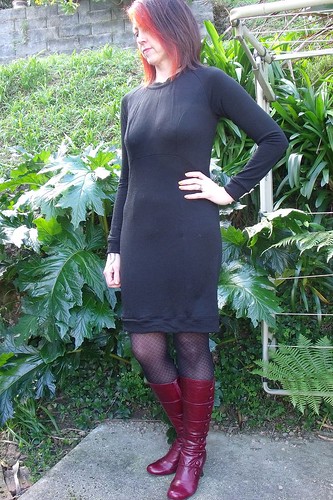
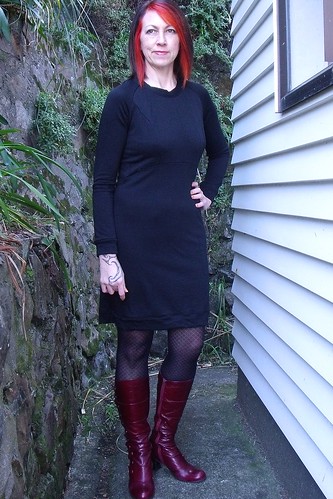
Yep, so this is version two of the Lola dress by Victory Patterns, which I made earlier here. On my first make (which I have only worn once) the shoulder/armseye area was a bit tight and while I really liked the dress it was uncomfortable to wear. This time 'round I made a size 6 for the top and bottom.
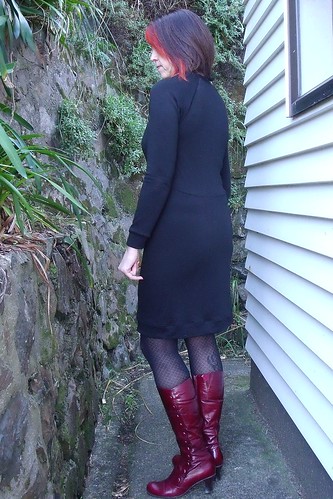
Here's the obvious ... I extended the sleeves to a long version, cause it's a winter dress, and omitted the side pockets. I made a couple of other preference adjustments: I added 2" to the length of the hem band, so it didn't pull the hem of the dress in to much and I lengthened the bodice at the high bust by 1/2".
I finished this dress back in early August and have worn it loads over the last few months, changing it up each time with one of my jackets. It's perfect for winter work - a bit of a blank canvas!
I did make a bit of a boo boo! Instead of putting the join in the band of the hem at the back of the dress, I ended up putting it smack bang in the middle of the front. Thank goodness that it's black, cause the only person that can see is probably me.
The fabric is a Merino/Nylon jersey knit blend that I picked up from The Fabric Store for $15p/m. It is a good weight for this dress and doesn't have a fluffy wrong side, which I quite like.
More photos on my Flickr -->
Yep, so this is version two of the Lola dress by Victory Patterns, which I made earlier here. On my first make (which I have only worn once) the shoulder/armseye area was a bit tight and while I really liked the dress it was uncomfortable to wear. This time 'round I made a size 6 for the top and bottom.
Here's the obvious ... I extended the sleeves to a long version, cause it's a winter dress, and omitted the side pockets. I made a couple of other preference adjustments: I added 2" to the length of the hem band, so it didn't pull the hem of the dress in to much and I lengthened the bodice at the high bust by 1/2".
I finished this dress back in early August and have worn it loads over the last few months, changing it up each time with one of my jackets. It's perfect for winter work - a bit of a blank canvas!
I did make a bit of a boo boo! Instead of putting the join in the band of the hem at the back of the dress, I ended up putting it smack bang in the middle of the front. Thank goodness that it's black, cause the only person that can see is probably me.
The fabric is a Merino/Nylon jersey knit blend that I picked up from The Fabric Store for $15p/m. It is a good weight for this dress and doesn't have a fluffy wrong side, which I quite like.
More photos on my Flickr -->
Monday, 27 October 2014
Meet Gillian - THE. Wrap Dress
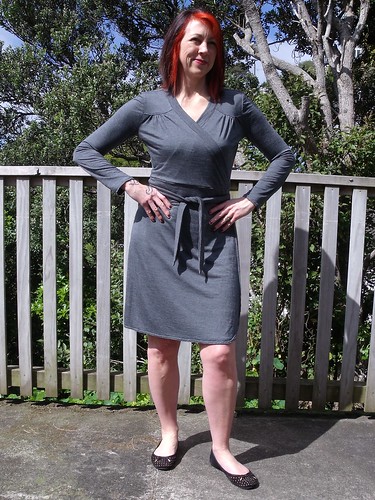
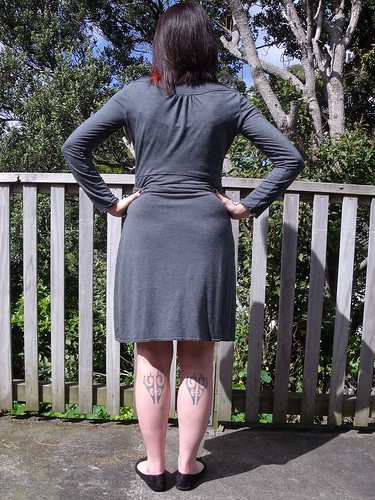
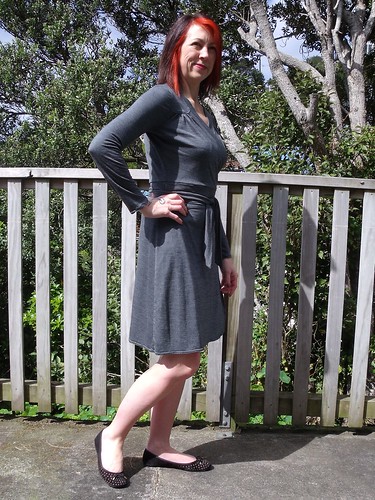
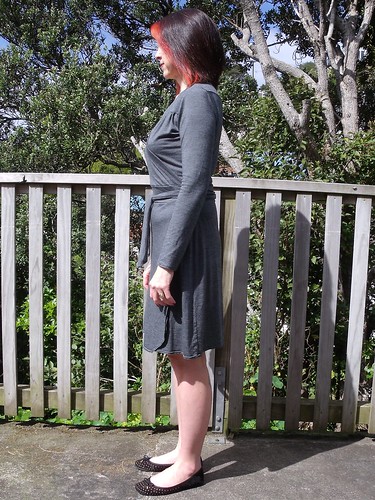
This is Gillian! She is the new release from Muse Patterns. When Kat asked our local sewing group if we were keen to test her new pattern, I was keen as mustard. At that stage I had planned and cut my frankenpattern wrap dress the "Midnight Dream Coppelia", so I really wanted to sew an actual wrap dress pattern for a comparison.
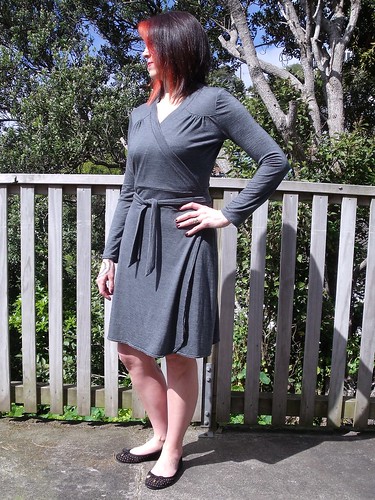
The detail on this dress is well thought out and very figure flattering (in my opinion). The front yoke provides just the right amount of space for the bust and the waist band provides a region for your waist to be, without being exact. I love that, coz usually I have to lengthen the bodice of most patterns by 1/2". The curve to the bottom corner of the skirt provides a good visual balance to the curve of the yokes.
The back also has a yoke detail without making the back of the dress too wide. I think it provides interest to the back of the dress, when otherwise all you would get is butt hugging knit fabric!
![]() |
| excuse the (unflattering) butt photo!!! |
The pattern is like seven patterns in one: a wrap skirt with two length options, a wrap top with two sleeve options and then but them both together for dress options. I only tested the long sleeve dress, but I've definitely got plans to make a short sleeve wrap top.
Testing was most interesting for me ... I actually had to stop and read the pattern instructions. My usual process is to skim read the pattern instructions, I may stop and actual read things that are new to me or sound complicated, then just get on with it, briefly referring to the illustrations as I go :-)
This time I did my skim reading first, but then followed each and every step of the pattern exactly as the instructions said. Oh boy was I challenged!
The hole construction on the waist band of this dress is so genius, but do you think I could work it out ... simply the waist band folds back on itself to completely enclose the hole which the waist tie passes through - no raw edge or wee slit in the seam. This method also provides some structure to the waist band from which the skirt can hang. Look, at least I didn't put the hole on the wrong side like I did with the Midnight Summer Coppelia!
I went fabric shopping for this make ... I know you would have thought I would've had something in amongst the stash, now that you've seen photos of it! I picked up this very fine stripe merino from The Fabric Store. I would describe it as a medium weight, which gives just the amount of structure to hold the details but drape as a wrap dress should. I used 2.25m to make the long sleeve, above the knee dress version. I bought 2.5m, but measured exactly how much I actually used.
Anyway - I've worn this dress every week since I've made it, which is always a good testament to a pattern for me, otherwise it just hangs in my wardrobe.
If you are interested you can check out all the other variations over on the Muse Patterns website.
More (not so great, shadow struck) photos on my Flickr -->
Fine print stuff: you know ... I volunteered to pattern test, these opinions are my own and I was not paid in any way to write this post - other than to receive the free pattern for the purpose of testing.
Sunday, 19 October 2014
Midnight Summer Coppelia
Just over a month ago, I joined The Frankenpattern Contest on pattern review and set to looking for the most appropriate patterns to mash together. After working through a number of options I settled on a couple of Papercut Patterns which would produce my first wrap dress.
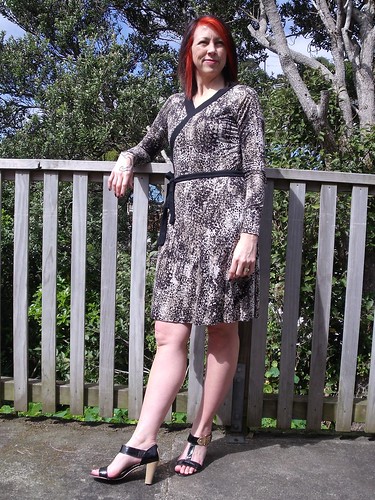
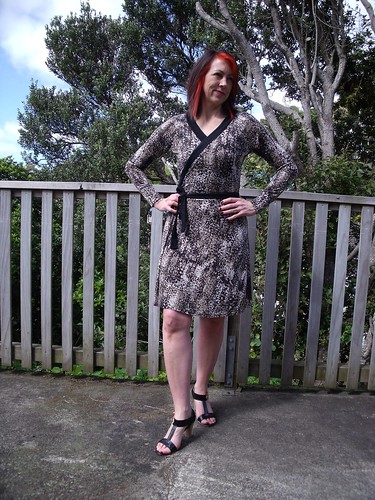
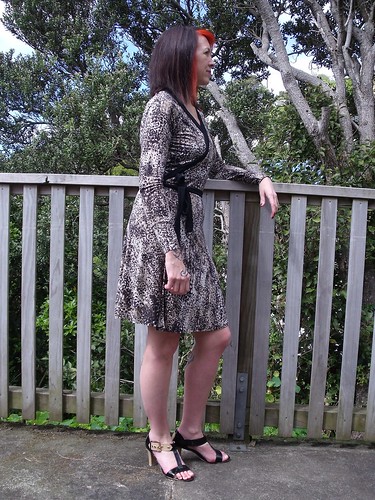
I took the skirt (and tie) from the Midnight Summer Dream, a garden party summer wrap dress, and the Coppelia, ballet style raglan sleeve wrap cardi, and morphed these into a Spring appropriate wrap dress.
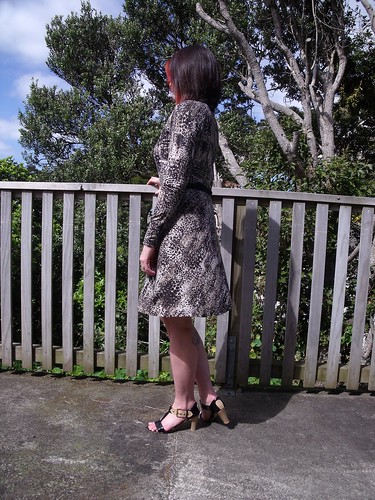
The skirt of the Midnight Summer Dream was fuller than I wanted so I reduced the fullness by taking out a wedge of 3-1/2" at the skirt side. This resulted in more of an A-Line skirt - thanks to a slight breeze in the next photo for capturing the skirt shape.
The top and the skirt came together pretty seamlessly. I measured bottom of cardi and top of skirt and only had to reduce the cardi by 1-3/4", so I just took that from the narrow end of the wrap. I kinda followed the pattern instructions for the Midnight Summer Dress which called for the wrap ties to be attached to the narrow end of the top, where it meets the skirt.
There is a small slit in the side seam of the top, just above the waist seam for the tie of the under-wrap.... nothing to complicated, however I put the slit in the wrong side, so the dress wraps the wrong way around! Is there actually a right way or wrong way to wrap?
I picked up this snake skin cotton knit from The Fabric Store sale and paired it up with some black merino for the contrast, to break up the print. The fabric is really light weight and with skirt cut on the bias it dropped quite a bit after being hung for a few days. It almost looked like a high/low skirt! But I think I've over corrected just a tad too much and the back is now a fraction shorter then the front - you'll only ever notice if I stood still at all, luckily I don't :-)
Because I fluffed around for so long with the hem, and I suck at getting my photos sorted, I missed the deadline for The Pattern Review contest :-( Never to mind, I had fun working on this one, main thing right!
More photos on my Flickr -->
I took the skirt (and tie) from the Midnight Summer Dream, a garden party summer wrap dress, and the Coppelia, ballet style raglan sleeve wrap cardi, and morphed these into a Spring appropriate wrap dress.
The skirt of the Midnight Summer Dream was fuller than I wanted so I reduced the fullness by taking out a wedge of 3-1/2" at the skirt side. This resulted in more of an A-Line skirt - thanks to a slight breeze in the next photo for capturing the skirt shape.
The top and the skirt came together pretty seamlessly. I measured bottom of cardi and top of skirt and only had to reduce the cardi by 1-3/4", so I just took that from the narrow end of the wrap. I kinda followed the pattern instructions for the Midnight Summer Dress which called for the wrap ties to be attached to the narrow end of the top, where it meets the skirt.
There is a small slit in the side seam of the top, just above the waist seam for the tie of the under-wrap.... nothing to complicated, however I put the slit in the wrong side, so the dress wraps the wrong way around! Is there actually a right way or wrong way to wrap?
I picked up this snake skin cotton knit from The Fabric Store sale and paired it up with some black merino for the contrast, to break up the print. The fabric is really light weight and with skirt cut on the bias it dropped quite a bit after being hung for a few days. It almost looked like a high/low skirt! But I think I've over corrected just a tad too much and the back is now a fraction shorter then the front - you'll only ever notice if I stood still at all, luckily I don't :-)
Because I fluffed around for so long with the hem, and I suck at getting my photos sorted, I missed the deadline for The Pattern Review contest :-( Never to mind, I had fun working on this one, main thing right!
More photos on my Flickr -->
Sunday, 12 October 2014
Duffle Coat
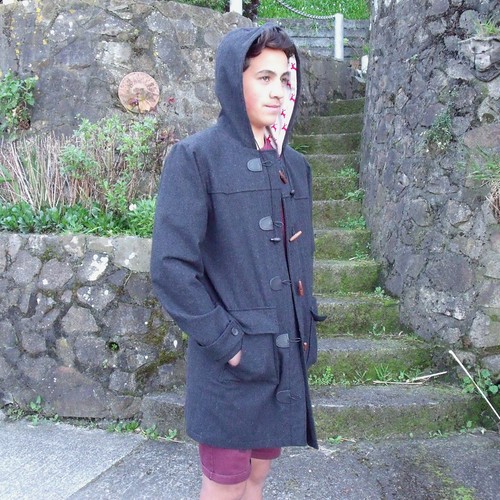
This one has been coming for a wee while. It was my son's birthday back at the beginning of May and he was keen for me to make him a winter coat ... after a bit of coercion :-)
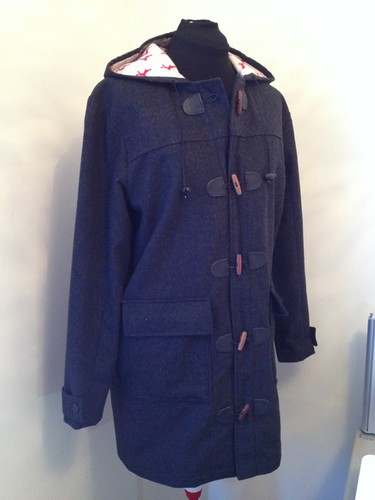
We went shopping together and got this fabulous wool coating from The Fabric Store - perfect for a men's coat. Finding an appropriate lining wasn't so easy. Originally we picked up some striped acetate, but after a bit of deliberation I realised that it wasn't going to add any warmth to the coat and that it would be useless for the Wellington winter. So the hunt was on for some flannelette. At Spotlight I found a similar coloured stripe with red stags - boy appropriate I thought!
I only put the flannelette on the back and fronts to add warmth and used the original acetate in the sleeves, so it would be easy to put on and take off, sliding over the usual winter hoodie.
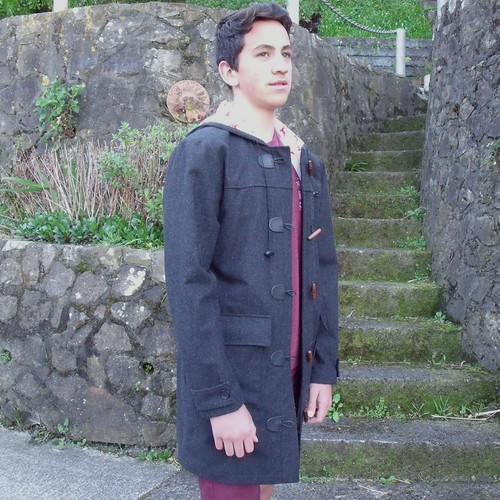
The pattern is Albion by Colette Patterns. My son is much taller than the average 13 year old and swimming gives him a triangle shape, making things a little interesting. His measurements placed him in a size Medium across his shoulders and a size Small around the chest.
The fabric wasn't cheap, so I decided that it was best to do a muslin first and work out how I was going to blend the two sizes together. I cut the front and back yokes and the upper sleeve in a size medium, the under sleeve and body pieces in a small. Although where the yoke and the body pieces meet I left as a size medium and then blended down to a size small at the underarm.
This gave the perfect fit across the shoulders with a bit of spare room for growth!
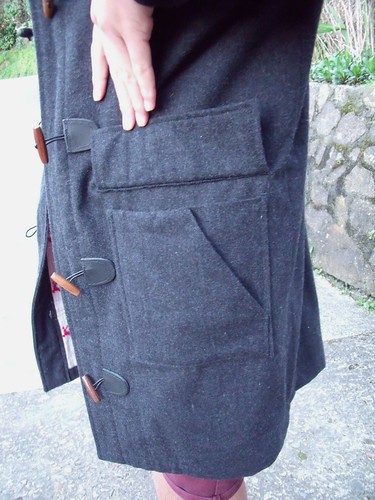
I omitted the side seam pockets - cause I just don't like them. I lined the patch pockets before attaching them - I little bit of added warmth is a good idea. Then when we were in town one day we came across some RTW duffle coats - one feature I found really interesting was the double patch pocket. A second pocket stitched over the first, but with an angle for easy access by the hand.
Although I had already finished the pockets, luckily I hadn't sewn the lining closed. So I drafted the second pocket with a 1" self facing and attached over the same seam lines as the original patch pocket.
While the buttons look great, they were a real b*!#h to put on. I used a 90/14 needle on the machine, but turning around the curved edges was a real struggle.
The pattern was a pleasure to sew. The instructions were clear and easy to follow and would definitely be a pattern I would sew up again.
More photos on my Flickr -->
We went shopping together and got this fabulous wool coating from The Fabric Store - perfect for a men's coat. Finding an appropriate lining wasn't so easy. Originally we picked up some striped acetate, but after a bit of deliberation I realised that it wasn't going to add any warmth to the coat and that it would be useless for the Wellington winter. So the hunt was on for some flannelette. At Spotlight I found a similar coloured stripe with red stags - boy appropriate I thought!
I only put the flannelette on the back and fronts to add warmth and used the original acetate in the sleeves, so it would be easy to put on and take off, sliding over the usual winter hoodie.
The pattern is Albion by Colette Patterns. My son is much taller than the average 13 year old and swimming gives him a triangle shape, making things a little interesting. His measurements placed him in a size Medium across his shoulders and a size Small around the chest.
The fabric wasn't cheap, so I decided that it was best to do a muslin first and work out how I was going to blend the two sizes together. I cut the front and back yokes and the upper sleeve in a size medium, the under sleeve and body pieces in a small. Although where the yoke and the body pieces meet I left as a size medium and then blended down to a size small at the underarm.
This gave the perfect fit across the shoulders with a bit of spare room for growth!
I omitted the side seam pockets - cause I just don't like them. I lined the patch pockets before attaching them - I little bit of added warmth is a good idea. Then when we were in town one day we came across some RTW duffle coats - one feature I found really interesting was the double patch pocket. A second pocket stitched over the first, but with an angle for easy access by the hand.
Although I had already finished the pockets, luckily I hadn't sewn the lining closed. So I drafted the second pocket with a 1" self facing and attached over the same seam lines as the original patch pocket.
While the buttons look great, they were a real b*!#h to put on. I used a 90/14 needle on the machine, but turning around the curved edges was a real struggle.
The pattern was a pleasure to sew. The instructions were clear and easy to follow and would definitely be a pattern I would sew up again.
More photos on my Flickr -->
Subscribe to:
Posts (Atom)