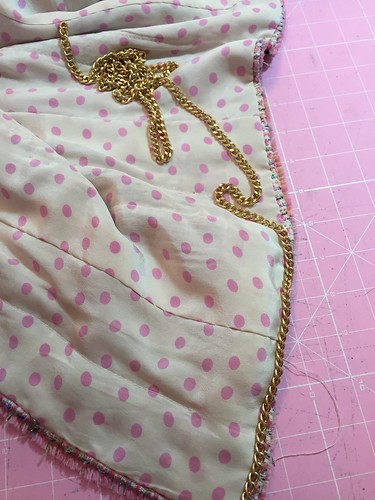
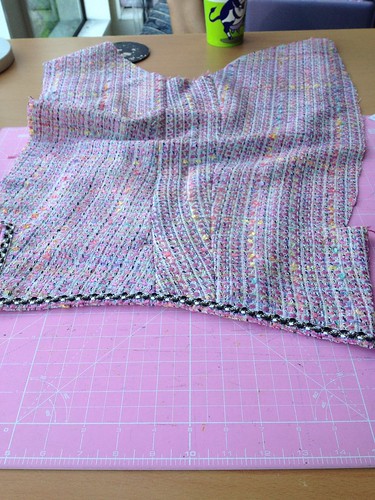
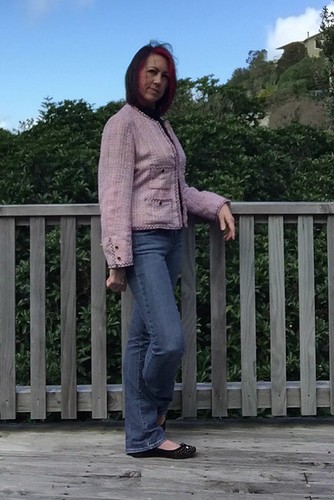
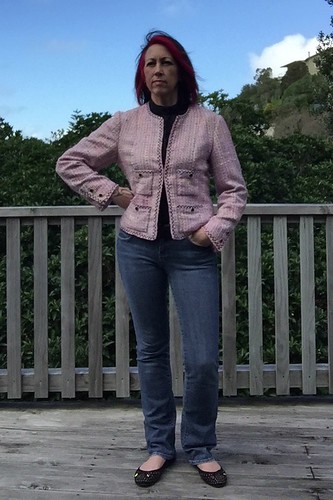
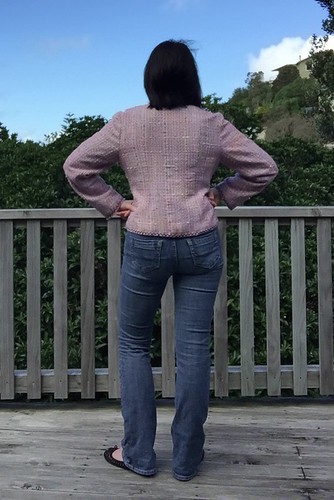
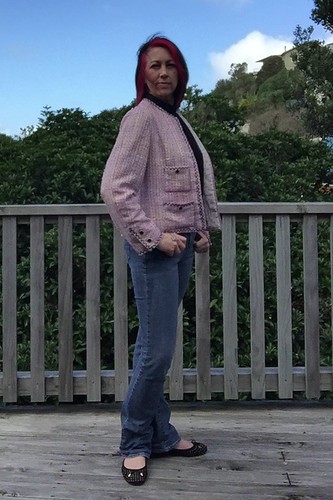
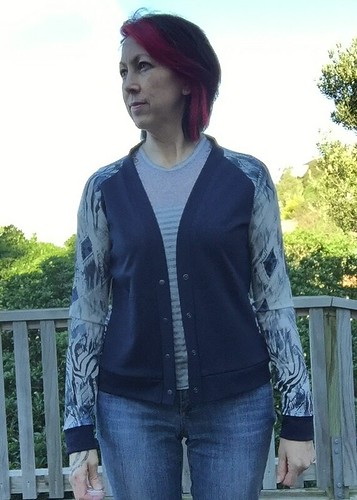
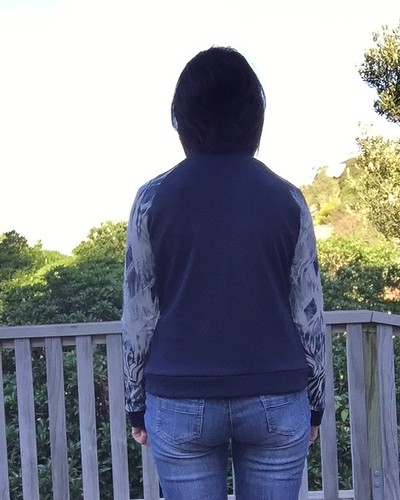
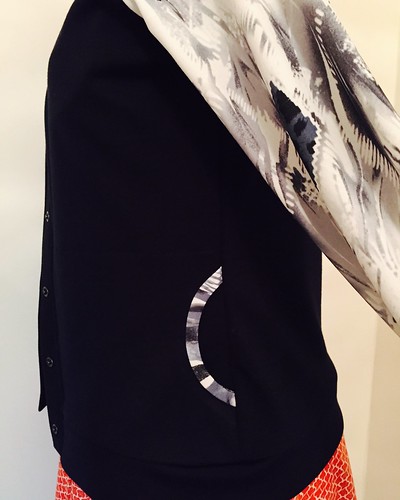
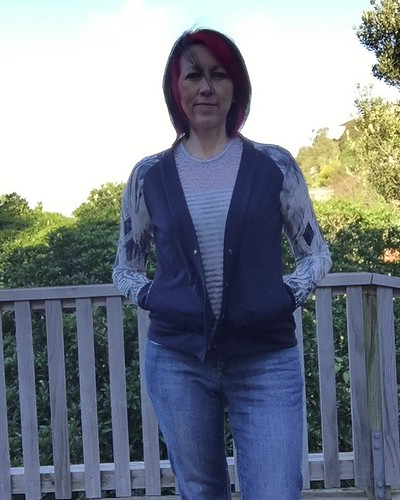
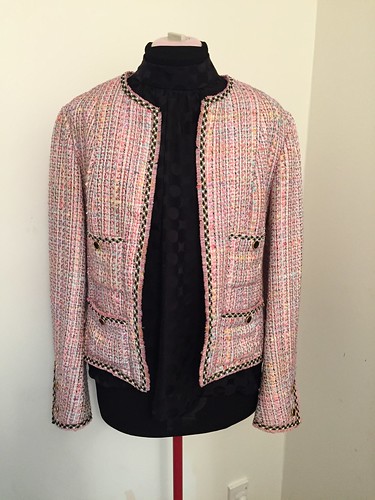
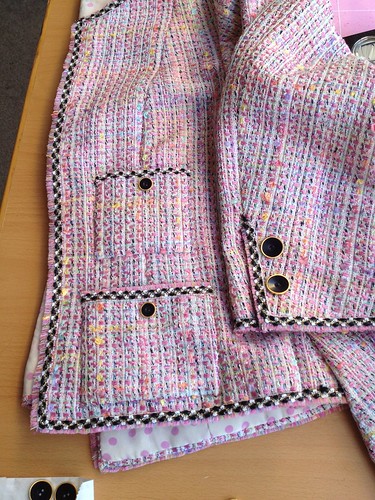
I didn't realise how long it has taken me to finish this and get pictures.... back in December 2014 I shared my progress with my second French Jacket here. It was 99% finished back in December, but it look me forever to put the buttons and the chain onto it.
To be honest I was a bit disappointed with it once I finished putting the jacket itself together. Mainly because of the sleeves. This jacket was a mash together of two patterns - V7975 for the body and V8804 for the sleeves. I cut a size 12 from both patterns.
I had used V7975 for my first Jacket so knew that the fit would be fine. I just needed to make a couple of adjustments to provide more room across my back. I add 1/4" to the shoulder blade on the side back piece, added 1/8" to the shoulder seam on the side back and another 1/8" to the shoulder seam at the armhole edge on the side front pattern piece.
Now, the sleeve on V7975 is a two piece pattern and I really wanted to try and three piece sleeve. So I took the pattern pieces from V8804, checked the armscye measurements on the sleeve and the jacket to make sure they would fit together - no problem, no adjustment needed. I also checked the bicep measurement of the sleeve. The only adjustment I needed to make was to the sleeve length, to which I added 3".
It all came together real well, but the final finished look of the sleeve left me deflated. There was just too much ease around the arm, which makes the jacket look all sleeves!
The slight adjustment across the back has given the jacket just that little bit more freedom of movement that my first one doesn't quite have.
I also think that I fluffed around finishing it because I really wasn't sure how I was going to wear it without it ageing me 20 years (thanks to some very frank observations from my daughter)! Hopefully the jeans and black Marfy top keep the look fresh and now.
More photos on my Flickr -->
Tuesday, 29 September 2015
Saturday, 26 September 2015
Refining the Granville
Third time lucky ... well so the saying goes anyway.
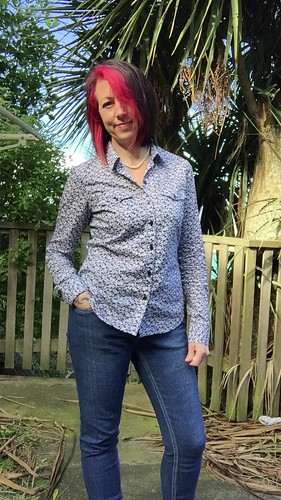
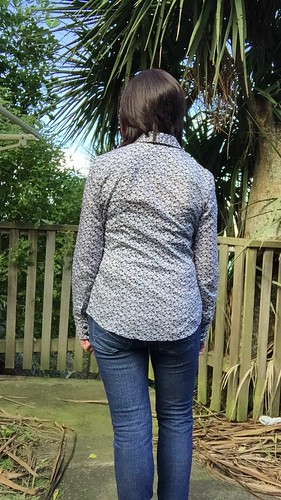
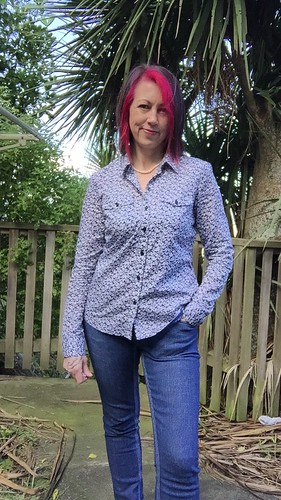
This is my third Granville Shirt. The first was HERE and the second HERE. But even though this was the third I felt that there were still further adjustments I needed to make to refine the fit.
For this version I left all the previous adjustments in place, you can get that list here, and then made the following tweaks
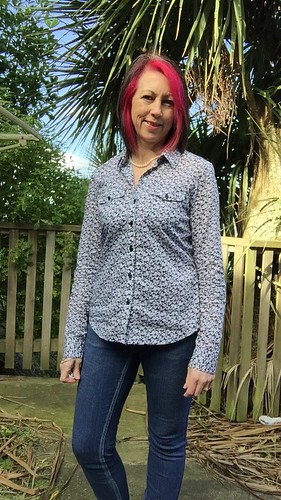
For this version I included the pocket flaps - although this is the only tell tale sign that there is actually pockets there. They are lost amongst this lovely cotton poplin I got from Blackbird Fabrics. Including postage it worked out to be NZ$18 p/m which I thought was very reasonable.
Sadly I didn't take any photos of the inside, but I finished all the seams with a french seam finish, except for the armscye, which I finished with some Hug Snug binding. I also applied Hug Snug to the hem and then turned it up and sewed it down. It provided a much nicer finish to the hem rather than turning it up twice, especially around the curve. It makes the inside look interesting as well.
I'm really lovin this shirt and it works well with my Ginger Jeans.
More photos available on my Flickr -->
This is my third Granville Shirt. The first was HERE and the second HERE. But even though this was the third I felt that there were still further adjustments I needed to make to refine the fit.
For this version I left all the previous adjustments in place, you can get that list here, and then made the following tweaks
- Added 1/4" to front side seams
- Added 1/4" to the side back side seam - both these adjustments were so I could get more room around the body.
- Added 1/4" to each side of the sleeve under arm seam, tapered to existing wrist edge - again giving me more room around my arm.
- Added 1/2" to the length above the waist.
- this time I added 1" to the original pattern length of the sleeve.
For this version I included the pocket flaps - although this is the only tell tale sign that there is actually pockets there. They are lost amongst this lovely cotton poplin I got from Blackbird Fabrics. Including postage it worked out to be NZ$18 p/m which I thought was very reasonable.
Sadly I didn't take any photos of the inside, but I finished all the seams with a french seam finish, except for the armscye, which I finished with some Hug Snug binding. I also applied Hug Snug to the hem and then turned it up and sewed it down. It provided a much nicer finish to the hem rather than turning it up twice, especially around the curve. It makes the inside look interesting as well.
I'm really lovin this shirt and it works well with my Ginger Jeans.
More photos available on my Flickr -->
Saturday, 29 August 2015
The Knit Shift Dress
I've never really thought about where I fit into the style spectrum, I just make and wear what appeals. Oh yes, I've done the whole "what's in fashion now" thing, then look back at old photos and wonder what on earth I was thinking at the time?!
Now that I've done 2.5 years of ready to wear fasting I look at my wardrobe and realise that the shift dress, or variations of it, is a 'thing' for me. This probably explains why I've made two knit shift dresses in a month.
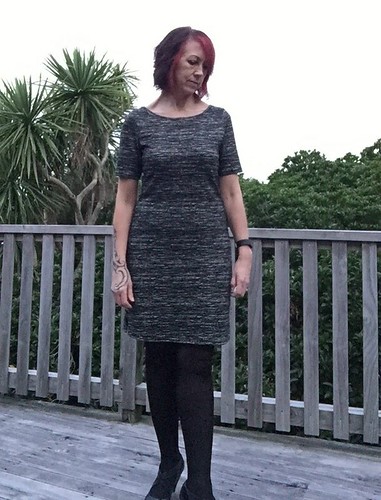
This is Mesa, one of the patterns issued with the June 2015 edition of Seamwork. It is described as "The flirty knit shift that's as stylish as it is comfortable", and I agreed 100%. Apparently it should only take 1 hour to make. It took me longer than that but that probably because I decided to line it.
I picked up 1.5 metres of this medium weight jersey double knit from Fabric Barn specifically for this dress. The pattern suggested light to medium weight knit fabrics with at least a 25% 4-way stretch. Personally, I think that a light weight jersey would show all the 'lumps and bumps' underneath - No Thanks!
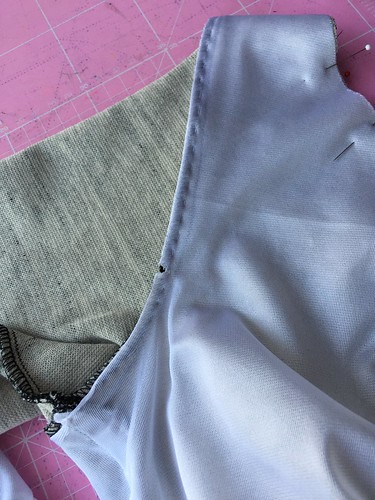
Because it's winter and I wanted to wear stockings for warmth but didn't want it cling, so I picked up some knit tricot to line the body. This stuff is so light weight that you barely notice its there but the difference it makes is incredible. In my opinion, so much better than having to wear a slip underneath that constantly keeps riding up. After I sewed up the side and shoulder seams of the tricot I pinned it to the shell at the neck before attaching the neck band. I attached it to the armscye with a simple running stitch.
I didn't clearly fit into one size on the body measurement chart so decided to select my size based on my waist/hip measurement and made a size M (8-10). Looking at the sample photos on the Seamwork site the dressed looked to be quite short and I'm taller than the average so went ahead and cut the length to the 3XL pattern length, 2" longer than the size M. This is the perfect length for me, falling just above my knee.
The hem, I just overlocked the raw edge, folded it up by 3/4" and stitched it down with two rows of straight stitch. I also added 1" to the length of the sleeve - a short sleeve just didn't seam right.
There's a couple of things I noticed after wearing it a few times. The neckline at the front is a bit loose, so the neck band could be a little bit more snug, I could really do with an additional 1/2" around the hips and a bit more room across the shoulder blades.
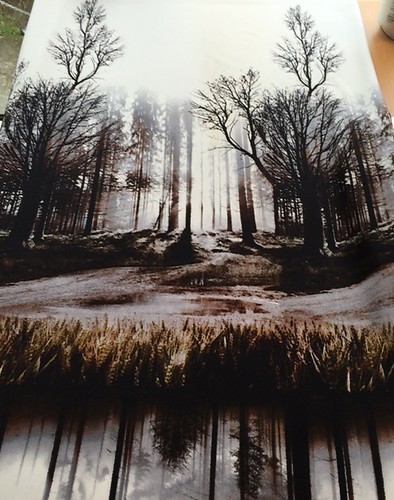
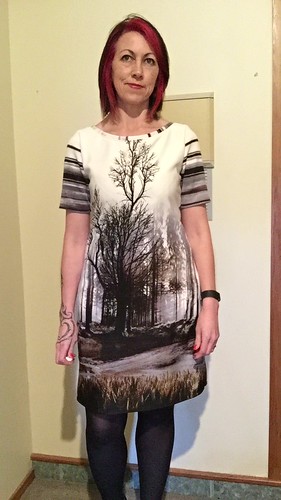
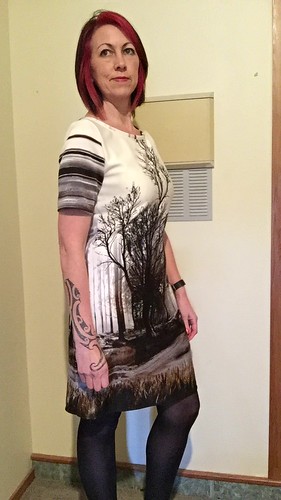
I wasn't planning on making another Mesa immediately but my WSBN friends spotted this fabulous panel print at The Fabric Warehouse and as all good sewing friends do, sent me a picture and said "this has your name all over it". Having been fabric enabled I was down at the shop within the next 24 hours buying 1.5 metres of it.
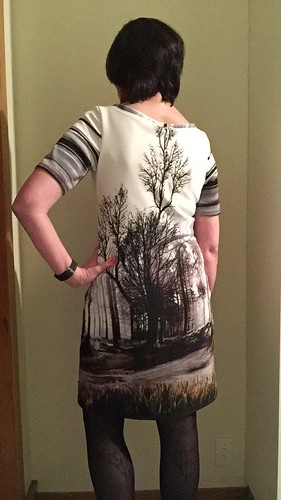
After looking at the print for a while I decided that it best that the tall part of the tree should go up to the neckline at the front and back. I had just enough fabric to pattern match and get just the right part of the panel placed where I want.
I cut the reflection off the panel so the dry grass ended at the hem, so I could successfully wear some dark stockings with the dress without it looking odd.
I made a few changes to the pattern before I cut this version:
Two super comfy dresses that I've been wearing non-stop for the last couple of months :-)
More photos on my Flickr -->
Now that I've done 2.5 years of ready to wear fasting I look at my wardrobe and realise that the shift dress, or variations of it, is a 'thing' for me. This probably explains why I've made two knit shift dresses in a month.
This is Mesa, one of the patterns issued with the June 2015 edition of Seamwork. It is described as "The flirty knit shift that's as stylish as it is comfortable", and I agreed 100%. Apparently it should only take 1 hour to make. It took me longer than that but that probably because I decided to line it.
I picked up 1.5 metres of this medium weight jersey double knit from Fabric Barn specifically for this dress. The pattern suggested light to medium weight knit fabrics with at least a 25% 4-way stretch. Personally, I think that a light weight jersey would show all the 'lumps and bumps' underneath - No Thanks!
Because it's winter and I wanted to wear stockings for warmth but didn't want it cling, so I picked up some knit tricot to line the body. This stuff is so light weight that you barely notice its there but the difference it makes is incredible. In my opinion, so much better than having to wear a slip underneath that constantly keeps riding up. After I sewed up the side and shoulder seams of the tricot I pinned it to the shell at the neck before attaching the neck band. I attached it to the armscye with a simple running stitch.
I didn't clearly fit into one size on the body measurement chart so decided to select my size based on my waist/hip measurement and made a size M (8-10). Looking at the sample photos on the Seamwork site the dressed looked to be quite short and I'm taller than the average so went ahead and cut the length to the 3XL pattern length, 2" longer than the size M. This is the perfect length for me, falling just above my knee.
The hem, I just overlocked the raw edge, folded it up by 3/4" and stitched it down with two rows of straight stitch. I also added 1" to the length of the sleeve - a short sleeve just didn't seam right.
There's a couple of things I noticed after wearing it a few times. The neckline at the front is a bit loose, so the neck band could be a little bit more snug, I could really do with an additional 1/2" around the hips and a bit more room across the shoulder blades.
I wasn't planning on making another Mesa immediately but my WSBN friends spotted this fabulous panel print at The Fabric Warehouse and as all good sewing friends do, sent me a picture and said "this has your name all over it". Having been fabric enabled I was down at the shop within the next 24 hours buying 1.5 metres of it.
After looking at the print for a while I decided that it best that the tall part of the tree should go up to the neckline at the front and back. I had just enough fabric to pattern match and get just the right part of the panel placed where I want.
I cut the reflection off the panel so the dry grass ended at the hem, so I could successfully wear some dark stockings with the dress without it looking odd.
I made a few changes to the pattern before I cut this version:
- moved the shoulder seam forward 1/2"
- dropped the front neckline 3/8"
- widen the back at the shoulders by moving the armscye out by 1/8" on the back pattern piece
- widen the hip by 1/4" on each pattern piece, blended down to top the top of the split and up to the armhole.
Two super comfy dresses that I've been wearing non-stop for the last couple of months :-)
More photos on my Flickr -->
Saturday, 22 August 2015
Channelling my inner Olivia Pope!
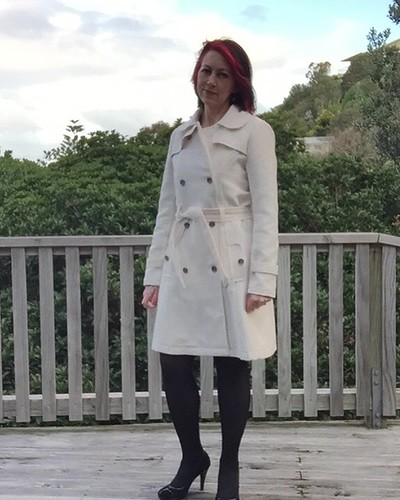
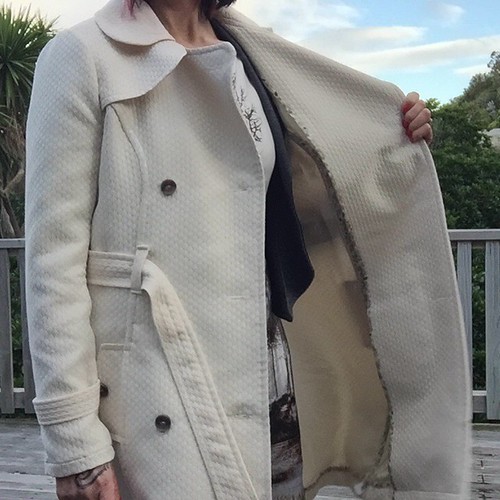
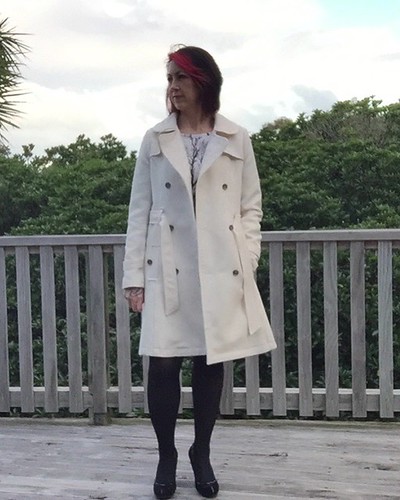
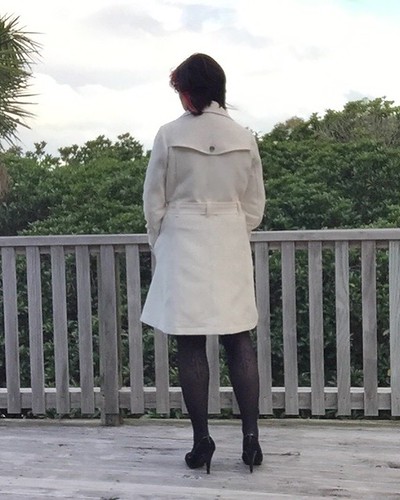
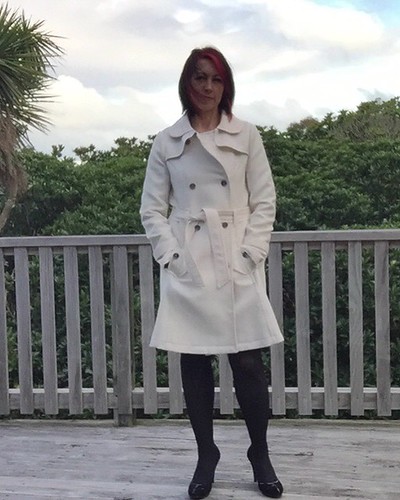
I'm not gonna lie, I was completely inspired by a winter white coat worn by Olivia Pope, while I was engrossed in a Scandal watching marathon! Would it fit in my wardrobe and would I have anything to wear with it - who cared, I was making it anyway :-)
The coat itself has been a bit of a marathon make. I already had the Robson Coat by Sewaholic Patterns in my stash. My first attempt at this pattern had been a complete disaster, for a couple of reasons but anyway if I was going to make this one work I needed to get a muslin sewn up and work out the fit issues. So that happened in February 2015.
Sorting out my fit issues took a while - I couldn't work out why I was getting putting on the front armscye where it joined the side front. I tried adjusting the armscye itself, but to no avail. So I let it smoulder for a few months. Then in May I had a brain wave and went back to the muslin to adjust the bust curve on the princes seam - letting it out to provide more room. That combined with a slight change in the armseye shape on the side front so it was less of a curve, provided that extra room that allowed freedom of movement. Here is the list of adjustments I made in the order I made them:
The cotton jacquard was really opaque, but I still thought it needed to be interlined - well for a couple of reasons really: one, to ensure that any dark colours I wore under the coat wouldn't taint the collar of the coat from the outside; and two, that the inside would be lined making it easy to put on over other clothing fabrics. So on another one of my visits to The Fabric Warehouse I got this really lovely, light weight, shinny, polyester lining - oh yes I did say polyester, but it is just lovely and I figured that it would help keep the warmth of the coat in.
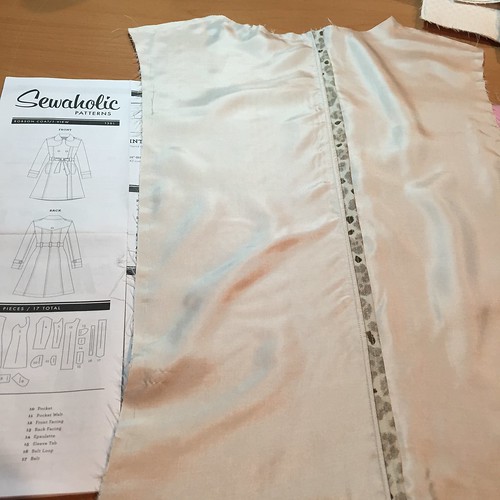
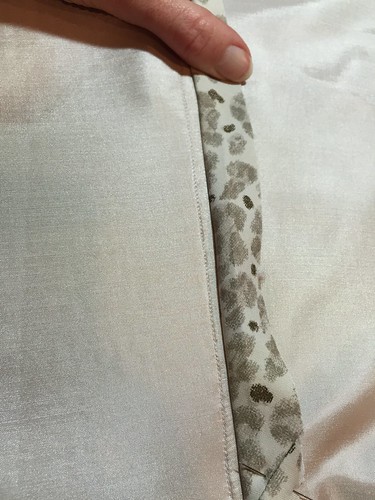
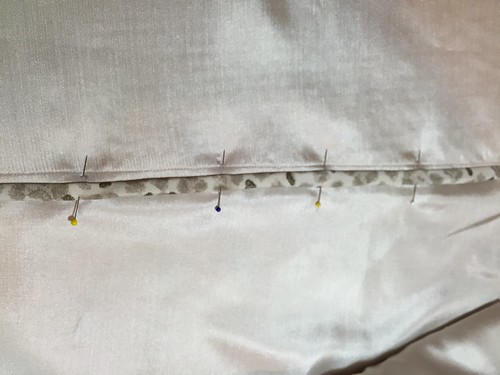
I hand basted all the lining pieces to the shell fabric pieces by hand, then sewed them as one. To avoid an additional row of stitching rather than binding the seams closed I used a hong kong finish, the raw edge of the bias tape was closed in when I top stitched the seam down.
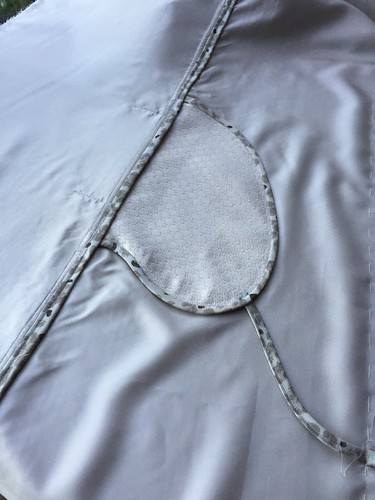
The exception was around the edges of the pocket.
Overall, the inside of the coat looks soo nice. But attaching all that bias tape took forever, and I'd get fed-up with the process, so I'd treat myself by taking a break and sewing something completely different.
At first I wasn't quite sure what to wear with it, and because it's such a statement piece, the first few times I worn it I felt like the clown at the party. Now I've worn it with dresses and pants and am feeling a lot more comfortable.
I finished the look by added some mottle light brown buttons. I am totally happy with the final fit of the coat. I can comfortably wear two layers underneath without it feeling tight or uncomfortable. It is exactly as I imagined it would be!
More photos on my Flickr -->
The coat itself has been a bit of a marathon make. I already had the Robson Coat by Sewaholic Patterns in my stash. My first attempt at this pattern had been a complete disaster, for a couple of reasons but anyway if I was going to make this one work I needed to get a muslin sewn up and work out the fit issues. So that happened in February 2015.
Sorting out my fit issues took a while - I couldn't work out why I was getting putting on the front armscye where it joined the side front. I tried adjusting the armscye itself, but to no avail. So I let it smoulder for a few months. Then in May I had a brain wave and went back to the muslin to adjust the bust curve on the princes seam - letting it out to provide more room. That combined with a slight change in the armseye shape on the side front so it was less of a curve, provided that extra room that allowed freedom of movement. Here is the list of adjustments I made in the order I made them:
- I started with a size 10 (upper body through to waist), then tappered into a size 6 at the hips and the length of a size 0.
- Lengthened the bodice by 1/2" at the high bust. This lowered the apex of the bust and the armpit, both which I need as I am much taller than the woman the pattern is designed for.
- Removed 1" from the length of the coat - I did this 5" above the hem.
- Added 1/4" to the armscye on the side back to provide more room for my broad back. I also had to make this adjustment to the back flap to ensure it would sit across the back and match the new cutting line of the side back.
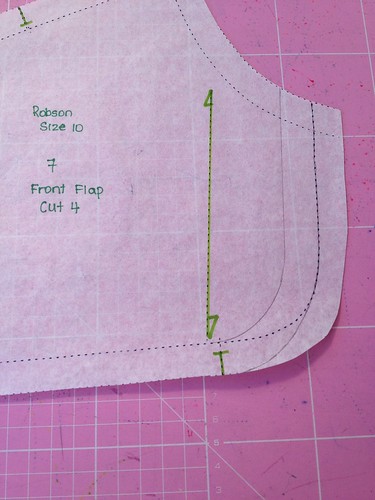
- Removed 5/8" from the front flap at the centre front side. I wanted the front flaps to sit under the collar - something I had noticed from the first disaster attempt!
- Added 1/2" to the base of the armscye curve on the sleeve piece to provide for the extra length I had given to the bodice.
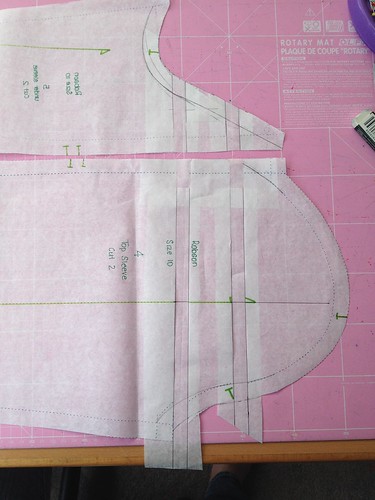
- Added 1/2" to the cap of the sleeve to add more fullness.
- Omitted the epaulets on the shoulder to reduce the bulk.
The cotton jacquard was really opaque, but I still thought it needed to be interlined - well for a couple of reasons really: one, to ensure that any dark colours I wore under the coat wouldn't taint the collar of the coat from the outside; and two, that the inside would be lined making it easy to put on over other clothing fabrics. So on another one of my visits to The Fabric Warehouse I got this really lovely, light weight, shinny, polyester lining - oh yes I did say polyester, but it is just lovely and I figured that it would help keep the warmth of the coat in.
I hand basted all the lining pieces to the shell fabric pieces by hand, then sewed them as one. To avoid an additional row of stitching rather than binding the seams closed I used a hong kong finish, the raw edge of the bias tape was closed in when I top stitched the seam down.
The exception was around the edges of the pocket.
Overall, the inside of the coat looks soo nice. But attaching all that bias tape took forever, and I'd get fed-up with the process, so I'd treat myself by taking a break and sewing something completely different.
At first I wasn't quite sure what to wear with it, and because it's such a statement piece, the first few times I worn it I felt like the clown at the party. Now I've worn it with dresses and pants and am feeling a lot more comfortable.
I finished the look by added some mottle light brown buttons. I am totally happy with the final fit of the coat. I can comfortably wear two layers underneath without it feeling tight or uncomfortable. It is exactly as I imagined it would be!
More photos on my Flickr -->
Thursday, 23 July 2015
Going for Casual
This is my most recent make, because blogging about things in the order I make them just isn't the done thing!
Sophie is the new pattern release by Muse Patterns. Sophie is a cute, sporty cardigan - a fitted style, which curves gently in at the waist and flares out again over your hips. Raglan sleeves add a casual touch and also give great opportunities for mixing fabric, which is exactly what I did.
I was lucky enough to be one of the testers for this pattern. I cut a size 36. BTW I love the sizing of Muse Patterns - they are designed for the taller woman with a slightly bigger bottom half than top half, so I pretty much fit straight into a 36.
This pattern comes with so many collar options and front closure options that every version I've seen so far looks completely unique. I chose to make the v-neck button up version, but as you can see I applied domes instead of buttons.
Oh, and there are two different pocket options. I was really taken by the half circle at the side seam.
The entrance is just enough to fit my hand into, and spans the entire front of the jacket.
You could have so much fun with these pockets. Not only the trim but the pocket lining could be a third contrast colour.
The sleeves are nice and long, as you would expect for the taller woman, and are perfect for me without having to lengthen at all - whoop whoop! I know not everyone has long arms, and it's not the most complicated adjustment to make, but just not having to worry is a bonus.
Okay, enough about my Sophie, you should get on over to Muse Patterns and check out the lovely cherry red version with a collar and zip-up front. It is delicious!
A few more photos on my Flickr -->
Sophie is the new pattern release by Muse Patterns. Sophie is a cute, sporty cardigan - a fitted style, which curves gently in at the waist and flares out again over your hips. Raglan sleeves add a casual touch and also give great opportunities for mixing fabric, which is exactly what I did.
I was lucky enough to be one of the testers for this pattern. I cut a size 36. BTW I love the sizing of Muse Patterns - they are designed for the taller woman with a slightly bigger bottom half than top half, so I pretty much fit straight into a 36.
This pattern comes with so many collar options and front closure options that every version I've seen so far looks completely unique. I chose to make the v-neck button up version, but as you can see I applied domes instead of buttons.
Oh, and there are two different pocket options. I was really taken by the half circle at the side seam.
The entrance is just enough to fit my hand into, and spans the entire front of the jacket.
You could have so much fun with these pockets. Not only the trim but the pocket lining could be a third contrast colour.
The sleeves are nice and long, as you would expect for the taller woman, and are perfect for me without having to lengthen at all - whoop whoop! I know not everyone has long arms, and it's not the most complicated adjustment to make, but just not having to worry is a bonus.
Okay, enough about my Sophie, you should get on over to Muse Patterns and check out the lovely cherry red version with a collar and zip-up front. It is delicious!
A few more photos on my Flickr -->
Saturday, 4 July 2015
#NISM2015 I'm going, what about you?
It's time to get out from behind our computers/mobile devices and come face to face with all our social media friends as well as new ones. If you don't want to come alone, that is understandable, but all you have to do is convince a friend to come to - easy! I'll be there, so there will be at least one person you cyber know. I'm sure you also know the organisers as well, The Curious Kiwi and Flossie FT.
All the details can be found HERE, while you're there sign-up and come join us on 1-2 August in Rotorua.
See you at NISM2015 :-)
Wednesday, 1 July 2015
Ponte Morris Blazer
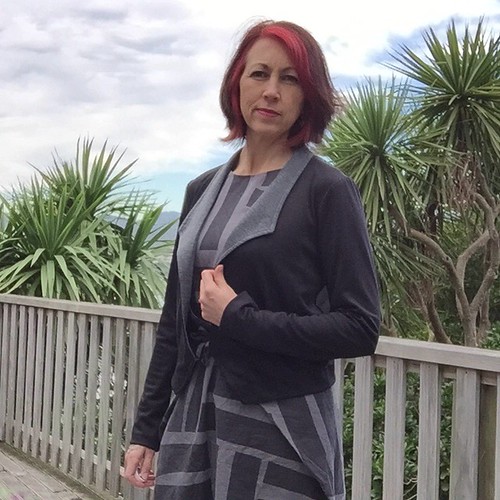
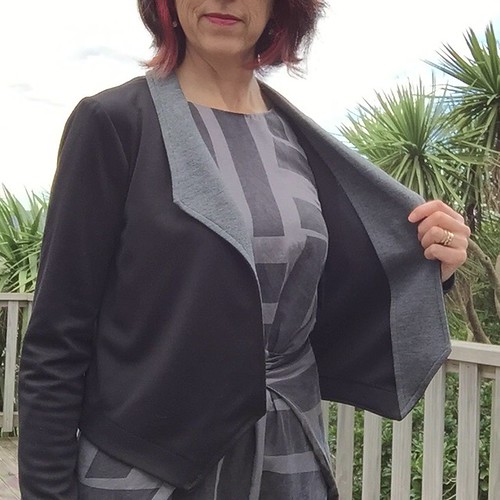
The Grainline Studio Morris Blazer is the ideal casual smart clothing item that fits perfectly into my wardrobe. The appeal of this pattern is that it is intended for a knit fabric (or a stretch woven). I imagine that it would wear like a cardigan in a knit.
I downloaded the PDF pattern from the Grainline Studio website, dug out some black ponte from the stash and set to.
I traced off a size 10 and made just one alteration. I'm not really a 3/4 length sleeve kinda girl, so I lengthen the arms by 6 1/2", allowing for a 1" hem. I did away with the sleeve facing because I thought the ponte would behave better with a turned up hem.
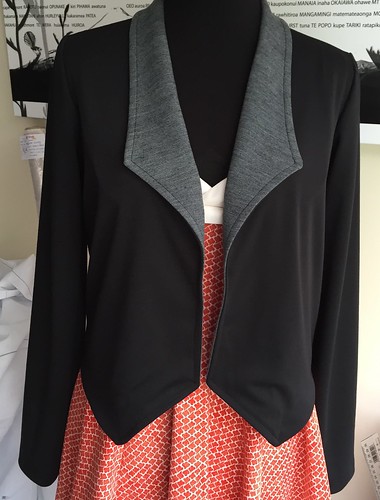
For the facing I used a merino remnant from my Gillian Wrap Dress, a very fine stripe in a grey. This was much much lighter than the ponte so I used an equally heavy knit fusible interfacing - that worked a treat.
I stitched all the seams on the sewing machine using a zig zag 1.5 1.5 stitch and finished each seam on the overlocker (serger). Nothing usually makes it off the sewing table without a touch of hand sewing - this Blazer was no exception, I used a catch stitch to tack the collar facing to the back neck seam.
Now ... See those annoying wee bubbles at the bottom of the front in the photo below - I wasn't sure whether I'd done something or whether it's a result of the knit fabric??? I did a bit of a search of other blogs and noticed it on some other knit versions as well, so figured that it wasn't just me. But it could be that the facing is a tad shorter than the front piece caused by either incorrect cutting or that the interfacing slightly shrunk the facing piece. Anyway the knit fabric moves and wiggles in every direction when I'm wearing it so I figured it doesn't really matter that much - I'm probably the only one noticing!!
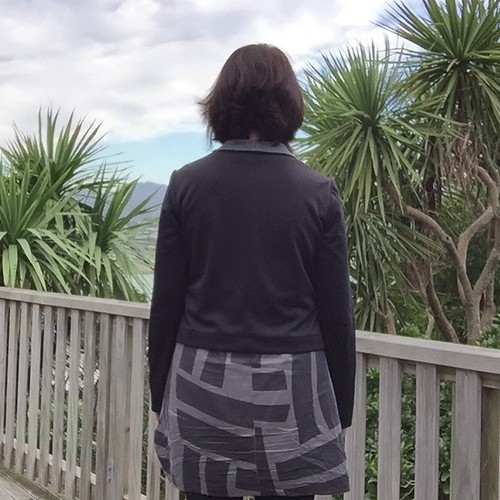
The Blazer wears beautifully. The only thing that I would change next time would be to lower the side seam at the under the arm; it's a tad high which restricts what I can wear under it and creates pulling when I look at photos of the back.
I downloaded the PDF pattern from the Grainline Studio website, dug out some black ponte from the stash and set to.
I traced off a size 10 and made just one alteration. I'm not really a 3/4 length sleeve kinda girl, so I lengthen the arms by 6 1/2", allowing for a 1" hem. I did away with the sleeve facing because I thought the ponte would behave better with a turned up hem.
For the facing I used a merino remnant from my Gillian Wrap Dress, a very fine stripe in a grey. This was much much lighter than the ponte so I used an equally heavy knit fusible interfacing - that worked a treat.
Now ... See those annoying wee bubbles at the bottom of the front in the photo below - I wasn't sure whether I'd done something or whether it's a result of the knit fabric??? I did a bit of a search of other blogs and noticed it on some other knit versions as well, so figured that it wasn't just me. But it could be that the facing is a tad shorter than the front piece caused by either incorrect cutting or that the interfacing slightly shrunk the facing piece. Anyway the knit fabric moves and wiggles in every direction when I'm wearing it so I figured it doesn't really matter that much - I'm probably the only one noticing!!
The Blazer wears beautifully. The only thing that I would change next time would be to lower the side seam at the under the arm; it's a tad high which restricts what I can wear under it and creates pulling when I look at photos of the back.
Subscribe to:
Posts (Atom)