Saturday, 23 May 2015

Belcarra Tunic

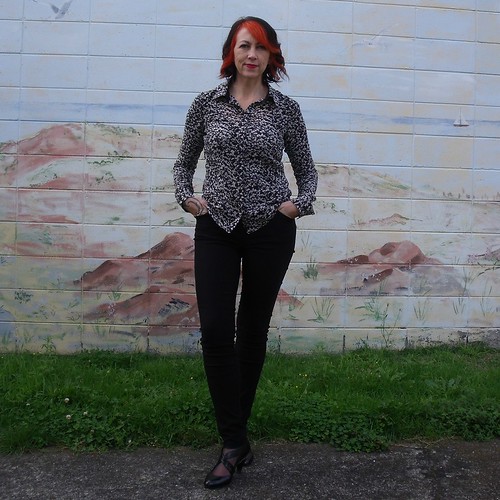
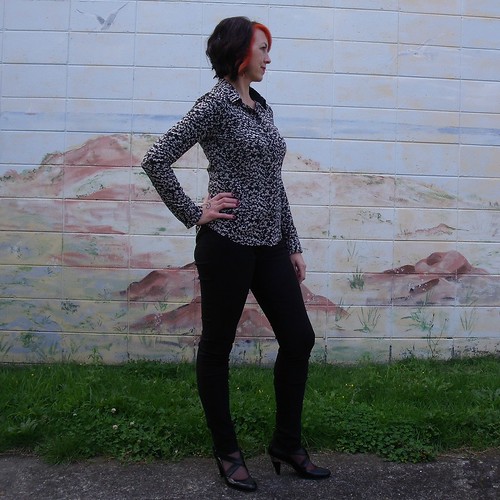
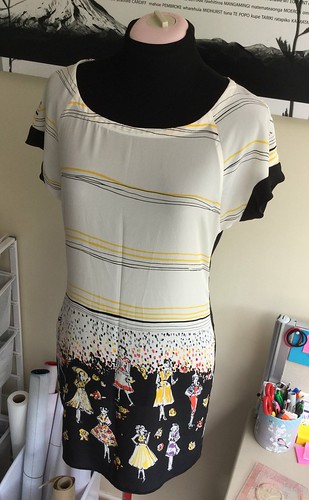
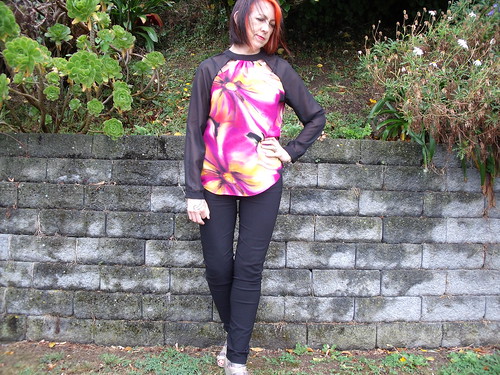
When I purchased the Belcarra from Sewaholic I knew that it would be such a versatile pattern that I could manipulate to get multiple looks. This is my third look from this pattern.

Belcarra Tunic

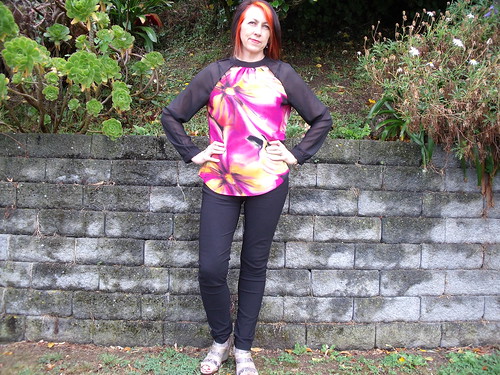
This time a tunic!  I walked into The Fabric Store on 12 September 2014 and immediately fell in love with this border print.  I was there for another quite specific purpose, that alludes me just as this moment - coz every trip to the fabric store is for a specific purpose right!!!

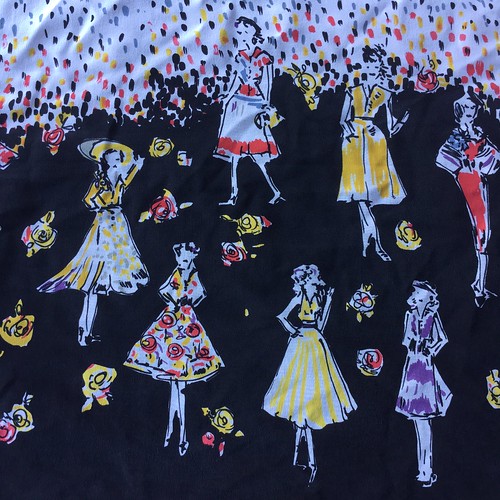
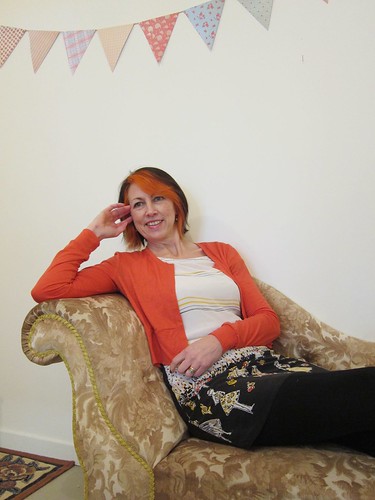
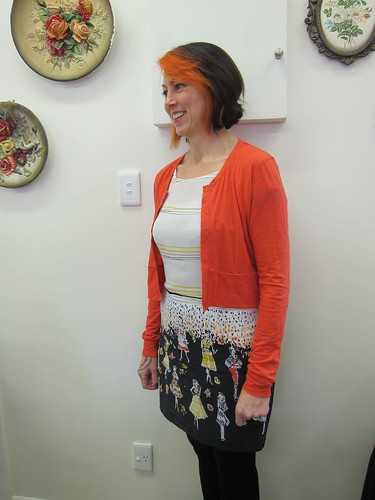
It wasn't cheap at $36 for 1 length which was 1m x .95cm, but it was crepe de chine and felt soooo nice. After wrestling for some time with my inner voice I gave in a bought a metre. The border print is filled with pretty dresses in pretty colours ....
Belcarra Tunic

It's been sitting in the cupboard for a wee while because I couldn't decide what to match it with, until a few weeks ago, when I was back at The Fabric Store, I found some black crepe de chine on special for $10p/m.

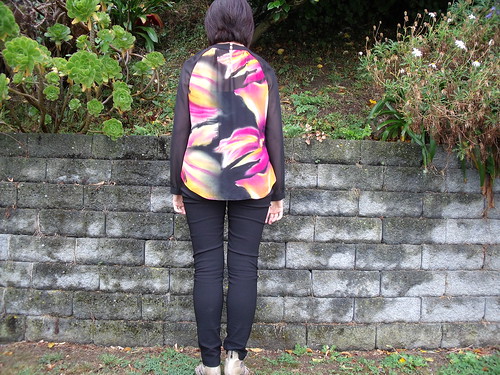
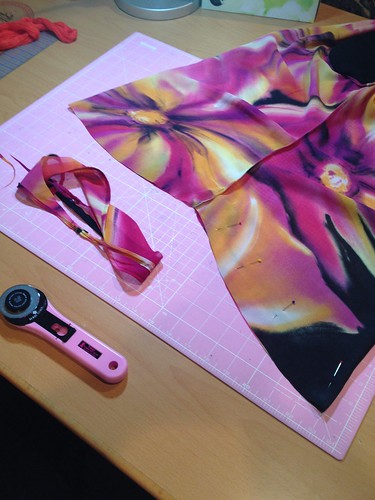
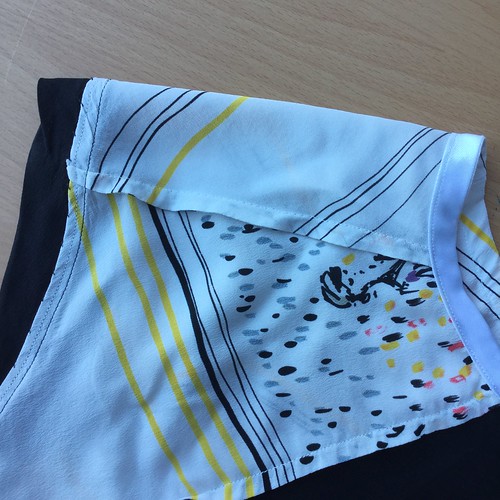
I used every little scrap of the boarder print on the front and sleeves.  I then used the black for the back and the sleeve bands.  Because I didn't have enough of the boarder print for the neck binding and the black would have shown right through the cream, I had to use some knit tricot that I had in the stash - oh the joys of having a stash!
Belcarra Tunic

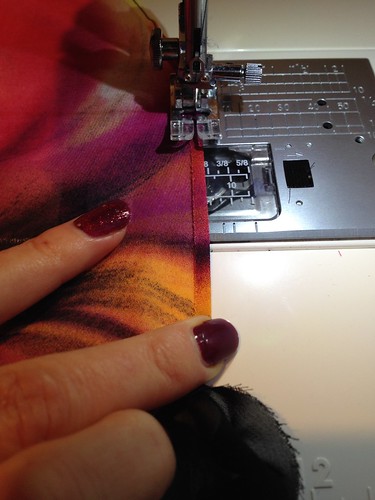
All the side seams and shoulder/sleeve seams are finished with a french seam. The sleeve cuffs where sewn as normal, right sides together, but then I graded the cuff seam allowance and turned the cream over and run another line of stitching around the seam allowance - the cream encasing the trimed raw edges of the black cuff.  The seam allowance had to be pressed towards the cuff so it wouldn't be seen through the cream sleeve. After a good press I tacked the seam allowance to the cuff by hand.

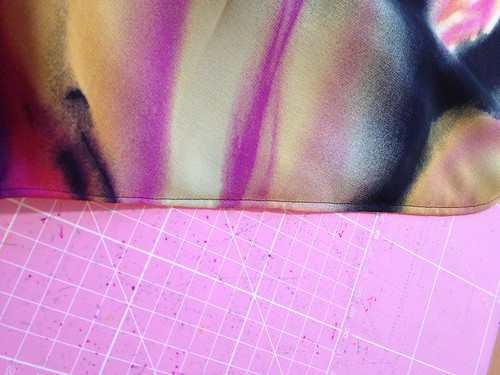
The bottom hem I used a hairline seam technique that is so easy and looks so great.
Belcarra Tunic

I fiddled with the pattern sizing a little more this time, after my dress version had way too much room around the waist and hips.  I traced the pattern off again, this time tracing a size 8 for the bust and graded it down to a size 6 at the waist and hips.  It's a little snug around the hips this time, which isn't the look I was going for, so somewhere in-between both sizes would be ideal for next time.
Belcarra Tunic

You may remember in my last post I talked about the WSBN 0 Degrees of  Sewing Separation Challenge... well this is my second link in the chain.  For the fabric I link to The Dreamstress who made a beautiful Dorothy Lara dress and for the pattern I link to The Crazy Gypsy Chronicles.  The full chain of links can be found in this post by The Dreamstress.

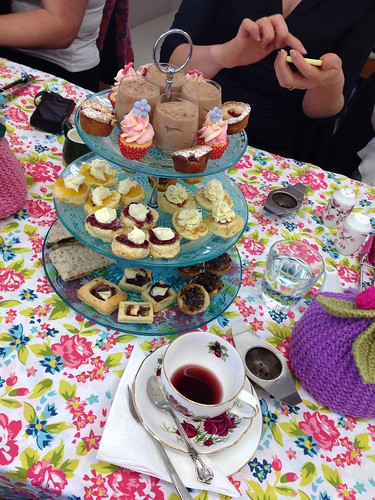
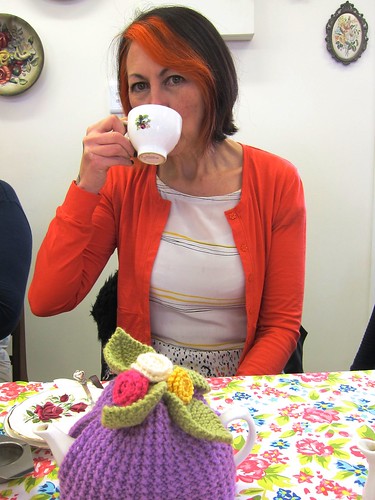
Thanks to The Dreamstress for taking some photos yesterday at our WSBN get together for High Tea.
Belcarra Tunic

WSBN High Tea 23 May 2015

More photos on my Flickr

Tuesday, 14 April 2015

Silk Granville Shirt

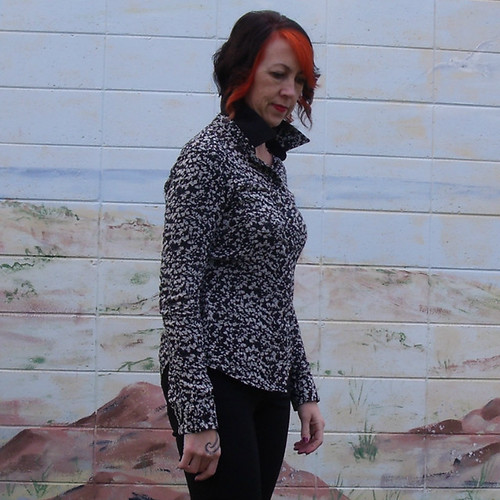
Silk Granville Shirt

After finishing my wearable muslin (which I haven't blogged yet, oops! but will explain more soon...) I immediately made the following changes to the pattern pieces of the Sewaholic Granville Shirt:
  • moved the side dart and waist down 1/2" using the cut and slash method above the bust on the front pieces and the two back pieces.
  • I didn't want to change the length of the shirt, so I removed 1/2" at the high hip on all three pattern pieces.
  • I added 1/8" at the waist by the front and side back pieces, created an additional 1/2" of ease all round.
  • I added 1" to the original sleeve pattern piece.
This shirt is a little difficult to get a true read on fit because the silk is so mobile, but it is feeling like the changes worked.

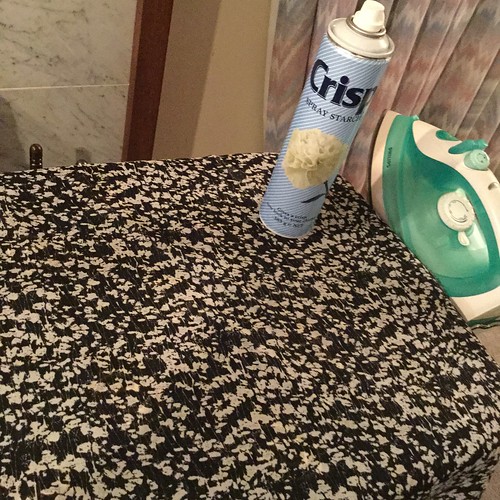
To keep the silk under control while sewing I used some starch spray, ironed it in and then left it overnight to set. Not sure that you need to let it set, but once it was dry the silk had a wee bit more control.
Makings of a silk Granville Shirt

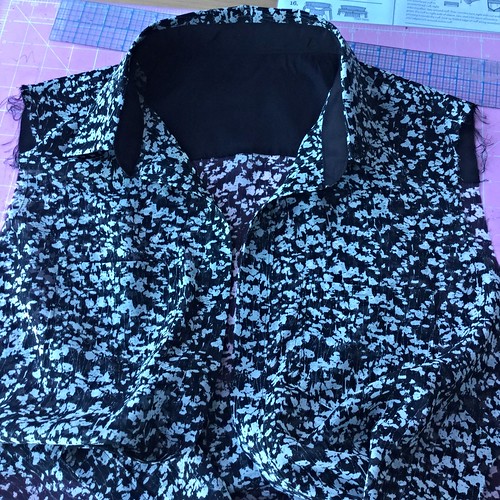
I wanted to add some structure to the collar, collar stand and cuffs - so rather than using a really heaving interfacing I elected to use some silk crepe de chine on the underside of these pieces. I applied the interfacing to the crepe de chine pieces so the silk would move loosely over top . I love the end of result of this.

I think I should have used the crepe de chine for the sleeve plackets because constructing these with the silk was just a real pain in the arse! They are not pretty!!!

Makings of a silk Granville Shirt

Silk Granville Shirt

I finished all the seams with the french seam technique including setting in the sleeve. This is the first time I've used the french seam to set in the sleeve and I was so nervous about sewing it the wrong way I must have triple checked it twice over, each time.  It was relatively easy to do and the finish around the sleeve is now just as pretty as all the other seams.

Because the silk was so delicate I used a 70/10 needle in my machine and purchased some machine embroidery thread which is much finer than the standard polyester thread. I would definitely recommend it - I'll be using it again for other fine silk / chiffon fabrics. I also put my walking foot on my machine to minimise the movement of the fabric.  A combination of all these bits and pieces made sewing the silk very enjoyable.

I used the hairline hem technique which I've used more than once before, but this time it's a bit of a mess - not sure what I did wrong this time, but really wish I'd done a rolled hem by hand!!

You can't see in the pictures but there are pockets on both sides of the front. I probably didn't need to put them on because the fabric is so busy you can't see them, but I know they're there.

Silk Granville Shirt

This time round I made a much better job of the collar stand. I drafted a collar stand template like Tasia recommended in her tutorials, marked the stitching line on the fabric and then followed on the machine. The silk was easy to tuck out of the way, resulting in the ends of the collar stand looking identical. Whoop, whoop!

The sad part is that the weather in this part of the world has just turned terribly cold - you know coat and gloves cold!  So my lovely silk shirt will probably have to hang in the wardrobe until the end of the year then the warmer weather rolls around again.  I had to put a merino on underneath to take these photos!

Silk Granville Shirt

Anyway more about why I've blogged my lovely silk version before my muslin version of the Granville Shirt ... well you know that the Wellington Sewing Bloggers Network (WSBN) get up to all sorts of sewing fun that also includes fabric enabling and pattern shopping :-)  The Dreamstress put this idea to the group: "Could the Wellington Sewing Bloggers Network create a linking chain of sewing creations, where each person’s creation shares a fabric or pattern with the next person’s creation?"  And so the 0Degrees of Sewing Separation Challenge was born.

Sew Along

This was probably the hardest challenge we've had so far, it took a few months to sort out our connections and how they would link into a chain, but we got there in the end.  I am second in the chain matching the Granville Sewaholic pattern to Silly Billy Sewing who ended up being twinsees with Two Random Words.  The chain continues with Fifty Two Fancies using the same fabric as me to make a pattern shared with another.  You get the picture right!  For the month of April we are unraveling our 0Degrees of Sewing Separation with a blog tour.  If you are interested in reading about our antics head over to The Dreamstress who is updating her blog daily with each reveal.

Silk Granville Shirt

More photos of my Silk Chiffon Granville over on my Flickr -->

Saturday, 4 April 2015

Chiffon Marfy Top

This top is a really old make that I've been trying to decide whether I make again or not - this was my wearable muslin.

Marfy Chiffon Top

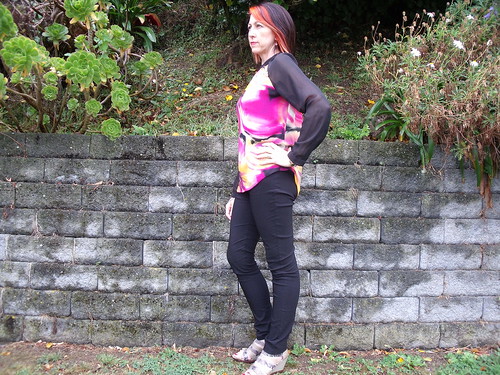
I picked up this colourful chiffon for $3p/m at a Fabric Direct Sale last year, and not just a couple of metres, oh no, there was 5 metres left of the roll so I got the whole thing! I paired it with some simple black chiffon that I got at the Arthur Toye closing down sale for $5p/m. So you can now see why I'm calling this my wearable muslin.

Marfy 3450

The pattern is Marfy 3450 from the 2014/15 catalogue, the first that I ever bought. What drew me to this pattern was the neckline with slits down the raglan sleeve. I cut the fabric exactly to the pattern in a size 46. The overall fit is fine, even the sleeve length is perfect.

After I cut the sleeves I realised that they were going to be very full and boofy! Not really me, so I removed 1.5" from each side of the sleeve at the cuff, grading it to 0 at the under arm edge. This gave me just enough to have a small gather around the cuff.

Marfy Top 3450

The cuff is folded in half, interfaced on the under half.  They are really comfy.

Marfy Chiffon Top

I used a french seam finish on all the side seams and sleeve seams.  For the hem I used a hairline seam technique on the machine using Gertie's video on You Tube.

Marfy Top 3450

... and it gives this really pretty finish.

Marfy Top 3450

The pattern didn't provide any indication of how the back closure was to be done. Marfy patterns don't have any instructions, but usually there are enough markings on the pattern to indicate what goes with what. I decided that I would use a couture technique that I learnt when making my free Marfy top HERE and keep the collar closed with a couple of hooks n eyes.

Marfy Chiffon Top

I was pretty happy with the top once I finished, given that I didn't have to make any major fit changes. I put it in my wardrobe and wore it a few times before I decided that there was just something about the hem that was bugging me. Back to the sewing table it went ... I needed to take some length off the front, oops forgot to note how much I removed, but it looks like about 1". At the back is only took enough off to remove the existing hem.

Marfy Top 3450

I think it has better balance now.

Marfy Chiffon Top

Conclusion: I do like how easy the top is to wear, but I'm not a fan of the front slits in the raglan sleeve seam. They are located in a place that is constantly moving so they don't sit nicely like the sample photo indicates. I think the top would be just as nice if the slits were sewn closed.

More photos on my Flickr -->

Saturday, 14 March 2015

Maxi Shirt Dress

I didn't think a shirt dress was really my thing but when the Wellington Sewing Bloggers Network (WSBN) started throwing ideas around about a shirt dress challenge, some of the patterns really got me inspired.  I did look at a few patterns, but kept coming back to one already in my stash.

Butterick B5920
Butterick B5920

However this pattern needed some modifications to replicate my vision....

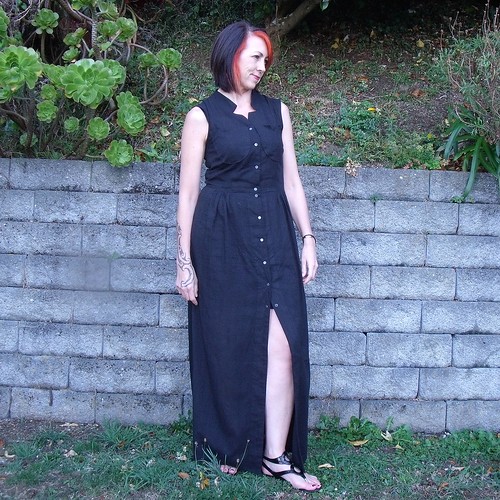
I really like the neckline on this pattern and the front gathers that don't extend around the hips - uh-hm I don't need to make them any bigger than they are! I wanted the front placket to extend the full length of the skirt so I could wear it unbuttoned to just above the knee. I also wanted the back of the skirt to replicated the front by having gathers that didn't extend to the side seam, rather than the full skirt the pattern provides.

I'm pretty happy with the final look ... that neckline is just so pretty!

Maxi Shirt Dress

Why BLACK??? The February challenge over at The Monthly Stitch was solid colours, and of course it had a twist.  Miss Bossy said we had to use a colour that the initials of our first name or last name  matched to in the colour chart and both my initials matched to black!

I had this black voile in my stash that has a checkered pattern running through it, also in black but not so obvious in the photos. I picked it up at the Arthur Toye closing down sale for just $5p/m. I had 2.3m which wasn't quite enough, so had to use some solid black voile (from the stash) for the facing and the arm bindings.

Maxi Shirt Dress

Lengthening and manipulating the skirt was pretty easy ... I look the skirt pieces from the Ama Dress as a template (the length and fullness have made that dress a real pleasure to wear).  I kept the shaping at the hips in the original Butterick pattern piece and transferred this to the back pattern piece as well.  The gathers at the back were a bit of a guess and in the end I just used the width of the Ama Dress back pattern piece - I measured the front pattern piece to know how far away from the side seam to begin the gathers.

Maxi Shirt Dress

To finish I hammered on some antique brass snaps and to add some colour I wear it with my orange Jenna Cardi.

Maxi Shirt Dress

As we move into Autumn this is the perfect transition dress.

More photos on my Flickr -->
Saturday, 28 February 2015

Electric Blue Pavot

I made this soooo long ago that I almost don't know where to start.... hmmm...

Pavot Jacket

The pattern, let me start there.  No, let's start with "these photos are s**t", which is why it has taken me so long to post this, but taking new photos just ... well just! 

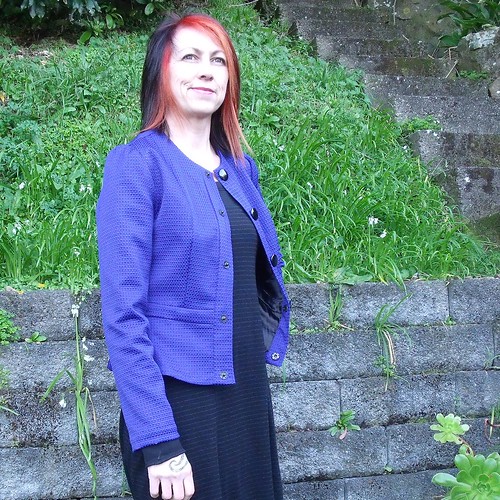
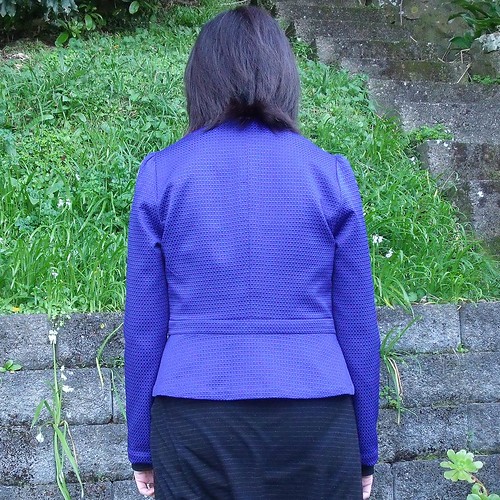
Back to the pattern, this is the Pavot Jacket by the French designer Deer & Doe.  I ordered this pattern over a year ago, I think, with every intention of making the full length version.  I knew I needed to make a muslin to check the fit - just as well I did because there were a number of changes I needed to make.  At the muslin point I decided that the full length jacket looked all wrong and wasn't working for me.

Pavot Jacket

I traced off a size 40 which I graded out to a size 42 at the waist and hip.  I cut 4" from the length of the jacket skirt, so the short version sat on my hip.  As with all other patterns the bust curve in the princess seam was too high and the bodice too short, so I lengthened the bodice at the high bust by 1" and added 5/8" to the bottom of the bodice.  This is the most that I have ever had to add to the bodice of a pattern. I also removed some excess fabric from the centre back along the seam line.  I didn't think it was necessary to have a seam on the centre back of the skirt piece so place that on the fold when cutting the fabric.

Pavot Jacket

I also didn't following the instructions step by step and decided it would be easier to sew the waistband to the bodice and then the skirt to the waist band, off before sewing the shoulder seams together and inserting the sleeves.  The more I get to work in the flat the better I recon!

This pretty blue fabric is a poly/cotton/lycra blend which is just lovely, but it was a bit of a biarch to sew when it came to the front placket - slight stretching under the sewing machine foot.  I think I unpicked twice!

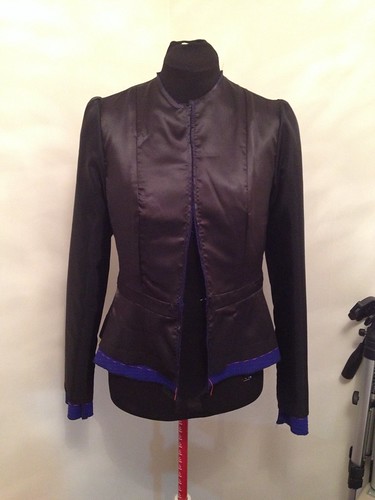
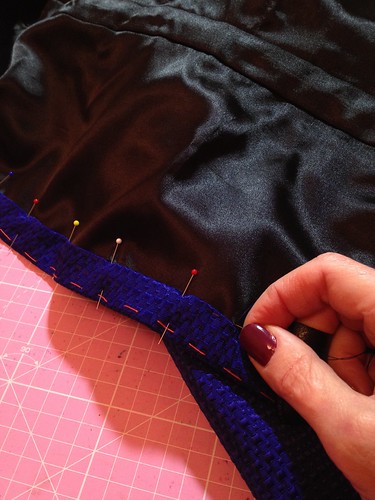
The pattern is an unlined jacket, but it's no secret that I like to line everything!  So instead of drafting a lining for the jacket thinking about how it would attach to the facings, oh no, I just cut lining exactly the same as the bodice pieces, and then tacked the facings down on the lining by hand.  It looks perfectly fine and because it is so lightweight it didn't really add any extra bulk to the jacket.

Pavot Jacket


Pavot Jacket

Given the amount of problems I had with the front placket due to the lycra content I was really scared to go anywhere near it with buttonholes.  My buttonhole foot and I don't get along at the best of times.  I picked up some large domes/snaps for the closure and then added some big black shank buttons to the outside for decoration.  I think they look fabulous!

Pavot Jacket

I wasn't too sure about the Peter Pan Collar so took the vote to Instagram and my gut feeling of no collar won out.
Pavot Jacket

Pavot Jacket

More photos on my Flickr -->

Saturday, 14 February 2015

Jeans! a learning journey

I am on a crusade to find / create the perfect fitting jean pattern that I can then use to make a whole draw full of jeans, cause in my opinion you can't beat a great pair of jeans!

I have only ever sewn jeans using the Jalie 2908 pattern.  There has been something about the crotch of the Jalie that I haven't been able to figure out, so I've got three new jean patterns to try so I can try and work out what I like or don't like about the fit of each and then produce 'THE' jean pattern for me.

First up is the mostly recent release, the Ginger Jean by Closet Case Patterns.  I had been stalking other blogs, to get a heads up on anything to watch out for.  But as other blogs have indicated the pattern is well drafted and the instructions are thorough.  So let's take a look at the final result ... I made view A: low rise with stovepipe leg.

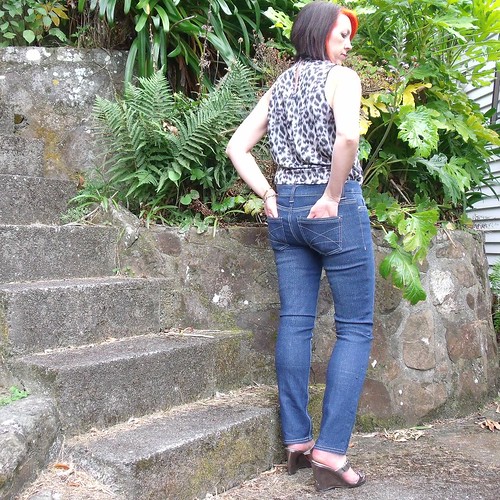
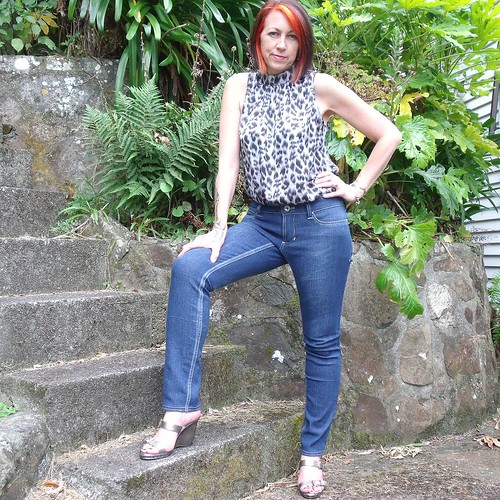
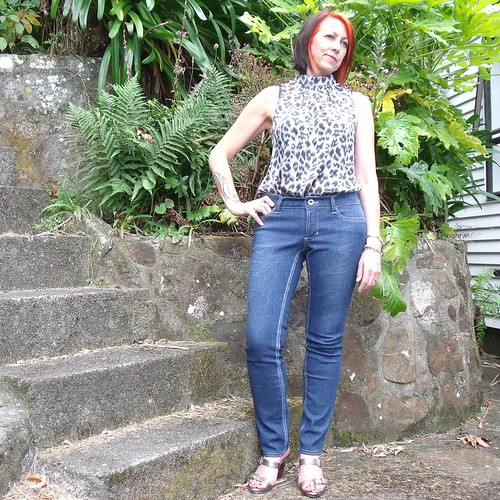
Ginger Jeans v1

First impressions: I think they fit reasonably well and don't look too bad for a first attempt of the pattern.  This is my 'wearable muslin' if you like.

Ginger Jeans v1

Accordingly to my body measurements the size 12 was the fit for me, so a size 12 is what I cut. The pattern recommends that you baste the pieces together for a fit test to see if any adjustments need to be made before spending hours constructing only to find that they don't fit.  Just as well I did because I was swimming in denim.  The pattern recommends stretch denim with at least 2% lycra, which is exactly the fabric I used, so I thought that there would be a little negative ease to account for the lycra, but that doesn't appear to be the case.

I unpicked all the basting stitches and reduced the pattern pieces to a size 10.  I basted them together again for another fit test.  Much better, just small tweaks to make this time. The one I expected was the "too much fabric under the butt" scenario (which I now have a fix for), too much fabric around the knee and too tight around the calf.

To fix the problem I have with excess fabric under the butt I created a crescent leg, which is a fitting technique I learned from Kathy Ruddy, teacher of the Craftsy course 'One Pant, Many Looks'. The crescent leg is her term for something she discover one day and it involves removing a crescent shape from the side seam of the back pattern piece at the butt, therefore reducing the amount of fabric around the leg in this area.

I immediately knew that this would work, because when I was sewing up the Peter & the Wolf Pant by PaperCut Patterns I noticed the slightly strange shape of the side back pattern piece.  This is the shape created when the crescent technique is applied.  My Peter & the Wolf Pant are a good fit and I didn't have any excess butt fabric to worry about with that pattern.

Once cut the leg looks like this ...

Crescent leg adjustment

Then I decided that the excess fabric at the knee and the additional room required for my calf could be solved by using the same crescent or reverse crescent technique in the knee and calf areas, but this time I would apply this to both the back and front pattern pieces.  The side seam of the back pattern piece now looks like a windy road!

Ginger Jeans
The pink line shows the reduction at the knee flowing down to the full calf adjustment
The crescent at the butt came in by 1/4", the crescent at the knee was 1/8" on both pattern pieces so 1/4" in total and the reverse crescent at the knee came out by 1/4" on both pattern pieces so 1/2" in total. 

The jean looks more like a skinny fit than stove pipe now, but when I put them on my daughter said to me that the bottom of the leg (near the ankle) wasn't a skinny fit and looked weird. Personally I quite happy with it, because if I put a pair of heels on they fall nicely.  I added another 1" to the length of the pattern pieces, which has worked out perfectly for this style.

Ginger Jeans v1

I am still in love with the light grey top stitching I used on my Moss Mini, so went and bought another two spools for these jeans, together with some shinny silver rivets.

Ginger Jeans v1

As you can see these jeans have been lightly distressed, using my learnings from the Moss Mini.  I went back to Bunnings and bought a 220 grit sandpaper sponge to see that made a difference to the distressing, because it is finer.  I don't think it did, the distressing just took a little longer and more elbow grease!

Sewing jeans means that I get to play with an array of hardware rather than just the sewing machines... sandpaper, hammer, rivets!

Ginger Jeans v1

I actually finished these jeans about mid January but I wanted to wear them before drawing my final conclusion of the pattern.  We are in the middle of summer so jeans haven't been on the wardrobe rotation.  This weekend has been a bit chilly and gave me the perfect opportunity to test drive 'in real life'.  I've been wearing them with a belt which makes all the difference to the jean staying put on the body.

I prefer a low rise jean but sometimes that means hiking up the back every time I stand up.  Initially I thought that would be the case with this jeans as the top of the waist band slightly stretched during sewing, but I was wrong!  Next time, I might take a small wedge out of the waist band to accentuate the curve more and provide a closer fit at the top of the waist band, as well as removing a smidge at the inner leg seam just below the crotch.

They have been most comfy to wear. The crotch curve and crotch intersection are all working in synergy and feel great - much better than the Jaile jean, in my opinion.

More photos on my Flickr -->

Tuesday, 27 January 2015

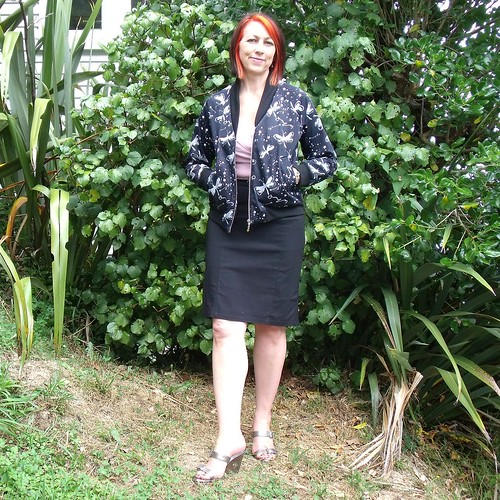
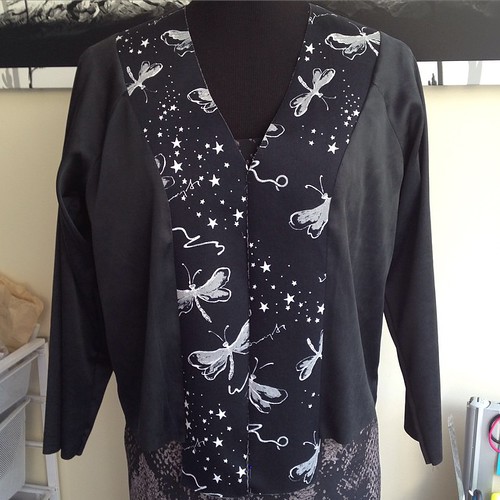
Rigel Bomber Jacket January ft Dragonflies

When it comes to a bomber jacket no longer is it the stereo type of two toned solid colour with a stripe in the cuff, which may have been the 'in thing' when I was back in High School!  Skip a few decades and the bomber jacket is still popular but the variety is far from stereo type.

One that really caught my eye recently was worn by Gwen Stefani during her time judging on "The Voice", but do you think I can find it anywhere on the net - NO!  But what I did start was a inspiration board on Pinterest, if you're looking for something to spark your bomber craze.

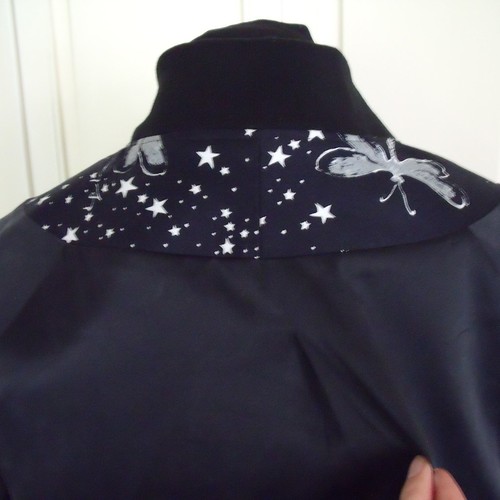
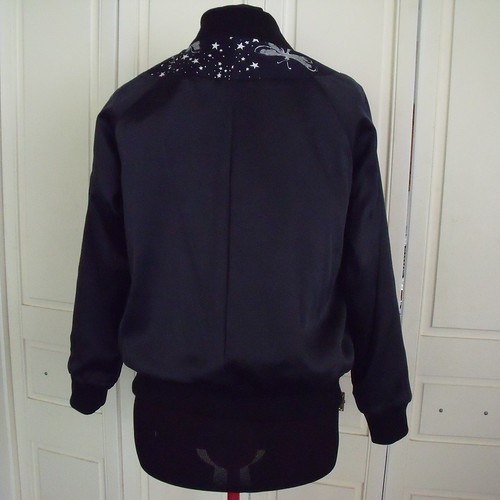
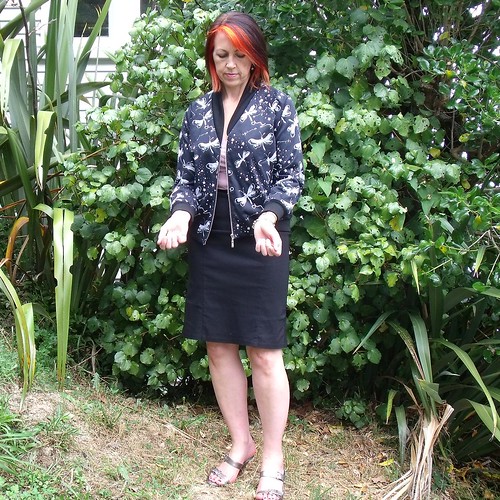
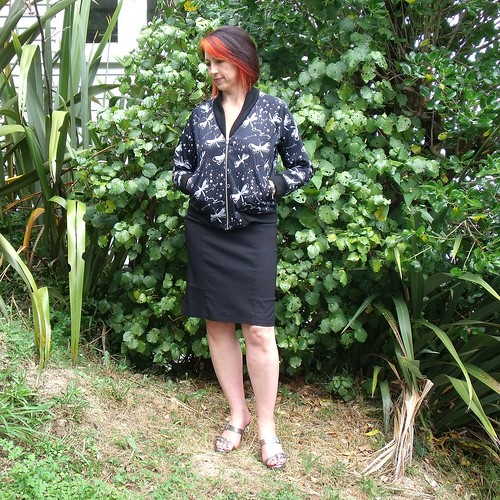
After all that inspiration can you believe it, I settled on a black ... but hey it's got silver and white Dragonflies!

Dragonfly Rigel Bomber

About this time last year I made a satin bomber jacket for my daughter using a Burda pattern.  While it was relatively easy to put together what I didn't like was that the zipper was sewn directly to the bottom band and when you put ribbing under the machine foot it squishes and stretches.

So when Sonja, Mel and Kat announced Rigel Bomber Jacket January I was keen to sew along and this time make myself a bomber.  And that I'm a bit of a Papercut Pattern fan was another reason.

Confession: I'm a bit of a queen when it comes to lining, I line everything!  Well except for knits and pants that is.  I only have one woven dress in my wardrobe that is not lined. 

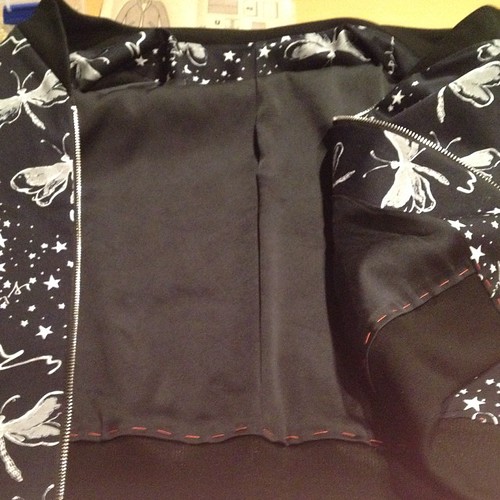
So I always knew that I would have to work out how to line this jacket because the pattern is unlined.  I surprised myself in how much I knew to be able to work this out on my own - actually not that difficult!  Kat has since written a great tutorial on drafting the lining, which is pretty much what I did, with a couple of variances that really aren't worth mentioning.

Feeling pretty impressed with myself - successfully drafted a lining and attached it to the facing 🌟 #rigelbomberjanuary #papercutpatterns #sewcialist

I used a stretch satin (for the lining) that I picked up from The Fabric Warehouse to make a slip to go under the wrap dresses I made last year ... yeah, that never happened because I didn't want to wait and just went ahead a bought one :-)

When drafting the lining I decided it would be nice to include a back pleat.  I didn't really need to because the jacket has plenty of room and both the lining and shell fabric have lycra content.  This was more a 'because I can'.

Dragonfly Rigel Bomber Dragonfly Rigel Bomber

There really isn't any shaping to this pattern so I didn't bother making a muslin - not even to see if it was broad enough across the shoulders.  Because I've sewn a few Papercut Patterns before I just trusted that the sizing would be fine for me - and it was.  There is just one thing I wish I had been a bit more diligent about and that is the length of the arms.  On most patterns I have to lengthen the arms so you would've thought I would.have.known.better!

Dragonfly Rigel Bomber

While they don't look terribly bad in these photos, I really wish they were at least another 1" maybe 2" longer.

The only other alteration I made was to trim 1/4" off the bottom of the pocket so it would fit inside the lining.

Oh, inserting the lining I did a little bit differently than the tutorial, cause I hate fluffing around with the machine.  I attached the lining to the facing by machine and then stitched the facing in as per the pattern instructions, but then I sewed the bottom of the lining in by hand, as well as the cuffs. 

Lining basted in coz I prefer to hand stitch it down #rigelbomberjanuary #papercutpatterns #sewcialist
I basted the lining to the jacket so I didn't have to deal with pins and then very carefully used a fell stitch along the stitching line where the band is attached to the shell.  I personally love the look of the wee fell stitches.

Dragonfly Rigel Bomber

I really did enjoy making this pattern.  It was kinda nice to just follow clearly written instructions (doing as told) with the added challenge of the lining.  I really like all the fabrics including the ribbing and the zip is awesome, but I am just not sure that I will wear it???  My jury is still out on that one.

More photos are up on my Flickr -->