After finishing my wearable muslin (which I haven't blogged yet, oops! but will explain more soon...) I immediately made the following changes to the pattern pieces of the Sewaholic Granville Shirt:
- moved the side dart and waist down 1/2" using the cut and slash method above the bust on the front pieces and the two back pieces.
- I didn't want to change the length of the shirt, so I removed 1/2" at the high hip on all three pattern pieces.
- I added 1/8" at the waist by the front and side back pieces, created an additional 1/2" of ease all round.
- I added 1" to the original sleeve pattern piece.
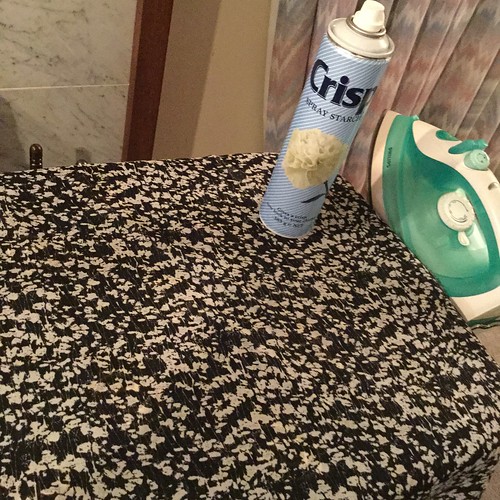
To keep the silk under control while sewing I used some starch spray, ironed it in and then left it overnight to set. Not sure that you need to let it set, but once it was dry the silk had a wee bit more control.
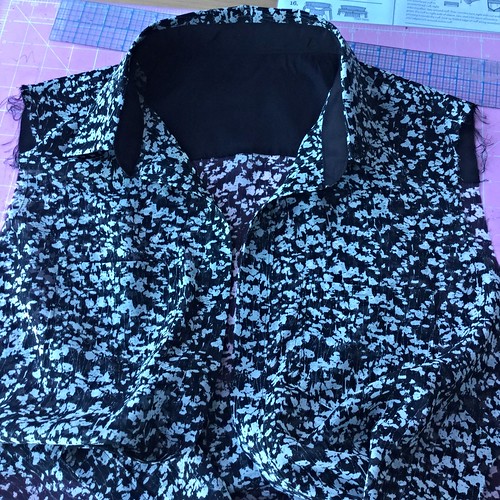
I wanted to add some structure to the collar, collar stand and cuffs - so rather than using a really heaving interfacing I elected to use some silk crepe de chine on the underside of these pieces. I applied the interfacing to the crepe de chine pieces so the silk would move loosely over top . I love the end of result of this.
I think I should have used the crepe de chine for the sleeve plackets because constructing these with the silk was just a real pain in the arse! They are not pretty!!!

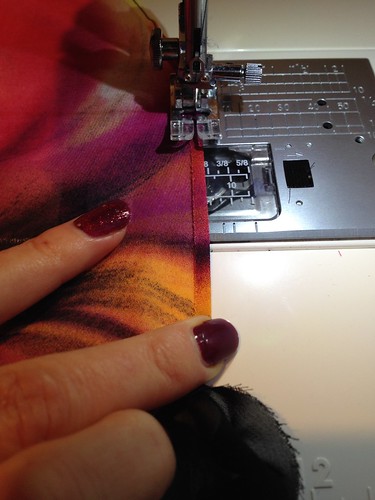
I finished all the seams with the french seam technique including setting in the sleeve. This is the first time I've used the french seam to set in the sleeve and I was so nervous about sewing it the wrong way I must have triple checked it twice over, each time. It was relatively easy to do and the finish around the sleeve is now just as pretty as all the other seams.
Because the silk was so delicate I used a 70/10 needle in my machine and purchased some machine embroidery thread which is much finer than the standard polyester thread. I would definitely recommend it - I'll be using it again for other fine silk / chiffon fabrics. I also put my walking foot on my machine to minimise the movement of the fabric. A combination of all these bits and pieces made sewing the silk very enjoyable.
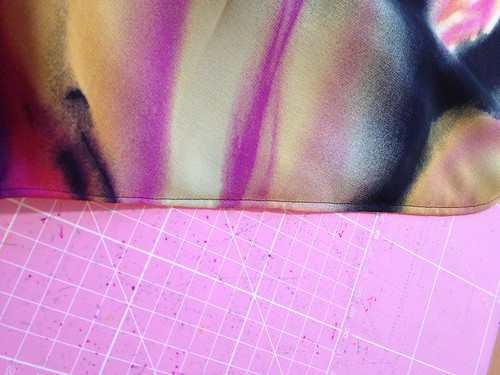
I used the hairline hem technique which I've used more than once before, but this time it's a bit of a mess - not sure what I did wrong this time, but really wish I'd done a rolled hem by hand!!
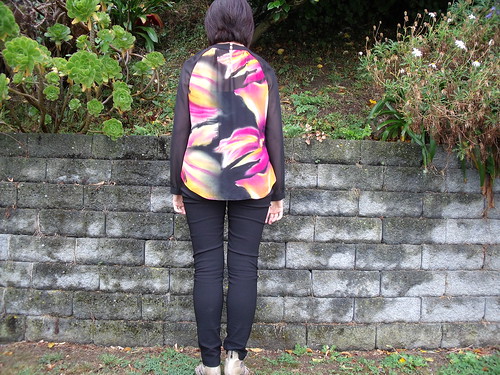
You can't see in the pictures but there are pockets on both sides of the front. I probably didn't need to put them on because the fabric is so busy you can't see them, but I know they're there.

This time round I made a much better job of the collar stand. I drafted a collar stand template like Tasia recommended in her tutorials, marked the stitching line on the fabric and then followed on the machine. The silk was easy to tuck out of the way, resulting in the ends of the collar stand looking identical. Whoop, whoop!
The sad part is that the weather in this part of the world has just turned terribly cold - you know coat and gloves cold! So my lovely silk shirt will probably have to hang in the wardrobe until the end of the year then the warmer weather rolls around again. I had to put a merino on underneath to take these photos!

Anyway more about why I've blogged my lovely silk version before my muslin version of the Granville Shirt ... well you know that the Wellington Sewing Bloggers Network (WSBN) get up to all sorts of sewing fun that also includes fabric enabling and pattern shopping :-) The Dreamstress put this idea to the group: "Could the Wellington Sewing Bloggers Network create a linking chain of sewing creations, where each person’s creation shares a fabric or pattern with the next person’s creation?" And so the 0Degrees of Sewing Separation Challenge was born.

This was probably the hardest challenge we've had so far, it took a few months to sort out our connections and how they would link into a chain, but we got there in the end. I am second in the chain matching the Granville Sewaholic pattern to Silly Billy Sewing who ended up being twinsees with Two Random Words. The chain continues with Fifty Two Fancies using the same fabric as me to make a pattern shared with another. You get the picture right! For the month of April we are unraveling our 0Degrees of Sewing Separation with a blog tour. If you are interested in reading about our antics head over to The Dreamstress who is updating her blog daily with each reveal.

More photos of my Silk Chiffon Granville over on my Flickr -->