Sunday 23 February 2014

Shinny Bellatrix

When Papercut Patterns released the new Constellation Collection I fell in love with the Bellatrix Blazer and immediately placed an order.  It has taken me a wee while to actually sew it up, but I'm pleased to say the first iteration is now in my wardrobe.

Untitled

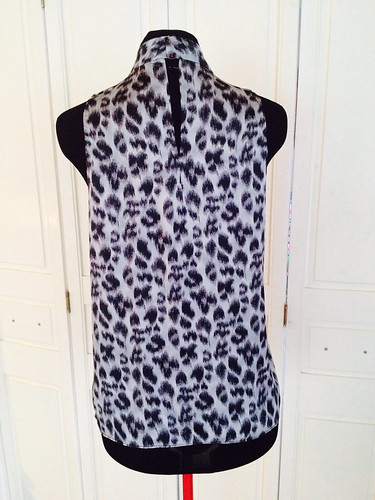
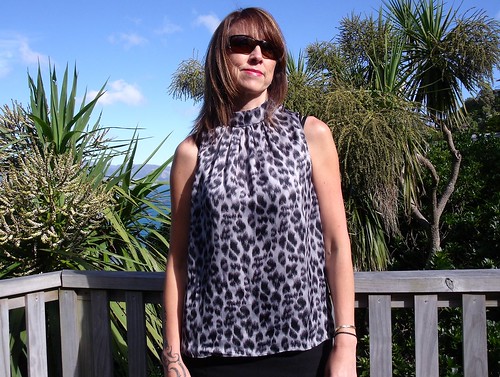
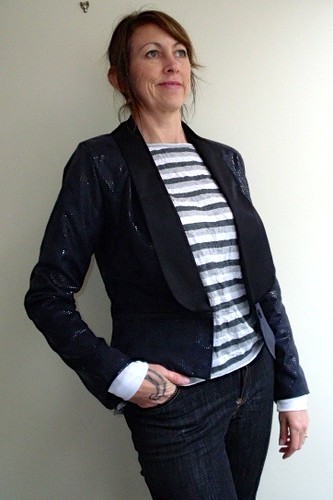
I dithered a bit about the fabric, but when I pulled this from the depths of my stash, it was obvious.  This shiny PVC/polytester blend that has a kinda suede feel was a little acquisition from The Fabric Store at one of their sales last year at something ridiculous like $6 p/m.

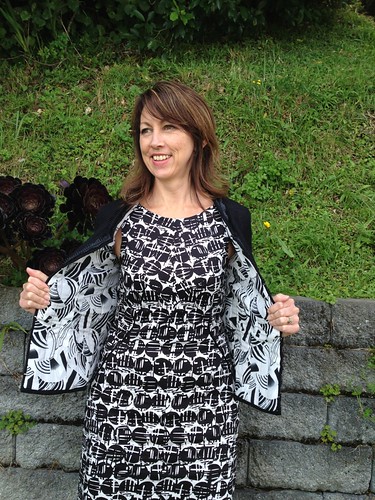
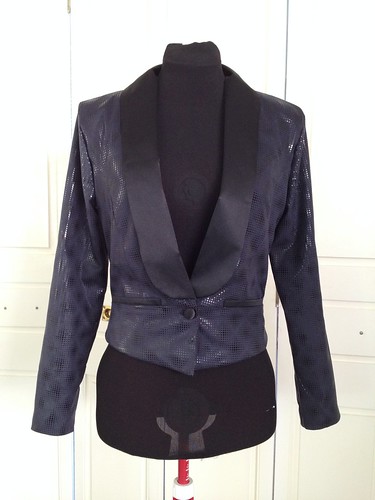
The black lapel and welt pockets are actually the reverse of the fabric.  I've got no idea where I got the button from, it was a solitary find in my button jar.  The match is so perfect you might think that I made a self-covered button, but no!

Untitled

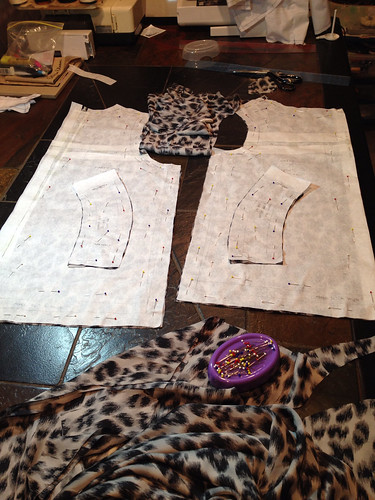
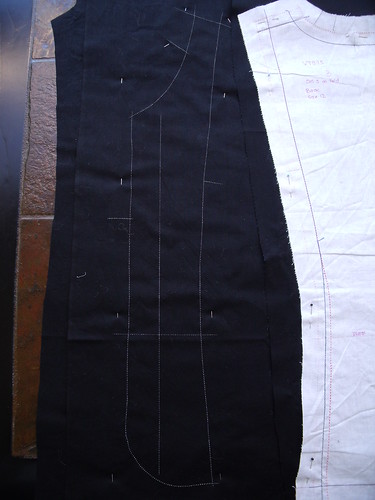
My inner self battled over whether or not to make a muslin - but the voice of reason spoke and the muslin was made.  Just as well, because changes were most definitely required for a better fit.  Well actually, it wouldn't have fit at all if I had made it direct from the packet.

Untitled

I had quiet a battle with the princess seams, fluffing with the curve for a small and lower bust.  Anyway it finally worked out after ripping the muslin apart and sewing it up again, about three times!
I also had to move the shoulder seam (at the arms edge) forward by 1.5".  In hindsight I should have also moved it forward at the neck edge about 1/2"!  I lengthened the sleeves by 2" and lengthened the body 1/2" about 3/4" up from the under arm.  Whilst that doesn't seem to be a long list of alterations I'm still trying to get my head around interpreting the adjustment that might be required.

Untitled

I didn't use interfacing in front of the jacket (as per the instructions), but rather just placed the interfacing in the lapel.  Given the stability of the fabric this was an okay decision.

Untitled

I wasn't sure about whether I would need shoulder pads, but after a final fitting before closing the lining I decided that the shoulders could do with some structure to help the blazer maintain it's shape.

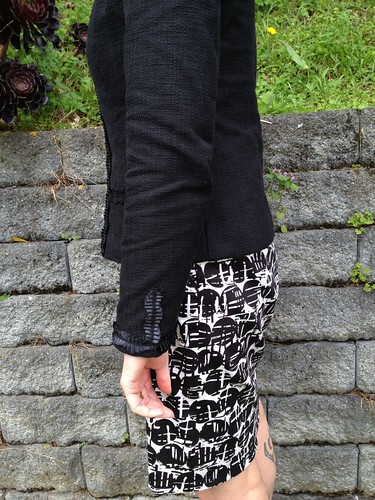
For a touch of fun I used this pretty pink plaid for the pocket lining, left over from my peek-a-boo dress.   This is also a really good close-up of the fabric.
Untitled

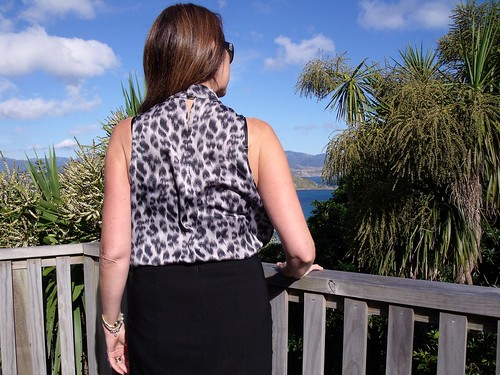
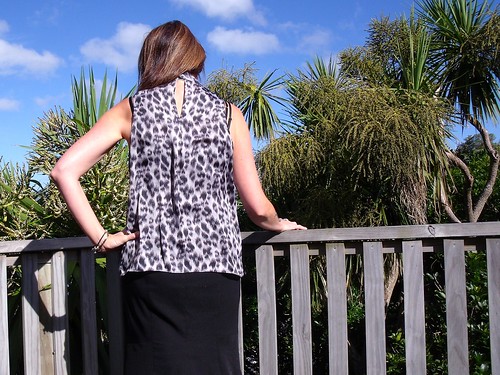
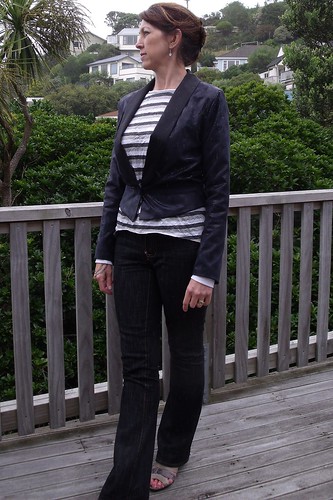
Now I just got to make some black skinny jeans to wear the jacket with - although my "me made" jeans in this photo worked.  It's not one of those garments that will go with everything - I'll have to be quite selective about what I can wear it with.  Maybe a black dress would work also?

Untitled

More photos on my Flickr -->

Saturday 8 February 2014

Stripe T-shirts

I hatched a plan in my head for a Lace Ensis Tee, and once it's in my head ... then it must happen! This is the result...

Lace Ensis Short Sleeve

I have sewn this pattern once before HERE.  Whilst I was happy with how the top-half fitted I was keen to get a better fit on the lower body this time.  I cut a XS size exactly to pattern and it is perfect!

Lace Ensis Short Sleeve

The upper sleeve is cut exactly to pattern and I made sleeve bands the same depth as the neckband. I applied the sleeve band first, then attached the sleeves to the body in the flat, sewed up the side seams and under sleeve including bands. Then I folded the band under and top-stitched. I'm pretty pleased with this application because the seam is neatly finished with no raw edges. Stripe matching was pretty easy with this fabric, it was beautifully on grain.

Lace Ensis Short Sleeve

The stripe fabric I recently picked up from the Arthur Toye closing down sale for just $7.50p/m.  It's a light weight jersey knit which matches the weight of the lace beautifully.  The lace I bought at the Fabric Warehouse pop-up sale at the end of last year for a mere $3.00p/m.

While I was rummaging around in my stash I also pulled out another stripe knit, this one acquired at the Fabric Warehouse pop-up sale for $3.00p/m and paired it with some white powernet I purchased for bra making, also from the Fabric Warehouse.

Hi Lo Stripe Raglan

This is the Hi Lo Raglan from Jamie Christina. I've also made this one before HERE.  I made a couple of alterations to the pattern: widened both front a back pattern pieces by 1/4" at the hip; shorted the back curve by 3/4" and added 2" to the length of the sleeves at the cuff end - I quiet like a long, long sleeve.

I feel I'm getting pretty good at this stripe matching thing ..

Hi Lo Stripe Raglan

Both of these t-shirts were quick and easy to put together - I cut and sewed both in one afternoon/evening.   I used my trusty ol walking foot on my Janome and finished the seams with the overlocker. My overlocker is soooo old that it is only good for finishing seams - doesn't do any fancy stuff.

On both I finished the hem by overlocking the raw edge and turning it up and under 1/4" then top stitched.  Although in hindsight I should have used by twin needle so it doesn't curl.

More photos on my Flickr -- Ensis Tee and Hi Lo Raglan

Wednesday 5 February 2014

Jungle Marfy

I recently got introduced to Marfy patterns, quite by accident.  Carola posted a question on the 2013 RTW Fasters FB page back in September, wanting to know if anyone had sewn a Marfy pattern, because they don't come with instructions.  What?!  No instructions, who are these people ... internet research revealed they are an Italian indie pattern designer that hand cut all their patterns before despatching.

As the LFJ sew-along got going there were loads of Marfy patterns posted to the inspiration board, this is when I started to look closely at them.  Then in December Leisa announced that she would be hosting a sew-along with the free Marfy patterns - a top, a skirt and a jacket.  Without hesitation I signed up (really I'm not a free freak, but what better way to get introduced to a new pattern brand).  Anyway enough reading, let me show you some pictures....

Jungle Marfy

Jungle Marfy

The suggested fabric by Marfy is jersey, crepe de chine, chiffon or satin.  I had a few pieces of fabric in my stash that would have worked perfectly but seen everyone in the blogisphere was stepping out for Jungle January I settled on this polyester satin.  I picked this up on Trade Me (NZ version of EBay) maybe 12-18 months ago and thought it would be great for lining.  I figured that if it all turned to custard I hadn't lost anything.

I must admit I was a little nervous about sewing this fabric because it just moves everywhere!  Determine to conquer I carefully folded the fabric and pinned, pinned, pinned and pinned again (my silk pins are definitely my BFF).

image

I sewed this together using a combination of regular 'ol sewing machine seams and couture techniques.  Leisa consulted with Susan Khalje who shared this fantastic couture technique for creating the back opening - the back pattern piece is cut on the fold.  I can see that look of confusion on you face!  Have a read of this and all will become clear - I think it's brilliant and easy enough to create.

image

I lined both pieces of the collar with silk organsa and machine basted them in place.  It was just the right amount of structure for the collar to sit up but not be rough on my neck.  Look at this - I was so happy with the result.

image

I applied the collar to the top with the sewing machine, around three sides, but then hand-stitched the back of the collar to the top so there wasn't a line of machine stitching visible at the bottom of the collar.  It also just feels better!

I tried a hairline seam for the shoulder seams and a french seam for the sides.  I did a machine rolled hem around the bottom and half machine, half hand-stitch rolled hem for the armholes.

I made a couple of pattern adjustments:
  1. Lengthen the body above the armpit.  Although now I'm not sure that I needed to lengthen as much as I just needed to slightly reshape the armhole so it didn't cut into the crease where my arm meets my body in the front.
  2. Added 3/4" (2cm) to the bottom.
  3. Cut and spread 1/2" (1.2cm) just off centre back to allow for the opening technique. 
  4. Curved in the side seams slightly to give a little shape to the top
I feel next time I could take 1/2" (1.2cm) off the side seam of the front and back and it would still have enough room.  Oh, I cut a size 46 - patterns are available from sizes 42-58.

Looking at the design sketches it appears that elastic has been put into the bottom so when worn out the bottom sits on hips and behaves.  I decided not to put elastic in mine, so I could wear tucked in with a skirt or out with a pair of skinnies (maybe?)

Jungle Marfy

Jungle Marfy

Again I have learnt so much from the very talented Leisa over at A Challenging Sew and I'm looking forward to putting the jacket together in March.  This Marfy pattern was well drafted and actually quite easy to put together, with a bit of thought.

IMG_3767My pattern-a-holic self could help herself and ordered the 2014/15 Marfy catalogue. 

One part of me was curious as to what other detail was provided in the catalogue to help guide the sewing decisions, the other part of me couldn't pass up the 20 free patterns included.   The Marfy pattern pricing isn't any different from other indie patterns that range from NZ$25-$30 and for that matter we pay NZ$30 for a Vogue pattern.  

It's the postage that's the killer, but even so the cost per pattern included in the catalogue works out to be just NZ$4.75 - what a bargain right!?  Bonus - the catalogue is beautiful.

After the sew-along has finished I'm looking forward to challenging myself with a few of these patterns - going solo if it were (scary!)

More photos on my Flicr -->

Sunday 2 February 2014

My Little French Jacket #1

Untitled

Say hello to my very first Little Black French Jacket!  Total hours to completion 55, which I'm pretty happy about, because before I started I expected it would take about 75!

In December when I was at 38 hours I made this progress post if you want all the details before now.  When I last left off I had just set-in the sleeves ... well, let me tell you, I had real problems getting the inside lining to sit just right on these suckers!  After wrestling with it for a few hours and reading Leisa's post over and over and over, I decided it was time for a different approach and consulted Claire Shaeffer's DVD "The Couture Cardigan Jacket" - I decided her method was a winner and final got it all in place, not as pretty as I would have like, but none the less the sleeves were in and the lining closed - who's gonna see it anyway, as long as the sleeves don't fall off while being worn, right?!

Untitled

I finally made a decision about the bottom front.  Initially I drafted a rounded edge as you can see below, but as the jacket came together, I just wasn't sure.  In the end I went with my gut instinct and advice from follow sewcialists and squared it off.

LFJ

The trim I found at The Fabric Warehouse - some pre-pleated satin ribbon, over which I laid some tiny gimp.  I love that the ribbon is 'wavey' and not just a simple straight line.

LBJ Trim

I also decided not to apply the trim around the bottom of the jacket, probably a bit OTT!

Untitled

The Vogue pattern I used only provided for a two piece sleeve which meant no sleeve vent, synonymous with the LFJ.  I was okay with this for my first jacket, but thought a faux vent would do the trick.  A three piece sleeve has a seam that runs from the top of the sleeve, where it joins the shoulder seam, straight down to the cuff which is where the vent is constructed.  My faux vent is located in exactly the same place with a strip of trim running perpendicular to the cuff.

Untitled

I made a few booboos along the way, like cutting the lining inside out - but luckily the lining was almost identical on the right and wrong sides, so you can't really tell.  I used a broadcloth as an interlining - I thought this would give the jacket some stability that I was looking for.  Oh it has definitely done that, but way more than necessary.  I should have just used it for the centre front pieces.  On the up side, it is super warm to wear.  I would set-in the sleeves differently next time and follow the Claire Shaeffer method to the letter - it is the last thing she does after closing the jacket and adding all the trim.  I think this would work better for me.

I must give a HUGE thank you to both Inna and Leisa for the sew-along - the amount of information shared by both was just invaluable and totally enjoyable.

Untitled

I love my LFJ and have worn it at every opportunity since it was finished in early January.  Now that I've got all my rookieness (that is totally a word!) out of the way I'm really looking forward to making my next one using the free Marfy pattern, starting in March.  For now I'm sewing pants for The Monthly Stitch 'Smarty Pants February'.  You can join me on Instagram for up to the moment progress and hopefully I can get all three complete.

More photos on my Flickr -->