Wednesday 17 December 2014

Little French Jacket No.2 (and a big fat fail)

I've been beavering away at my second Little French Jacket for the past couple of months...
LFJ 2

and I was making good progress until I was side-tracked by the release of the Holly Jumpsuit, which jumped to the front of the blog (here), before my other finished projects.

I was so pleased with the first Holly, I made the wee adjustment to the back crotch curve, went fabric shopping especially and picked up this lovely viscose for a long pant version.  In the weekend just gone, I got it all stitched up enough for a quick fitting .... and then this


That my friends is my freshly created UFO! There is just too much wrong with this #viscose #hollyjumpsuit that I don't know if I can be bothered #sewcialist

This pile, my friends, is my first UFO in a long time!  I believe it has got everything to do with the fabric choice.  It is too big, the crotch almost hangs down to my knees and it looks like a sack!  So for now I'm gonna consider this a big fat 'fail' and move on with my Little French jacket.

I'm not far away from finishing - I've just got the pockets to attached and the sleeves to set in.  With this Jacket I've decided to put four pockets on, like this ... the bottom pockets need bringing up by about 1/4 inch.

LFJ 2

LFJ 2

The fabric is like a cotton boucle, that I picked up off Trade Me (NZ version of eBay) from a sewer that was having a clean out.  When it arrived I really wasn't sure if I liked it or not, so I put it away in the stash and never thought much more about it. 

When I was ready to attempt my second Chanel inspired jacket, I still didn't think I was ready to cut into my really nice wool boucle, summer was coming and this cotton jumped to the top of the 'reasons why' list.  If it didn't work out then I wouldn't cry for days! 

What do ya know, it has actually begun to grow on me... when I started I didn't have the lining or the trim so I didn't really have a clear vision in my head of what it would look like.  When it was time for the lining, I must have looked at every possible lining option in The Fabric Store before it became obvious that this pink polka dot crepe de chine was perfect.  I'm not a polka dot person, so mentally I think I counted it out before I actual picked it up and placed it with the swatch I took with me.  It was the perfect match - don't you just love it when you surprise yourself with fabric choice!

LFJ 2

I cut all the selvage from the fabric to use as trim ... note to self: cut off all trim after placing pattern on fabric and before cutting them out.  Why you may ask, because instead of two long continuous pieces of trim I had a few odd lengths and had to look at joining them in discrete places on the jacket.  Finding trim was another major shopping expedition with fabric swatch in hand.  I picked up this lovely black, white and gold trim, that was the perfect width to go over the selvage, from Made Marion 

So at this stage I'm feeling a lot happier about this jacket than I am about Holly the sack!  I think it will be the perfect colour to wear with a nice pair of jeans ... hmmm I can see it fitting into my wardrobe now :-)


Tuesday 9 December 2014

Smitten by Holly

When By Hand London released the Holly Jumpsuit I was rather smitten by the wide legged, cowl neck version and every one I saw in the blogisphere convinced me it was a pattern I needed to sew this summer.

Holly Jumpsuit

While I agree a jumpsuit can leave you feeling rather vulnerable when you need to visit the loo, I figured that I would probably only wear it during the summer months and it wouldn't be any worse than going to the bathroom in a bikini!  Totally normal for summer right?

I decided that my first version needed to be beach/weekend wear, so went with the top of version 1 and the shorts from version 2 - lengthened to me more age appropriate for me.  I added 2" to the length of the pattern shorts.

Holly Jumpsuit

The real scary thing was the pant - cause I so haven't got my head around what part of the pant pattern needs to be adjusted when it doesn't fit properly/comfortably, arrrrgh!  The girls at By Hand London held a sew-along not long after the pattern was released.  I didn't sew along exactly but I was paying attention when they covered 'full and flat butt adjustments'. This is an interesting one, because while I don't have the outward curve of a 'young' butt I have really wide hips.

Holly Jumpsuit

I made a 1/2" flat butt adjustment, and then added 1/8" to the side seam at the high hip. The fit seemed to be good but the crotch felt a bit low, although I wasn't really sure where it should be!  So after wearing my muslin around for a little bit I thought I needed to remove 1/4" horizontally, which I did across both the front and back pattern pieces at the high hip.

Holly Jumpsuit

Is it weird to say 'look at my butt'?!? Maybe the more appropriate thing to say is 'look how well the pant falls over my backside', lol!  I'm pretty happy with the final fit, although I now realise that the back crotch could do with some more depth - I can feel it tighten when I bend over.

The flat butt adjustment also fixed the side seam which was leaning toward the front instead of staying perpendicular to the floor.  I still haven't got my head around the engineering of it all, but it worked for me and that is the main thing :-)

Holly Jumpsuit

I chose this really dreamy rayon from my stash that I picked up at the Arthur Toye closing down sale earlier in the year - the drape is ideal.  I wasn't going for perfect pattern matching, but I did attempt to look at the pattern placement on the fabric before cutting.  As it turned out the pattern matching across the back three pieces was pretty bloody fantastic!

Holly Jumpsuit

The fabric was kinda transparent, especially if I stood in the sunlight, it almost became completely sheer - and given I'm planning on wearing this to the beach I opted to line the whole jumpsuit with a really light weight acetate I had in the cupboard.  As you can see from this picture you can almost see through the lining as well.  Together they provide just the right amount of modesty while remaining light weight.

Holly Jumpsuit

I constructed both the shell and the lining, then attached them across the neckline of the front piece, understitching on the inside.  The back and the armholes are encased in the bias binding, with the short lining is hemmed 1" shorter than the shell.

I interlined the back pieces with some poly/cotton scraps to give it a bit more structure.

Holly Jumpsuit

Overall, I am pretty happy with my first Holly playsuit.  I've already got a second one in the pipeline - this one will be the long pant version, staying true to version 1 of the pattern.

Holly Jumpsuit

More photos on my Flickr -->

Monday 17 November 2014

Inspiration Station

It's not often I copy a RTW look to the tee.  Usually I troll through Pinterest or designer websites for inspiration on styling and the detail that leads me to what I pull together.   On one of my 'internet window shopping' sessions I came across this dress...

Belcarra Dress Inspiration

I thought this dress would be the ideal, easy wear, summer, work appropriate addition to my wardrobe - simple but classy.  Immediately the Belcarra top pattern came to mind - how easy would it be to simply add some length to make it a dress.

I went to the depths of my fabric stash and found this black crinkle chiffon (well that's what I'm gonna call it anyway) with a small floral print.  I bought this online a wee while ago and it wasn't what I expected when it arrived, so I figured that if the dress didn't work out then I wouldn't be too disappointed.

Belcarra Dress

When I made my first Belcarra top I selected a size 10 based on my bust and graded to a size 8 at the hip, resulting in a great fitting top.  I used exactly the same size selection for this dress and extended the bottom of the top straight down by 17".  However, the fit on this has a completely different result.

Belcarra Dress

It has way and I mean waaaay too much room around the waist and hip area.  I considered taking it in, but the seams have a french seam finish, which would mean unpicking the sleeves in order to get to the side seams and re-shape them.  The fabric is so fine, I was worried that I would cause more damage and render it completely unwearable, so no picking here.

My next thought was to add some elastic across the middle of the back at the waist.  I cut a 2" piece of 1/4" elastic and stretched this as much as I could while attaching it with a zig zag stitch.

Belcarra Dress

While that made a small improvement, I feel that it's still too big.  Thank goodness for a belt!

Belcarra Dress

There, that looks better already.  Okay, now we can move on to more of the details ...

I hoisted up the hem over the left leg ... I don't know why, but it just felt better, than on the right side.  Firstly I made a tab  3" wide by 7" long, folded it in half, sewed up two sides and turned right side out.  I then created a buttonhole in the dress, horizontal to the hem, 7" up from the hem - I applied a small amount of tailors fusible interfacing to stabilise  the fabric before sewing the buttonhole.  I threaded the tab through the buttonhole and hoisted up the hem then closed the tab using a few hand stitches.  Sorry, didn't take any photos of this process - brain was too busy working overtime trying to nut this out!

I decided that the lift in the hem wasn't dramatic enough, and the dress still looked like a sack, so promptly repeated the process making a second button hole and second tab, this time threading the tab through both button holes.

Belcarra Dress

Now that the fabric is made up into a dress, I actually don't mind it and will probably get loads of wear out of this dress over the coming summer months.

More photos on my Flickr -->


Saturday 1 November 2014

Take Two Lola!

I don't know about you, but I have developed a habit of making everything twice!  I haven't made any pattern more than twice, so I don't think I can say I have a TNT pattern, but I'm not sure what's up with this little ritual I have of putting everything in the wardrobe two by two???

Yep, so this is version two of the Lola dress by Victory Patterns, which I made earlier here.   On my first make (which I have only worn once) the shoulder/armseye area was a bit tight and while I really liked the dress it was uncomfortable to wear.  This time 'round I made a size 6 for the top and bottom.

Black Lola

Here's the obvious ... I extended the sleeves to a long version, cause it's a winter dress, and omitted the side pockets.  I made a couple of other preference adjustments:  I added 2" to the length of the hem band, so it didn't pull the hem of the dress in to much and I lengthened the bodice at the high bust by 1/2".

Black Lola

I finished this dress back in early August and have worn it loads over the last few months, changing it up each time with one of my jackets.  It's perfect for winter work - a bit of a blank canvas!

Untitled

I did make a bit of a boo boo!  Instead of putting the join in the band of the hem at the back of the dress, I ended up putting it smack bang in the middle of the front.  Thank goodness that it's black, cause the only person that can see is probably me.

Black Lola

The fabric is a Merino/Nylon jersey knit blend that I picked up from The Fabric Store for $15p/m.  It is a good weight for this dress and doesn't have a fluffy wrong side, which I quite like.

More photos on my Flickr -->

Monday 27 October 2014

Meet Gillian - THE. Wrap Dress


Gillian Wrap Dress

This is Gillian!  She is the new release from Muse Patterns.  When Kat asked our local sewing group if we were keen to test her new pattern, I was keen as mustard.  At that stage I had planned and cut my frankenpattern wrap dress the "Midnight Dream Coppelia", so I really wanted to sew an actual wrap dress pattern for a comparison.

Gillian Wrap Dress

The detail on this dress is well thought out and very figure flattering (in my opinion). The front yoke provides just the right amount of space for the bust and the waist band provides a region for your waist to be, without being exact.  I love that, coz usually I have to lengthen the bodice of most patterns by 1/2".  The curve to the bottom corner of the skirt provides a good visual balance to the curve of the yokes.

The back also has a yoke detail without making the back of the dress too wide.  I think it provides interest to the back of the dress, when otherwise all you would get is butt hugging knit fabric!

Gillian Wrap Dress
excuse the (unflattering) butt photo!!!
According to the Muse Patterns sizes I am a size 36 at the bust and hip but a 38 at the waist.  I figured it was a knit wrap dress and the waist wasn't that important, so I cut and sewed a size 36 with NO adjustments (I know I can't believe it looks this good with NO adjustments). 

The pattern is like seven patterns in one: a wrap skirt with two length options, a wrap top with two sleeve options and then but them both together for dress options.  I only tested the long sleeve dress, but I've definitely got plans to make a short sleeve wrap top.

Gillian Wrap Dress

Testing was most interesting for me ... I actually had to stop and read the pattern instructions.  My usual process is to skim read the pattern instructions, I may stop and actual read things that are new to me or sound complicated, then just get on with it, briefly referring to the illustrations as I go :-)

This time I did my skim reading first, but then followed each and every step of the pattern exactly as the instructions said.  Oh boy was I challenged! 

The hole construction on the waist band of this dress is so genius, but do you think I could work it out ... simply the waist band folds back on itself to completely enclose the hole which the waist tie passes through - no raw edge or wee slit in the seam.  This method also provides some structure to the waist band from which the skirt can hang.  Look, at least I didn't put the hole on the wrong side like I did with the Midnight Summer Coppelia!

Gillian Wrap Dress

I went fabric shopping for this make ... I know you would have thought I would've had something in amongst the stash, now that you've seen photos of it!  I picked up this very fine stripe merino from The Fabric Store.  I would describe it as a medium weight, which gives just the amount of structure to hold the details but drape as a wrap dress should.  I used 2.25m to make the long sleeve, above the knee dress version.  I bought 2.5m, but measured exactly how much I actually used.

Anyway - I've worn this dress every week since I've made it, which is always a good testament to a pattern for me, otherwise it just hangs in my wardrobe. 

If you are interested you can check out all the other variations over on the Muse Patterns website.

More (not so great, shadow struck) photos on my Flickr -->

Fine print stuff:  you know ... I volunteered to pattern test, these opinions are my own and I was not paid in any way to write this post - other than to receive the free pattern for the purpose of testing.

Sunday 19 October 2014

Midnight Summer Coppelia

Just over a month ago, I joined The Frankenpattern Contest on pattern review and set to looking for the most appropriate patterns to mash together.  After working through a number of options I settled on a couple of Papercut Patterns which would produce my first wrap dress.

Midnight Summer Coppelia

I took the skirt (and tie) from the Midnight Summer Dream, a garden party summer wrap dress, and the Coppelia, ballet style raglan sleeve wrap cardi, and morphed these into a Spring appropriate wrap dress.

Midnight Summer Coppelia

The skirt of the Midnight Summer Dream was fuller than I wanted so I reduced the fullness by taking out a wedge of 3-1/2" at the skirt side.  This resulted in more of an A-Line skirt - thanks to a slight breeze in the next photo for capturing the skirt shape.

Midnight Summer Coppelia

The top and the skirt came together pretty seamlessly.  I measured bottom of cardi and top of skirt and only had to reduce the cardi by 1-3/4", so I just took that from the narrow end of the wrap.  I kinda followed the pattern instructions for the Midnight Summer Dress which called for the wrap ties to be attached to the narrow end of the top, where it meets the skirt.

There is a small slit in the side seam of the top, just above the waist seam for the tie of the under-wrap.... nothing to complicated, however I put the slit in the wrong side, so the dress wraps the wrong way around!  Is there actually a right way or wrong way to wrap?

Midnight Summer Coppelia


I picked up this snake skin cotton knit from The Fabric Store sale and paired it up with some black merino for the contrast, to break up the print.  The fabric is really light weight and with skirt cut on the bias it dropped quite a bit after being hung for a few days.  It almost looked like a high/low skirt! But I think I've over corrected just a tad too much and the back is now a fraction shorter then the front - you'll only ever notice if I stood still at all, luckily I don't :-)

Because I fluffed around for so long with the hem, and I suck at getting my photos sorted, I missed the deadline for The Pattern Review contest :-(  Never to mind, I had fun working on this one, main thing right!

More photos on my Flickr -->


Sunday 12 October 2014

Duffle Coat

This one has been coming for a wee while.  It was my son's birthday back at the beginning of May and he was keen for me to make him a winter coat ... after a bit of coercion :-)

Duffle Coat

We went shopping together and got this fabulous wool coating from The Fabric Store - perfect for a men's coat.  Finding an appropriate lining wasn't so easy.  Originally we picked up some striped acetate, but after a bit of deliberation I realised that it wasn't going to add any warmth to the coat and that it would be useless for the Wellington winter.  So the hunt was on for some flannelette.   At Spotlight I found a similar coloured stripe with red stags - boy appropriate I thought!

Duffle Coat

I only put the flannelette on the back and fronts to add warmth and used the original acetate in the sleeves, so it would be easy to put on and take off, sliding over the usual winter hoodie.

The pattern is Albion by Colette Patterns.  My son is much taller than the average 13 year old and swimming gives him a triangle shape, making things a little interesting.  His measurements placed him in a size Medium across his shoulders and a size Small around the chest.

Duffle Coat

The fabric wasn't cheap, so I decided that it was best to do a muslin first and work out how I was going to blend the two sizes together. I cut the front and back yokes and the upper sleeve in a size medium, the under sleeve and body pieces in a small.  Although where the yoke and the body pieces meet I left as a size medium and then blended down to a size small at the underarm.

This gave the perfect fit across the shoulders with a bit of spare room for growth!

Duffle Coat

I omitted the side seam pockets - cause I just don't like them.  I lined the patch pockets before attaching them - I little bit of added warmth is a good idea.  Then when we were in town one day we came across some RTW duffle coats - one feature I found really interesting was the double patch pocket.  A second pocket stitched over the first, but with an angle for easy access by the hand.

Duffle Coat

Although I had already finished the pockets, luckily I hadn't sewn the lining closed.  So I drafted the second pocket with a 1" self facing and attached over the same seam lines as the original patch pocket.

While the buttons look great, they were a real b*!#h to put on.  I used a 90/14 needle on the machine, but turning around the curved edges was a real struggle.

The pattern was a pleasure to sew.  The instructions were clear and easy to follow and would definitely be a pattern I would sew up again.

Duffle Coat

More photos on my Flickr -->

Monday 29 September 2014

It's just a jump to the left ...

Well I was walking down the street just a-having a think, that this is the month for a bit of a 'behind the scenes' filming.  Earlier in the month I took on a wee tour of my sewing room 'that was' and 'that is'.   On that very same day Tanya from Mrs Hughes nominated me for the blog hop - well actually she, ever so politely, asked me if I would like to join her in the Blog Hop Around the World.  But you know what, I think I wanna hop on over to where Tanya lives ... the weather looks warm all year round and she gets to make loads of summer dresses, my fav!  Oh and have you seen her sewing room!

It just blows me away that by simply writing about my sewing adventures this has connected me to so many people around the world.  I've jumped aboard this tour, because on the tour plane are blog hoppers like Heather from Handmade by Heather B, Melanie aka Poppykettle, Lisa from Notes from a Mad Housewife, Inna from TheWallInna and so many other cool people.

So let's get to the questions ...

1. What am I working on?
In my head I'm working on everything!  But what is actually on my sewing table ... I've just finished some secret sewing that had me scratching my head, but after some perseverance I am totally happy with it.  Last week I started working on my bodice moulage - the more I sew, the more I want to understand it's beginnings and what aspects of a pattern are for fit and what are style-lines.  I want all the technicalities, cause hopefully this is gonna help me understand fit better - yeah I know a bit geekie right!

I have the pattern traced off for the Jenna Cardi that is going to be made up in this beautiful merino.

Pretty Merino

But recently the Holly Jumpsuit from By Hand London has jumped to the front of the cue.  Inspired by this version by Sew Busy Lizzy and this version by House of Pinheiro.

Holly Jumpsuit

Before that happened I had the Jamie Jeans PDF pattern all assembled and ready to trace, as well as planning my next little french jacket or tailored blazer.

2. How does it differ from others of its genre?
Gee, I'm not sure that it really does.  My blog isn't the reason I sew, sewing is the reason I blog.  I write about what I've been sewing and my learnings along the way.  I try to blog about projects in the order that I finish them, so I've got a reference for future of approximately when I made what.  Although at the moment it's taking me about two months to get stuff to the blog - yep, I've got a bit of a back log to get through! I suck at taking pictures :-(

3. Why do I create what I do?
I sew to full my own wardrobe and what I want to wear.  Every now and then I'll do some sewing for my kids, but they have to want it (which leads to appreciation - well that's my theory anyway and I'm sticking to it!).  It's unfortunate but they are the throw away generation, a product of cheap RTW.

I also sew stuff that has construction techniques that are new to me, I like to learn but that is balanced with sewing things more than once so I can master the techniques.

But I don't just want to sew stuff that looks like RTW, I want to make stuff that looks like it's been bought at a designer store.  This is probably why I'm fascinated with couture sewing techniques and tailoring - these have changed the way I approach sewing, for the better!

Marfy 1756


4. How does my creative process work?
OMG, I am a complete neat freak and my organisation is probably OTT for most.  So the process starts with an organised space and a clear desk - everything is put away, except for what I need to begin the new project.  While I might have more than one project on the go at any one time, I only have one project at a time on my sewing table.  Actually, I'll only have more than one project on the go at once if I need to stop and think about what next, or it might just need buttons or a decision on lining or length before hemming.  Most of the time I'll start one project and see it through to the end, before starting the next.  But I never, never, hardly ever put a due date or deadline on my projects, otherwise that would just feel like work and I'd be over it pretty quickly.  So it's all about the journey :-)

Before any project makes it to the sewing table it may have been on the to do list for quite a while or it could be a idea I just had.  Hmm, a to do list probably isn't the right description, its more like a "to do pool"!  And in that pool are patterns waiting for the right fabric, and fabric waiting for the right pattern, but just because both pattern and fabric have been matched doesn't mean that it automatically makes it to the sewing table next.  I have to be feeling it.

I tried using Evernote to create a to do list and put things in order of what I would do next, but it just didn't work for me - strange as that sounds for the organised OTT person!  I think this is where my creative process comes into its own and all lists go out the window and the whimsical takes over.

Next...
And then it's a step to the right ... hoping over to Sew Melodic.  Melody is a prolific sewer who always has a variety projects rolling off her sewing table.  She has this fantastic post on fit issues and how to adjust the flat pattern to remedy.  I love reading about her construction journey and she always has a pic of the inside of a garment (which I love btw).  Over to you Melody - can't wait to read :-)

With your hands on your hips ... a second hop is open for self-nomination.  If you would like to take part in the blog hop around the word and share your creative processes, please take this as your personal invitation to do so (this is total legit btw, cause Katie from Katiekadiddlehopper said so).  The way the blog hop works, is that you acknowledge your nominator, you answer the questions above (or similar if you want to change it up) and you nominate another one or two people to hop on ... a bit like passing the batten.  You get the picture.

I've really enjoyed reading about everyone's creative process and why they make what they do.  The sewing community is such a great place to be :-)

Happy sewing xx

Tuesday 23 September 2014

Lux fabric pattern hack = little red dress!

Warning:  before you read any further you might need to go get your sun glasses and put them on!

Why?  Because I've had a bit of a mono tone, near the black end of the colour scale, kinda obsession.  Just check this out for proof!  Then this happened ...

Untitled

Nope, no gradual introduction of colour over here - just jump right on in there a sew a red dress!

Well actually it's not just any read dress, it a beautifully soft wool crepe red dress.  And while the photos look bright the actual colour is more like a raspberry / ruby kinda mix.

Growing up as a kid I've got these memories of, what I now know to be, polyester crepe clothing.  I don't know what made me take a dislike to it, but it always made me shudder.  So whenever anyone mentioned crepe, I'm like, MEH!  But then the lovely MrsC said that I needed to go down to The Fabric Store and take a look at the lux wool crepe that they have in store in this really yummy raspberry.  Now if MrsC says that something is lux, then it must be - so off I went to the fabric shop ... I don't need to be told twice to go fabric shopping :-)

She wasn't wrong - this wool crepe is lux lux lux.  It's this stable woven that is light but malleable with this beautiful drape.  So you know I didn't just walk out of the shop with this one piece, oh no!  I bought some black and some beige - every colour they had actually!

Untitled

Just look how beautifully it falls :-)  Have you recognised the pattern yet?  I had this idea floating around in my head for a while, but just wasn't sure what fabric I wanted to use.  So when the wool crepe jumped into my life I knew that it was just right for this dress. 

Untitled

This is the Bill Jean Dress by Bluegingerdoll, which I'd made before here.  This dress looks super different after all the adjustments I made.  Here's the list:
  • the inner shoulder seam was lengthened to bring it closer to the neck.  The outer shoulder seam is original and creates this lovely wee cap.
  • extended the back upwards towards the neck to completely cover the back.  The original pattern has a scoop neck at the back.
  • changed the darts in the skirt back and front to be pleats with the top sewn so it still sits flat below my waist.
  • changed the shape of the skirt to an semi A-line shape, while maintaining the hip shaping of the pattern.
  • dropped the upper chest by 1/2".

Untitled

I really do like the bodice shape of the Bill Jean - the princes seams just seam to fall in all the right places.

What I'm not in love with are the armholes *face plant*.

Untitled

What I should have done, is raise the underarm by 1/2" when I lowered the upper chest.  And perhaps I should have considered reshaping the front and back armhole when I extended the shoulder seam in.  I did do a muslin before I cut into this beautiful fabric, and it looked okay, but I don't think I looked close enough - I was busy looking for where the waist fell and whether my bust was fitting into the princess seams where they should and that I was okay with the partially sewn pleats.

I'll feel a lot less self-conscious with a wee cardi thrown over top ... there better already :-)

I lined this with some acetate that feels like silk rather than the usual slippery acetate stuff.  I didn't really plan the lining and just grabbed something from the stash, well actually the only light coloured stuff I had, which was this beige stripe - you can see it poking out of the back shot above.  It probably would have been better with something that had a little more weight, but oh hum it's done now!

DSCF7736 - Version 2

Usually I like to wear my stuff a few times before I blog about them, so I can reconsider my thoughts that I had when I finished it.  Cause I go through this love / hate relationship with every garment I make and don't really make up my mind until I've worn it.  But I haven't worn this dress at all yet, other than to take photos.  It's still too cold here to go without stockings and this dress is too light weight.

For now I'm looking forward to summer and getting to wear this one :-)

More photos on my Flickr -->

Saturday 6 September 2014

The Great WSBN sewing room tour

It's probably really well known around the sewing bloggers that the WSBN are always up to something either in real life or in cyberland - gee I can barely keep up with the FB Group we have!  But then one of our lovely members (Gemma at 66stitches.wordpress.com) suggested we should do a sewing room tour to get us out of our winter slump and ready for spring - oh yeah, who wouldn't want to do this! 

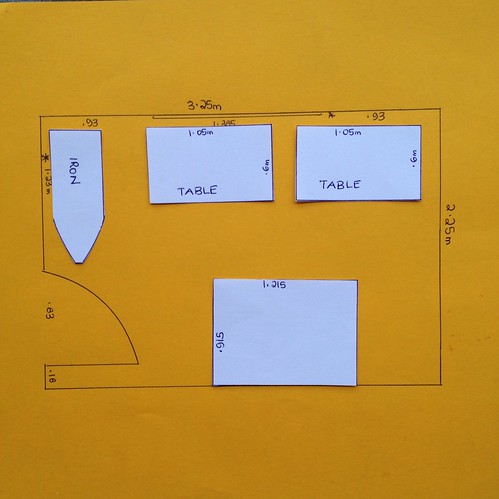
I think I've said before, that in March my eldest daughter moved to Australia which meant for the first time ever, I could have my own wee sewing room, and return the dining room to it's original purpose.  When I say wee, it is really wee compared to others I've seen on the WSBN sewing room tour.  Only 3.25m x 2.25m with a window on one long wall and the door on the short wall...
Sewing room plan

I started planning before my daughter had even left home (sad I know!), well this is what I had finally settled on.  I purchased the furniture second hand knowing the dimensions of the room were limiting - then they sat in the shed while I renovated the room.  Yep, I decided that if I was going to have a new sewing room then it needed to feel sparkly new.  Let me show you a picture of the pre-renovation room ...

Renovate sewing room
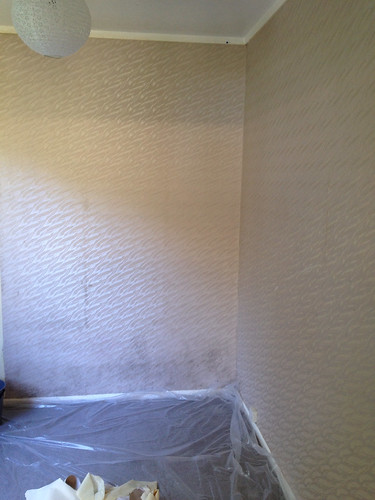
This is not pretty!  Not for a sewing room.
Well, I could write a detailed book about my first ever renovation project (which I did all by my little self), but I won't bore you with that detail, so let me just wave my little magic Cinderella wand ... abbra-ka-dabbra  *poof* ...
Sewing room
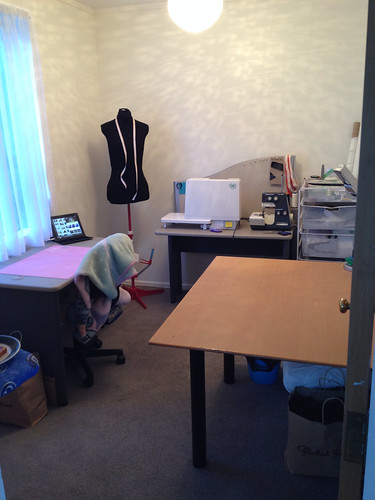
The prettiest little sewing room ever!
As you can see, it didn't go exactly accordingly to my original plans - I forgot to take into consideration the dress form (that doesn't have a name btw!) and the set of draws I inherited from daughter #2.  There is just enough room for me to scoot around on my re-purposed office chair (currently draped in a blanket, that I usually wrap around my legs, cause it's winter!).

Let's go around the room clockwise starting at the 9 - the ironing board is in the original location and you can see the blue end just in the photo, and just below that, the brown paper bag on the floor filled with fabric - I should be honest there is actually three bags, you just can't see them, hehehe!

Then at 10 is my hand work space with the ipad, cause I always like to watch things while I sew.  At 11 is my dress form, a Singer 150 which I bought a cover for - I don't think I could look at that bright red colour for too long.  I also like that I don't have to navigate the gaps when I'm using it.

At 12 are my sewing machines - my Janome DC6030 (purchased just 18 months ago) and overlocker Globelock M-4 which I inherited from my mother and had serviced.  It's okay but doesn't much like the sheer fabrics.  Next are the draws where I stash my patterns, muslins, interfacing, basket of threads, and the like.

Then at 3 you have my cutting table.  Yeah it's not very tall but I'm still trying to come up with a plan to elevate it more.  Then ... underneath the table are a few more bags spewing fabric!  Behind the door are my rolls of tracing paper, waxed tracing sheets and a roll of calico.

Day13 #mmmay14 today is lace dress day #Burda #sewcialist  Day27 #mmmay14 @victorypatterns #chloe dress and @papercutpatterns circle top  Day23 #memademay14 @cakeatwork #hummingbird tee and @papercutpatterns #Circletop and my fav RTW jeans #sewcialist
Most of my Me-Made-May photos where taken in this room

But sadly today I've moved out of my room so it can be converted back to a bedroom, and I'm taking up residence in the dining room again.  This time not on the dining room table!  I now have a corner of the room with all my furniture nicely arranged

15131208066_3903a32a5b
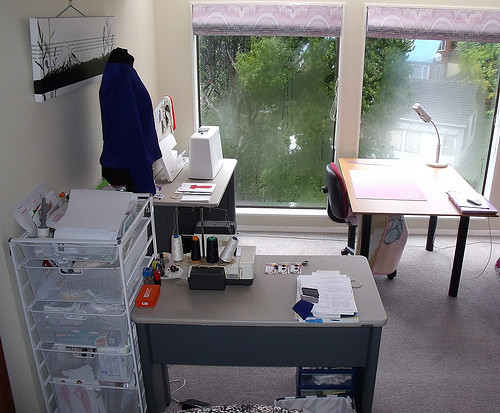
Today was a bit cold so the dehumidifier is still working on clearing the condensation!
Being back in the dining room I can be right in front of the fire in winter and get the best view in summer.  The light in the new space isn't that great at night but loads of natural light during the day.  It will be perfect now that we are heading into summer and daylight savings :-)

14967557380_a5c032d469

What you didn't see in previous photos was my wee set of draws with my scissors, zipper stash, elastics, trims and other bits and pieces.

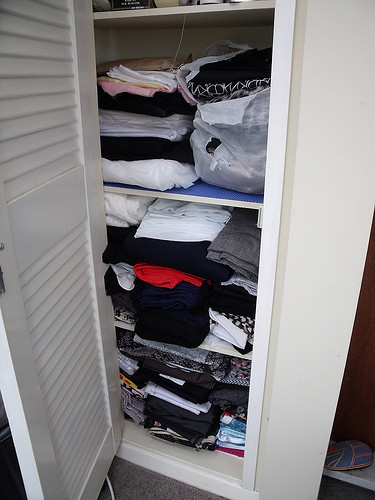
Where is her fabric stash I hear you say ... very valid question.  I never like to admit that I have a stash that keeps mutating, so it's hidden in a couple of places.  Here is cupboard one - originally the stash only took up two shelves in this cupboard (with room to breath); now it's stuffed into three!

14967662708_8b1f1225e9

Now let's take a walk downstairs and into my linen cupboards just outside the laundry ...

15154237425_4a44251bba

... hahaha you still cant' see any fabric.  Come on, a little hide-n-seek is always fun :-)  As you may have guessed those are all bags from The Fabric Store, cause that is seriously my favourite fabric shop!

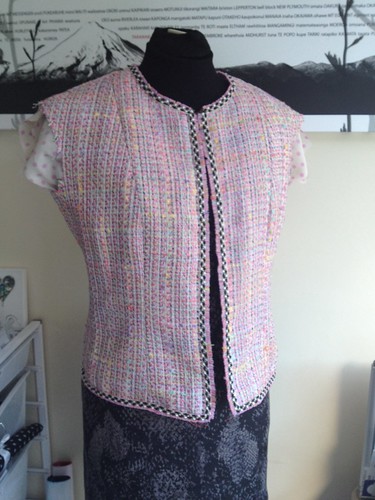
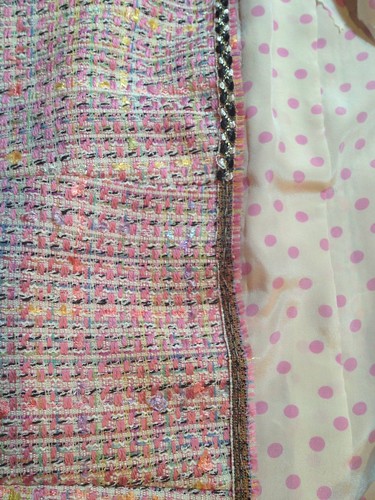
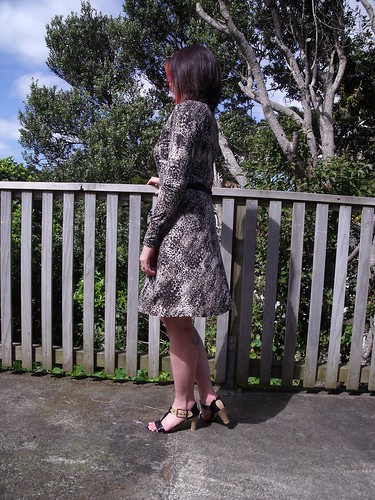
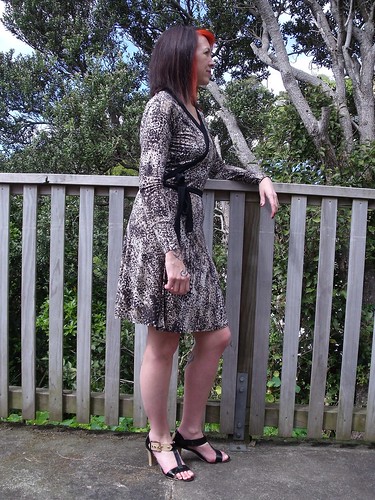
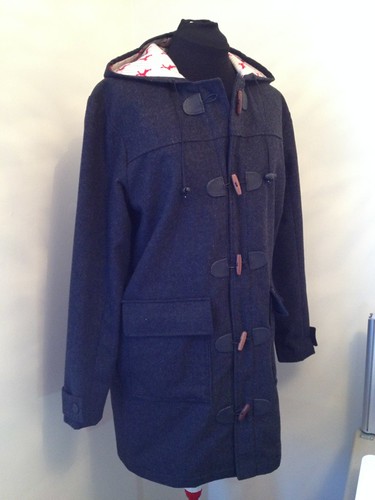
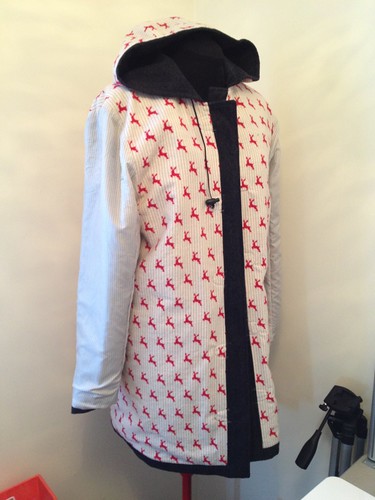
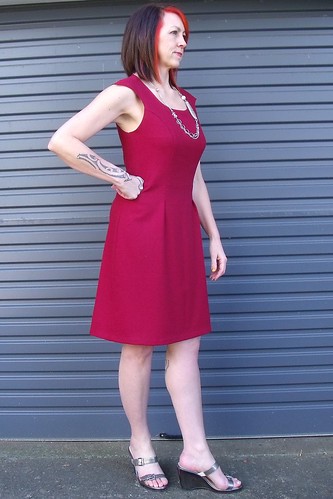
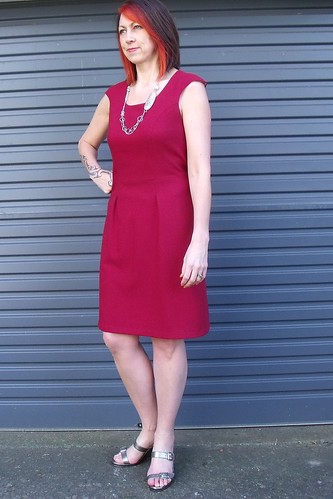
You also may have noticed that there isn't any work-in-progress.  Right now I'm trying to decide what to make next.  On my dress form is my recently finished Pavot jacket that is awaiting a decision on buttons - luckily Pavot is patient :-)

I've also just finished a Marfy top as a wearable muslin.  I'm tempted to make some changes and sew it all over again, but I don't feel like doing that right now.

I've just purchased the new Jenna Cardi and could make that up is this pretty merino, but I have to go to the office to print the PDF, and well that's not gonna happen today.
DSCF7800

I've got some beautiful wool crepe to make this Marfy dress, but I will need to go buy some lining appropriate for the fabric.  I also have another Marfy jacket that I want to make - but these are serious time consuming projects.
Sewing room plan
Then I want to make a Belcarra dress with this as inspiration, but will also need to make the slip dress underneath.

I have two Papercut Patterns that I'm keen to make a start on; the Coppelia wrap top from this pretty blue merino and some Ooh la Leggings from this shinny merino blend :-)

DSCF7799

Then I've got a master plan to sew a little something for the Pattern Review Frankenpattern contest, mainly because the contest master is Heather B, and morphing a couple of patterns together is always fun.  I'm undecided at the moment what exactly I'm gonna make.

So many options, so many decisions, so many patterns, so much fabric, I'm exhausted just thinking about it!  .... while sitting here looking out the window, at this little slice of heaven ...

15154240625_45b42689a5
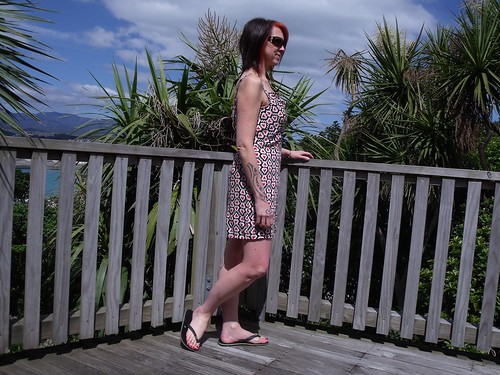
Today was rather overcast and the ocean a bit rough, but on a good day, it is beautiful.
... it has come to me, so gotta go, got some frankening to work out *mwahaahaa*

PS. If you're interested in more photos of my sewing room 'that was' and 'that is now', head on over to my Flickr -->

Edit note:  hopefully you can see all the photos in this post - I've had some trouble with Flickr goggling my images.  Please email me if you can see them and I'll try and fix again xx  

Edit note 2:  Full list of the WSBN Tour
1st: Gemma at 66 Stitches
2nd: Laura at Laulipopnz
4th: Nikki at NikkiStitches
5th: Juliet at Crazy Gypsy Chronicles
6th: Sandra at SewistStitch
7th: Sophie-Lee at Two Random Words
8th: Kat at Macskakat
9th: Holly at Polycraftual
10th: MaryLouise at Thanks I made this myself
11th: Nina at Ninavirgo
12th: Sandra at FlossieFT
13th: Melissa at The Curous Kiwi
14th: Zara at Off-Grid Chic
15th: Crafty Mermaid
16th: Gillian at Sewing Down Under
17th: Leimomi at The Dreamstress
18th: Teresa at Adventures of a Girl from the Naki
19th: Joy at Acharmofmagpies
20th: Nicola at Silvern Swan
21st: Jenna at Ruby Dust
22nd: MrsC from Sent from my iRon
22nd: Elisabeth