I don't know about you, but I have developed a habit of making everything twice! I haven't made any pattern more than twice, so I don't think I can say I have a TNT pattern, but I'm not sure what's up with this little ritual I have of putting everything in the wardrobe two by two???
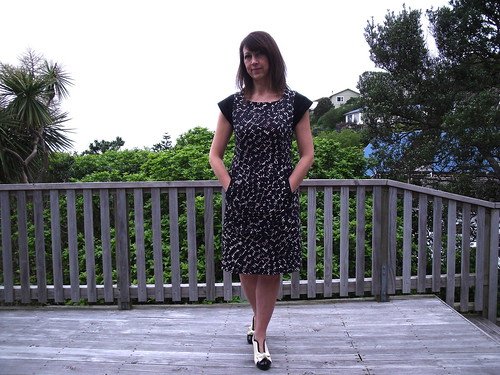
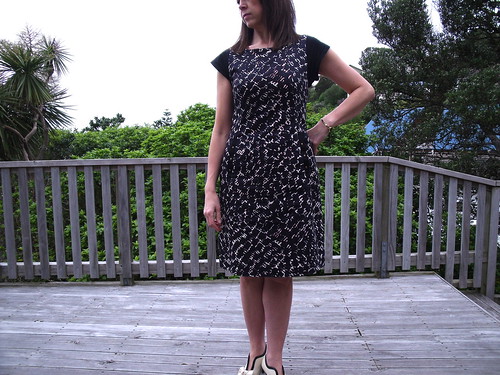
Yep, so this is version two of the Lola dress by Victory Patterns, which I made earlier here. On my first make (which I have only worn once) the shoulder/armseye area was a bit tight and while I really liked the dress it was uncomfortable to wear. This time 'round I made a size 6 for the top and bottom.
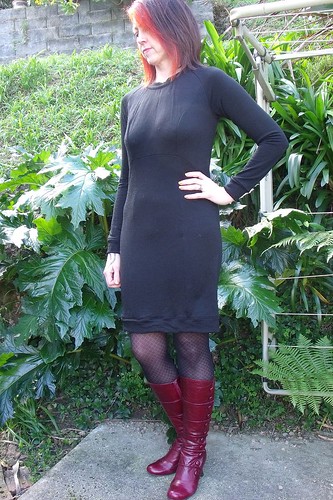
Here's the obvious ... I extended the sleeves to a long version, cause it's a winter dress, and omitted the side pockets. I made a couple of other preference adjustments: I added 2" to the length of the hem band, so it didn't pull the hem of the dress in to much and I lengthened the bodice at the high bust by 1/2".
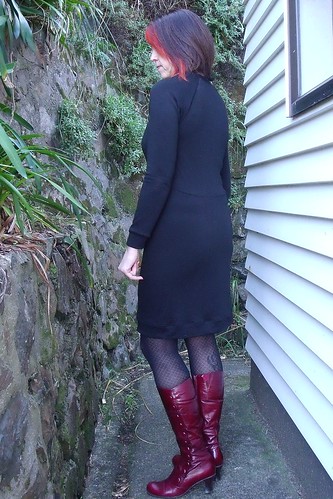
I finished this dress back in early August and have worn it loads over the last few months, changing it up each time with one of my jackets. It's perfect for winter work - a bit of a blank canvas!
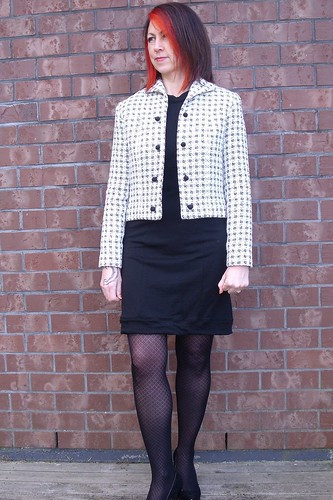
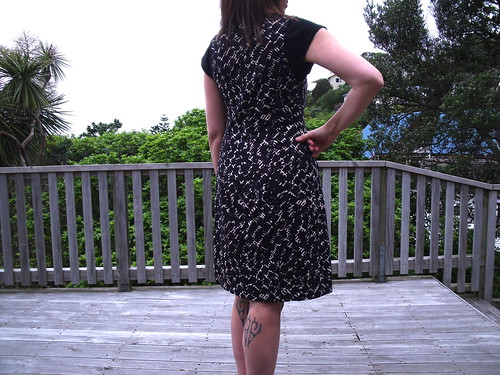
I did make a bit of a boo boo! Instead of putting the join in the band of the hem at the back of the dress, I ended up putting it smack bang in the middle of the front. Thank goodness that it's black, cause the only person that can see is probably me.
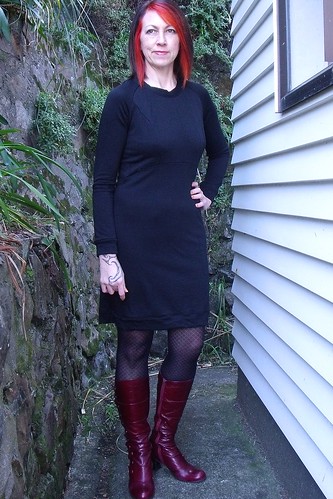
The fabric is a Merino/Nylon jersey knit blend that I picked up from The Fabric Store for $15p/m. It is a good weight for this dress and doesn't have a fluffy wrong side, which I quite like.
More photos on my Flickr -->
Showing posts with label Victory Patterns. Show all posts
Saturday, 1 November 2014
Sunday, 27 October 2013
Black Lace Ava
It would seem that I am in love with Victory Patterns at the moment ... first it was Lola, then Chloe 1 and Chloe 2 and now Ava.
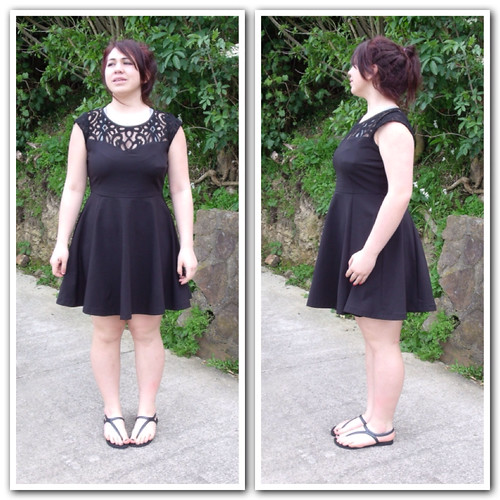
My daughter loves wearing dresses (yay!) and had worn the death out of a dress we had bought for Christmas last year. Ava is a very similar style and suits her hourglass figure like a glove. However, teenagers are so fickle that choosing the right fabric was real marathon but after a trip to The Fabric Warehouse we walked out with a medium weight polytester which had a really nice drape to it. The lace we had left over from a top I'd made for her back in May and that had already got the tick of approval.
I made up a muslin first to check fit, cutting out a size 12. A small list of adjustments were required, but nothing major:
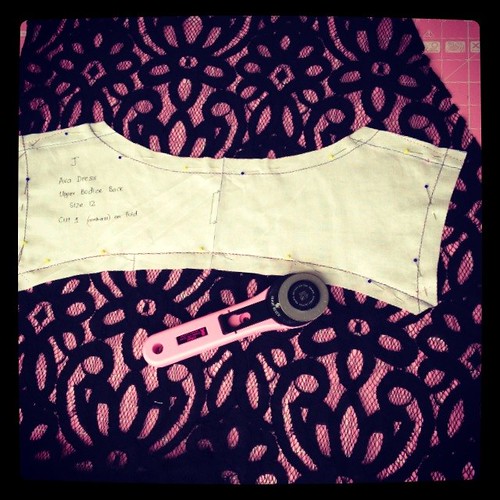
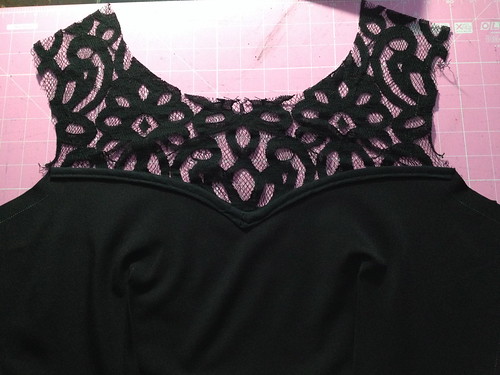
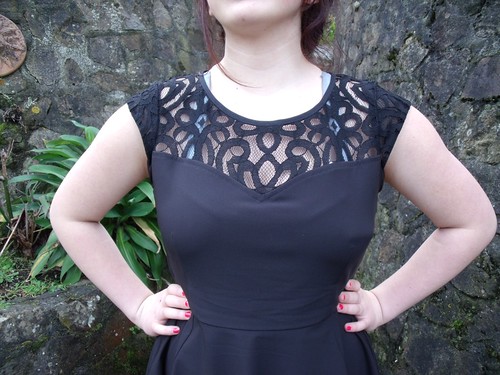
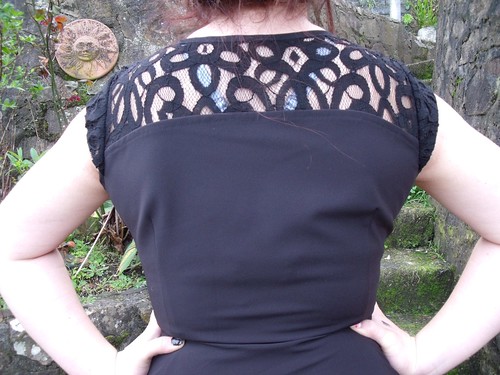
The dress is not lined, which is okay by her. The sweetheart neckline where the base fabric meets the lace is bound, as recommended by the pattern - that shit was fiddly, but I got there!
I underlined the sleeve caps with black chiffon from the stash, to provide them with a bit of stability. I basted the sleeve caps in before binding the sleeve opening. I bought some black cotton poplin and made my own bias binding for neck/sleeve openings and bound seems. The polyester was just too heavy for that purpose.
The side zipper was inserted by hand using a pick stitch. Oh how I love it!
Overall the dress is her all time new fav and got her first official outing to the Beyonce concert recently.
A few more photos on my Flickr -->
My daughter loves wearing dresses (yay!) and had worn the death out of a dress we had bought for Christmas last year. Ava is a very similar style and suits her hourglass figure like a glove. However, teenagers are so fickle that choosing the right fabric was real marathon but after a trip to The Fabric Warehouse we walked out with a medium weight polytester which had a really nice drape to it. The lace we had left over from a top I'd made for her back in May and that had already got the tick of approval.
I made up a muslin first to check fit, cutting out a size 12. A small list of adjustments were required, but nothing major:
- Lengthened bodice by 1.5".
- Moved shoulder seam back by 6/8" at neckline and 3/8" at shoulder seam.
- Removed 1/2" from each side seam under the arm and tapered to the existing side seam at waist.
The dress is not lined, which is okay by her. The sweetheart neckline where the base fabric meets the lace is bound, as recommended by the pattern - that shit was fiddly, but I got there!
I underlined the sleeve caps with black chiffon from the stash, to provide them with a bit of stability. I basted the sleeve caps in before binding the sleeve opening. I bought some black cotton poplin and made my own bias binding for neck/sleeve openings and bound seems. The polyester was just too heavy for that purpose.
The side zipper was inserted by hand using a pick stitch. Oh how I love it!
Overall the dress is her all time new fav and got her first official outing to the Beyonce concert recently.
A few more photos on my Flickr -->
Saturday, 19 October 2013
Cotton Chloe
Cotton Chloe comes very hot on the heals of my first make
I wasn't intending to make another Chloe so quickly but .... I was in the Fabric Warehouse getting some cotton lining for my super cool geek fabric and spotted this cotton black/purple/cream fabric and just couldn't put it down. I had very good intentions of only walking out with what I had come for - but my will power just wasn't that great.
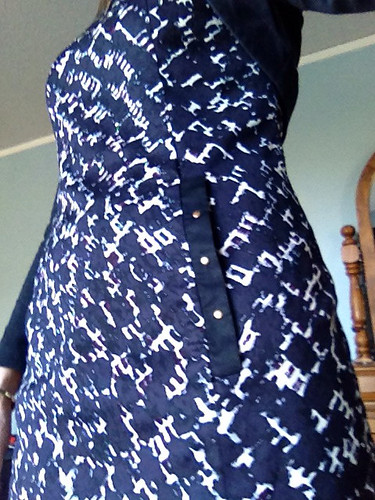
Before I even got out of the shop I knew that this fabric would be sewn up into another Chloe. I didn't make any changes to the dress itself. The sleeves on the other hand I thought I would remove the excess fabric from the underarm seam. On the first dress I took out 5/8" from the front side panel and back side panel but didn't remove the equivalent from the sleeve seam.
But that was a complete fail and the sleeves were too tight. This was a real shit because I had already hand sewn the lining to the dress around the sleeve seam. On the bright side I hadn't overlocked the raw edge of the sleeve seam, because I had tucked it into the dress before attaching the lining. Just as well I had plenty of the black cotton fabric in my stash, although I hate having to redo things! I should so have learnt my lesson with sleeves by now - obviously Not!
Oh I just about forgot, I also lengthen the hem of the dress 2" more than the pattern. Two reasons:
1. I wanted a deeper hem on this dress than my first which was only 1"
2. I wanted the dress to be about 1" longer than my first.
Yay for a deeper hem but I'm not sure that I really like the length, perhaps just a bit too long for the style? OR maybe it just seem like a lot of print?
Too finish I put wee studs on the pocket tabs. I didn't put any up near the neckline as the pattern suggests as I think they are too small and will get lost against the pattern and I think a nice necklace will be better.
I'm sure this won't be the last Chloe I make either. With summer coming on I think a sleeveless version in a nice light fabric might be in order!
More photos on my Flickr -->
I wasn't intending to make another Chloe so quickly but .... I was in the Fabric Warehouse getting some cotton lining for my super cool geek fabric and spotted this cotton black/purple/cream fabric and just couldn't put it down. I had very good intentions of only walking out with what I had come for - but my will power just wasn't that great.
Before I even got out of the shop I knew that this fabric would be sewn up into another Chloe. I didn't make any changes to the dress itself. The sleeves on the other hand I thought I would remove the excess fabric from the underarm seam. On the first dress I took out 5/8" from the front side panel and back side panel but didn't remove the equivalent from the sleeve seam.
But that was a complete fail and the sleeves were too tight. This was a real shit because I had already hand sewn the lining to the dress around the sleeve seam. On the bright side I hadn't overlocked the raw edge of the sleeve seam, because I had tucked it into the dress before attaching the lining. Just as well I had plenty of the black cotton fabric in my stash, although I hate having to redo things! I should so have learnt my lesson with sleeves by now - obviously Not!
Oh I just about forgot, I also lengthen the hem of the dress 2" more than the pattern. Two reasons:
1. I wanted a deeper hem on this dress than my first which was only 1"
2. I wanted the dress to be about 1" longer than my first.
Yay for a deeper hem but I'm not sure that I really like the length, perhaps just a bit too long for the style? OR maybe it just seem like a lot of print?
Too finish I put wee studs on the pocket tabs. I didn't put any up near the neckline as the pattern suggests as I think they are too small and will get lost against the pattern and I think a nice necklace will be better.
I'm sure this won't be the last Chloe I make either. With summer coming on I think a sleeveless version in a nice light fabric might be in order!
More photos on my Flickr -->
Saturday, 14 September 2013
Hello Chloe
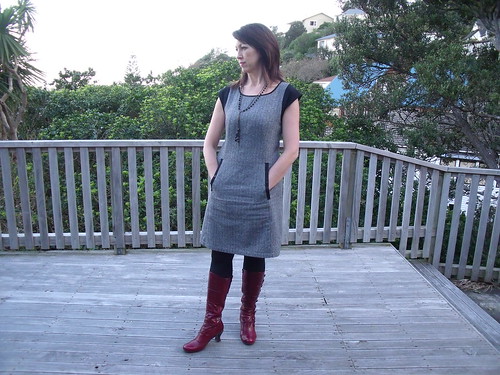
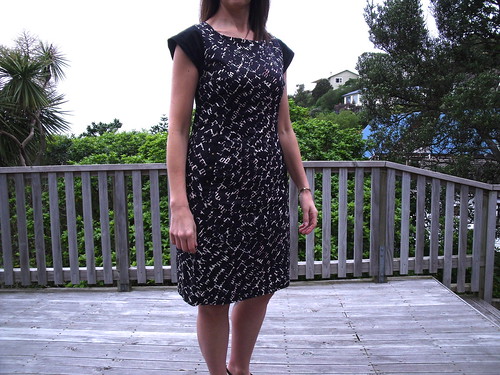
Chloe is a semi-fitted, mid length A-line dress that hints towards a 60's mod style - a pattern by Canadian company Victory Patterns. I purchased the pattern from Dresses and Me together with the Lola pattern - you can read about my Lola here.
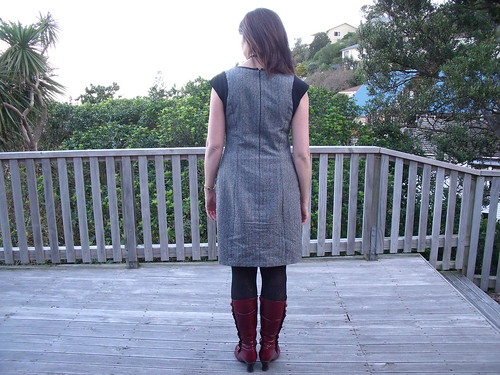
I really like the capped sleeve and contrast effect of version 2 and I chose a wool with a very fine red pinstripe which runs vertically.
I know this is really boring but I selected to contrast with a solid black cotton. It goes really nicely with my red circle top. Or on this day it was my black circle top and red boots.
I chose to make a size 8, knowing that on my muslin I would have to downsize the bust and increase the hip area. Here is exactly what I did to the pattern, after taking the dress off and on about eight times!
Side back piece: widen the hips by 3/8" at the side seam; take out 5/8" from the side seam at the armpit; to keep the side seam perpendicular to the floor I had to take 5/8" out of the bottom of the skirt at the side seam.
Centre back piece: widen the hip 1/4".
Side front piece: bring in by 5/8" under the arm on side seam; widen hips 3/8" on side seam; adjust the curve of the princess seam around the bust by straightening the curve above the bust by 1/8" and creating more of a curve underneath the bust by 1/4".
I absolutely love this dress and have worn it every week since I made it, which was about 3 weeks ago but a full on work schedule and then the nasty flu bugs all got in the way of taking some photos. I have since made a second Chloe - photos of that one yet to come.
More photos on my Flickr -->
Labels:
Chloe,
Dress,
Indie Pattern,
pinstripe,
Victory Patterns,
wool
Location:
New Zealand
Sunday, 11 August 2013
Sweet Lola
Lola, la-la-la-la-la-la Lola - come you you can't help but sing along! Don't tell me you don't know that song?!
Okay, okay I've finished singing now. Let me talk about the Lola dress by Victory Patterns. The dress is described as a comfortable slip on dress with raglan sleeves, ribbed hem bands, front neckline “V” detail, and oversized wrap around pockets.
I prefer to have a more fitted look so considered carefully the sizing. I went with a size 4 for the top and a size 6 for the skirt. I must say the sizing chart was spot on! I like how the size of the finished garment is shown directly under the body measurement chart.
I really like the fit of the bust area, but I feel like the shoulder/sleeves could do with a bit more ease.
I was thinking about this on my drive home from work and had a bit of an epiphany! SBA (small bust adjustment)!! I still need to have the room for my shoulders, which I'll say are normal (haha, as if there is such a word). If the shoulders fit, the bust is swimming - if the bust fits the shoulders are always too small, which is all good if the garment is sleeveless. Now to Google SBA and get my method sussed.
Back to my Lola! I don't often visit Spotlight, other then to buy haberdashery when I'm on that side of town. I got side-tracked on my last visit and found some double knit jersey for just $10 p/m - it's more like a ponti than a sweat-shirting. The weight of the fabric is perfect for the Lola the blue was irresistible, but the ribbing choice was a different story. In the end I decided that I could use the same fabric for the bands a the dress. I am really happy with how that turned out.
My favourite feature about this dress is the wrap-around pockets. This is because there is no side seam to faf around with, 'cause next to my SBA I always have to faf with the hip shape.
This Lola is dressy enough that I can wear it to work - I omitted the neck "V" so it doesn't have that casual look. I definitely plan on making another one that is more casual, a looser fit that can be worn over jeans - that one can have the wee neck "V" included.
Everyone needs a Lola for sure!
Okay, okay I've finished singing now. Let me talk about the Lola dress by Victory Patterns. The dress is described as a comfortable slip on dress with raglan sleeves, ribbed hem bands, front neckline “V” detail, and oversized wrap around pockets.
I prefer to have a more fitted look so considered carefully the sizing. I went with a size 4 for the top and a size 6 for the skirt. I must say the sizing chart was spot on! I like how the size of the finished garment is shown directly under the body measurement chart.
I really like the fit of the bust area, but I feel like the shoulder/sleeves could do with a bit more ease.
I was thinking about this on my drive home from work and had a bit of an epiphany! SBA (small bust adjustment)!! I still need to have the room for my shoulders, which I'll say are normal (haha, as if there is such a word). If the shoulders fit, the bust is swimming - if the bust fits the shoulders are always too small, which is all good if the garment is sleeveless. Now to Google SBA and get my method sussed.
Back to my Lola! I don't often visit Spotlight, other then to buy haberdashery when I'm on that side of town. I got side-tracked on my last visit and found some double knit jersey for just $10 p/m - it's more like a ponti than a sweat-shirting. The weight of the fabric is perfect for the Lola the blue was irresistible, but the ribbing choice was a different story. In the end I decided that I could use the same fabric for the bands a the dress. I am really happy with how that turned out.
My favourite feature about this dress is the wrap-around pockets. This is because there is no side seam to faf around with, 'cause next to my SBA I always have to faf with the hip shape.
This Lola is dressy enough that I can wear it to work - I omitted the neck "V" so it doesn't have that casual look. I definitely plan on making another one that is more casual, a looser fit that can be worn over jeans - that one can have the wee neck "V" included.
Everyone needs a Lola for sure!
Subscribe to:
Posts (Atom)