Showing posts with label Dress. Show all posts

Friday, 17 March 2017

Pink Floral Sweetheart

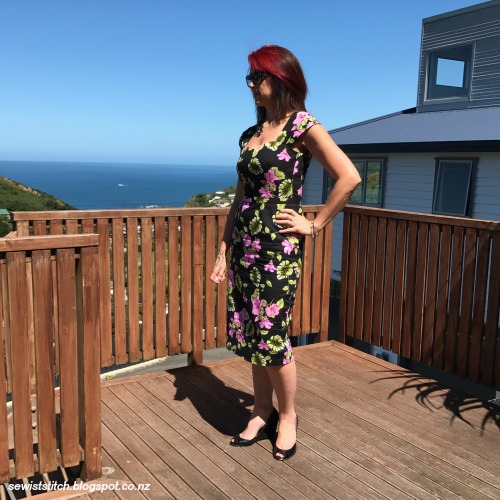
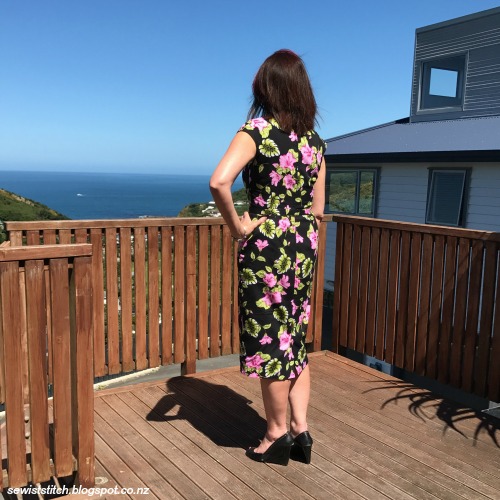
Pink Floral Dress

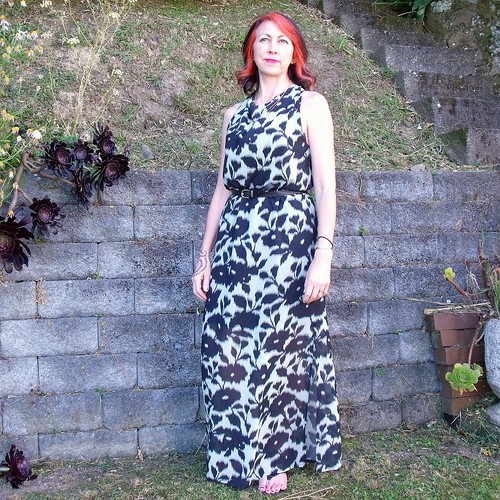
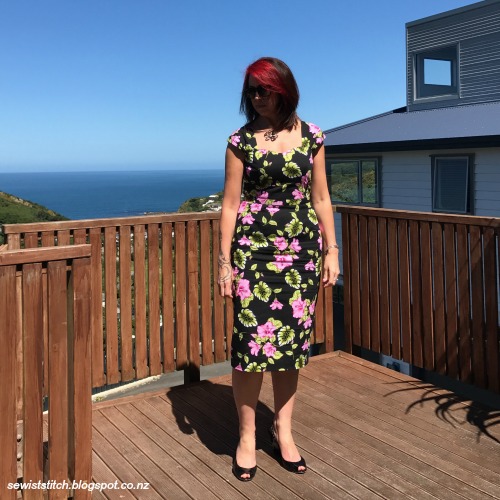
This dress was fun but challenging at the same time. First the fun ... I found this fabric by accident while on holiday in Rarotonga earlier this year, and immediately knew it would make a lovely summer dress while still keeping within my wardrobe comfort zone ... because it was black? probably!

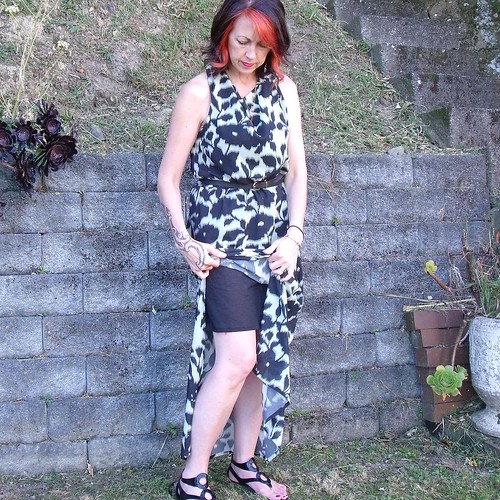
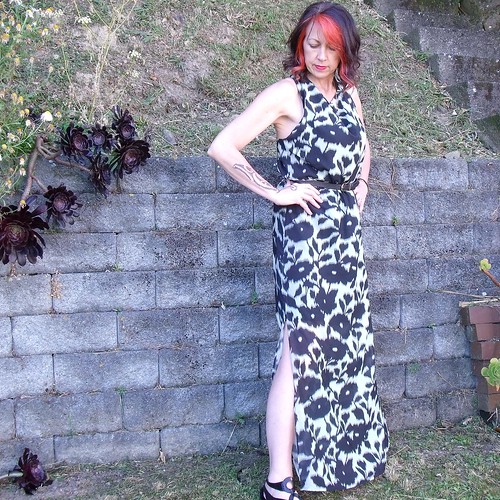
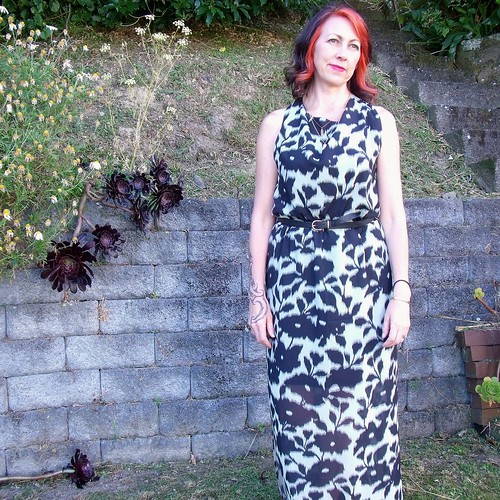
The challenge ... to mash together two separate patterns into one dress that looked like it was meant to be. The top is the Sewaholic Cambie pattern and the bottom is the Billy Jean pattern by Bluegingerdoll.  Both dresses I've made before quite a while ago, and well, the body has changed a little since then.


Then came the cheating ... in theory, the side seams and dart legs of the top are meant to be in the same vertical line as the skirt, right?! Hmm, did I really need to fluff with getting that right if the skirt and top are separated by a waist band and the floral print would act as a camouflage ... NO! Can you tell? NO!  #winning

Pink Floral Dress

Pink Floral Dress

With this dress I experimented a bit with the underlining. I took my silk organsa and underlined all the front pieces and the top half of all the skirt pieces.

A couple of reasons really.  I didn't want the dress to be too heavy but I did want the front to have some structure. The top half of the skirt needed to fall over my hips without showing every curve but the bottom half really didn't need it. Unfortunately I can't find any of my 'work in progress' photos to share with you :(

The dress is also fully lined, but with separate fabrics for the top and bottom.  The top half is lined with some silk crepe de chine from The Fabric Store. Something I bought a wee while ago at a good price because of colour inconsistency. No one gets to see the lining, so not a problem. The skirt is lined with some 'new to me' lining from Hawes and Freer Ltd, from their Superwash range. It is heavier than the crepe de chine which helps give another layer of fabric over the hips and butt and helps the skirt fall really nicely. It skims over the body and moves so nicely, but doesn't look bulky, and so far no static! I think I'm sold on this as a lining for skirts!

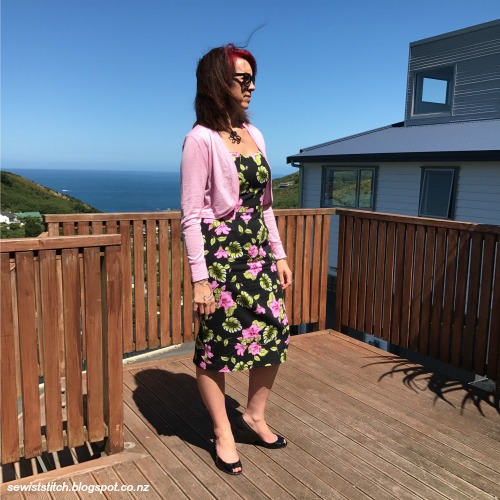
To finish the look I picked up some baby pink merino from Levana and whiped up this cute little bolero.

Pink Floral Dress


More photos in my Flickr album -->

Monday, 30 January 2017

Shirt Dress with Butterick Retro

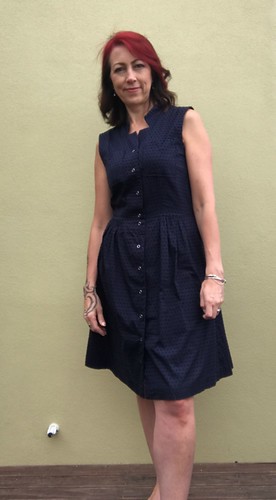
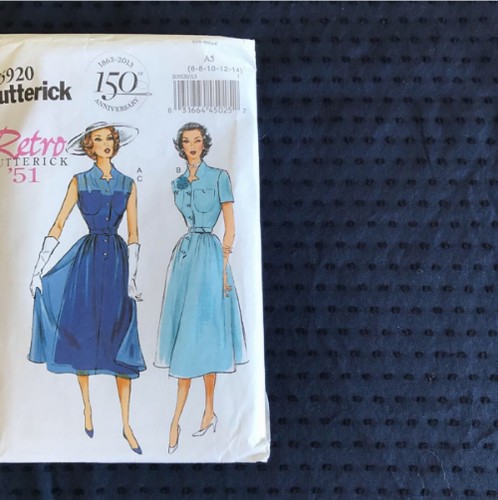
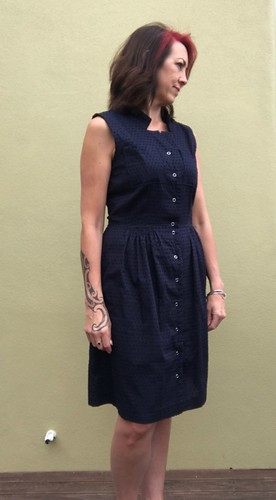
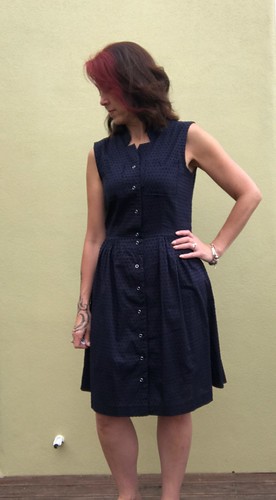
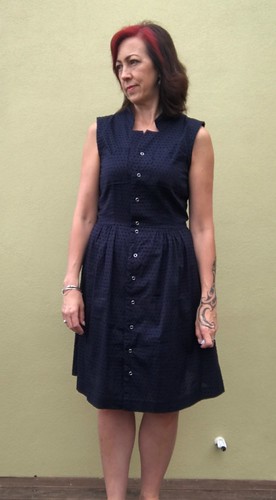
Shirt Dress B5920

B5920 was calling my name again ... it appears that I hadn't finished with it, despite having made it twice before.

Shirt Dress B5920


My first make was exactly to pattern version A. I never wore this dress! The second involved a few alterations to convert it to a maxi with a full length placket, which I wear regularly.

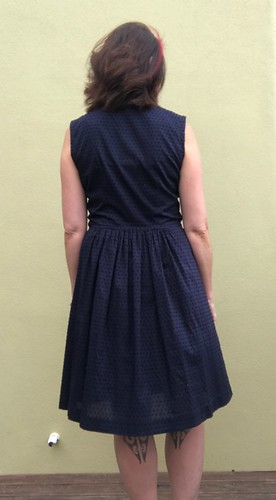
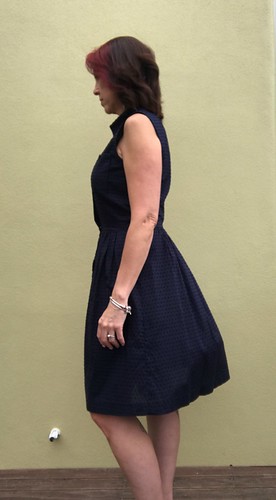
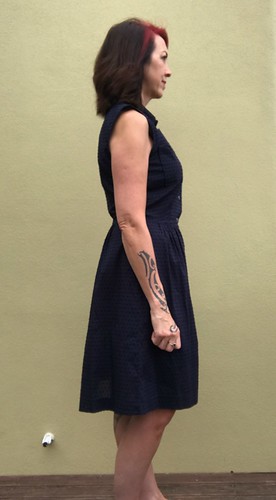
For this latest make I kept the skirt back alteration I made for the maxi version - I much prefer how this falls and is in keeping with the front gathers.

Shirt Dress B5920 Shirt Dress B5920

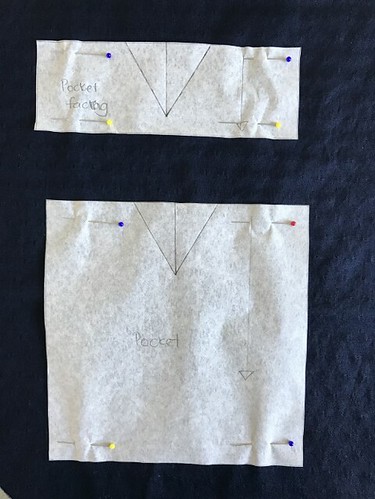
I changed up the pockets this time, and made them square at the bottom rather than rounded, for a more modern shirt look.  I am so in love with the neckline and notches I had to keep the notches on the pocket.

Shirt Dress B5920

This skirt pattern length I cut at 25" and turned up a hem of 1.5". It sits perfectly just above my knee.

The fabric is 100% cotton, 'flocked' is what was on the label, from The Fabric Store during their recent VIP 40% sale. And yes, I bought and sewed this fabric all in the same month!  The dress is unlined and will require a slip to be worn underneath.

Not a lot more to say so will just leave you with some photos.

Shirt Dress B5920 Shirt Dress B5920

Go on, you know you wanna make one now .... :-)

Saturday, 14 January 2017

Floral, Beach, Summer, Holiday ...

Happy New Year!  Hope you all ate yummy food 'til your heart was content. I know I did.

I'm looking forward to what 2017 brings, which must be much better than 2016.  I started last year sick and missed the wedding of my very good friend and I ended the year sick, for three weeks if you please!  In between that it was just a big pile of life stuff that I didn't enjoy at all.  By default the blog went into hibernation.

Life is settled again and I begun this year in Rarotonga celebrating my eldest 21st birthday on new year's eve.  Being on holiday called for drink lots of tropical cocktails


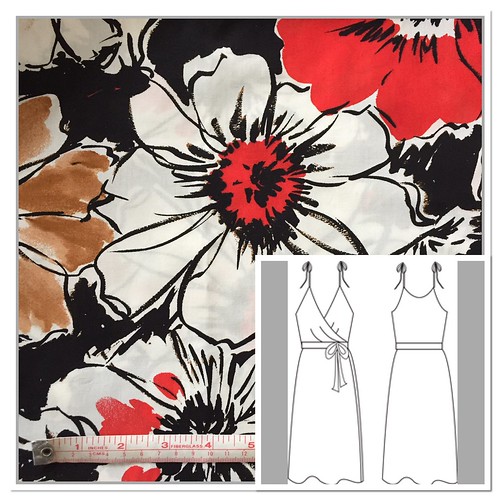
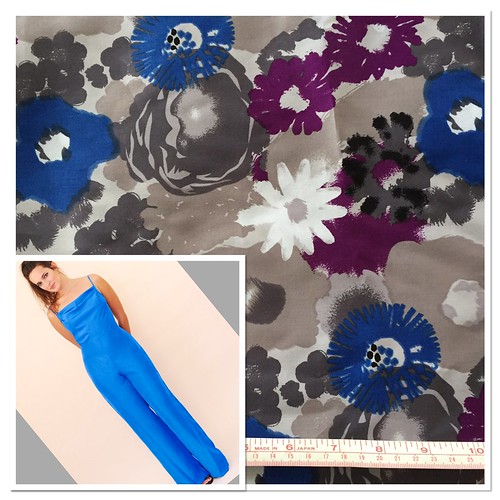
I had hoped to get a full holiday wardrobe sewn, but work demands and being sick meant that those plans fell apart.  I did get to finish two pieces, so all wasn't lost.  If you follow me on Instagram you would have already seen these plans.  You will also know that both these fabrics a quite different, really bold, compared to my usual choice of fabric.  But hey, it's a tropical holiday!
Holiday sewing

Holiday sewing

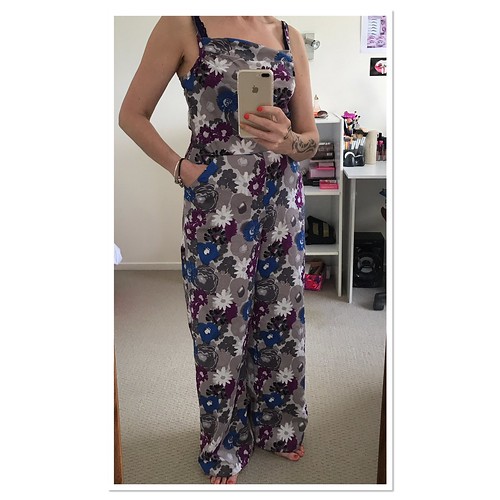
The Holly Jumpsuit I had made before with a short leg. I really wasn't sure about the wide leg pants in this floral, but Sewbusylizzy said that I should image that it's the same as a maxi dress, which instantly removed any doubts I had.

I really wanted to have pockets, so I drafted some pockets using the Moss Mini pattern as a guideline for the angle and where they should sit in relation to the waist and side seams.   They are perfect!

Holiday sewing

Although I've worn this jumpsuit a few times (including Christmas Day), I haven't taken the opportunity to get some good photos:-(  For now it's this mirror selfie, but you get the picture - great fit, pockets and I love the full length pants.

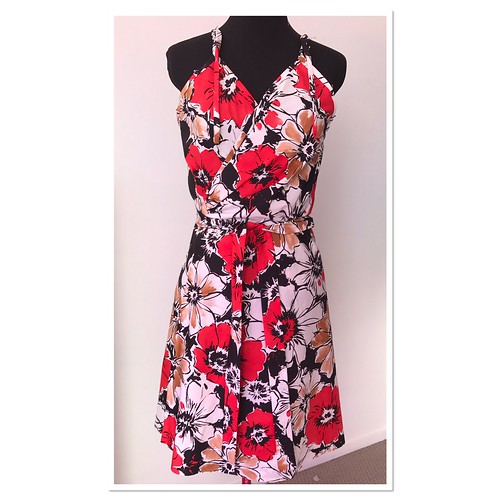
My feelings about the holiday dress are a little different.  This is the Mid Summer Nights Dream wrap dress by Papercut Patterns.  I am a Papercut fangirl, and I've had this pattern in the stash for a few years now.  When I finished the dress and hung it on the dress form I was in love.

Holiday sewing

But then when I tried it on, the side fronts forward of the armpit were gaping, like really gaping! You can get a glimpse of this in the above picture.  This meant I had to unpick the binding and insert a downward dart. Luck the fabric is so busy and the gathers whether the bodice meets the ties disguises everything. I also find that the shoulder straps are too close of the neck.  Otherwise it fits and is really comfy to wear.  I am totally in love with the fabric now it is wearable.

How was your Christmas/New Year holiday?


Sunday, 13 March 2016

Fluttering Around

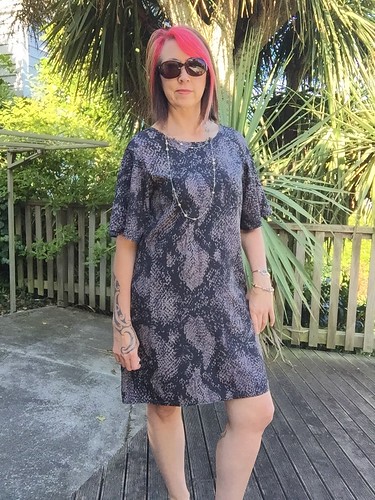
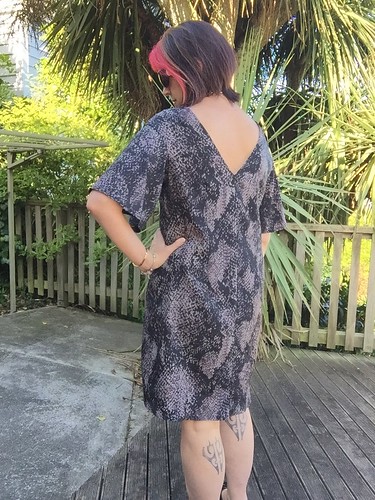
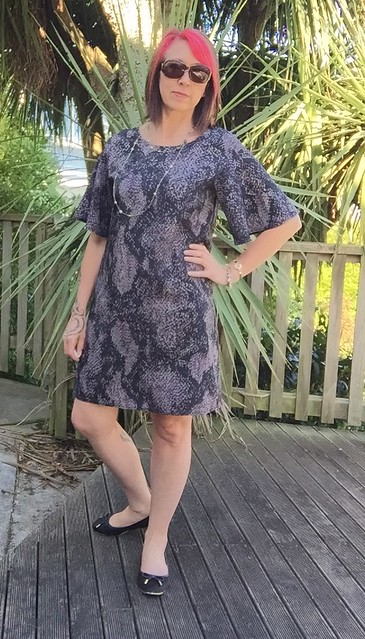
Kia ora!  Oh my gosh how did it get to be March already! Best I get a wiggle on then and tell you about my first make for 2016.  Introducing my flutter dress....

Flutter Dress


To be honest I had to see a few of these on the blogisphere before I went ahead and purchased the pattern. I am a Papercut fan girl and this pattern did not disappoint.

Flutter Dress

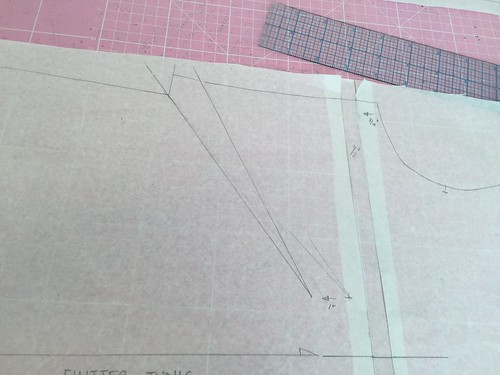
I knew I wanted to make a dress version rather than the tunic (oh but I have made one of those as well - more on that later). This required a few adjustments - here's what I did:
  • Lengthen the front and back pattern pieces by 3", where the pattern recommends
  • Below the armpit I lengthen the front and back pieces by a further 1/2", to lower the dart point
  • I lowered the dart point by a further 1" and redrew the dart legs - so the apex was lowered by a total of 1 1/2"
Flutter Dress
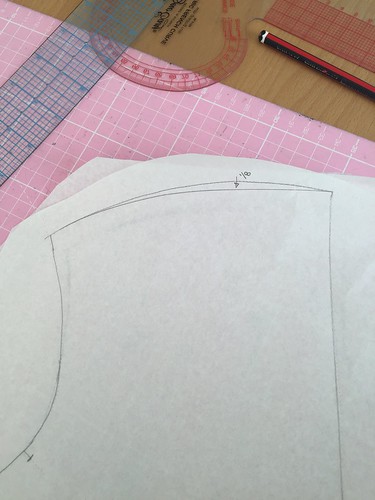
  • I removed 1/8" from the top of the shoulder - I have more of a square shoulder
Flutter Dress
  • I inserted darts into the back to provide some shaping
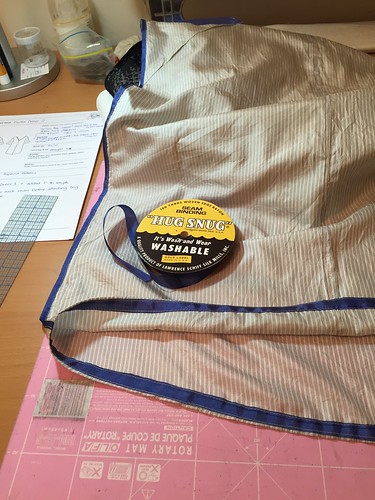
I love a lined dress so much that I couldn't not insert a lining into this one.  The fabric is a poly crepe and could even have some nylon in it, which would lead to the dress sticking to my body all over - arrrrgh!  I used some light-weight acetate from the stash and used the delightful Hug Snug to finish all the seam allowances and the hem - man I love that stuff :-)

Flutter Dress

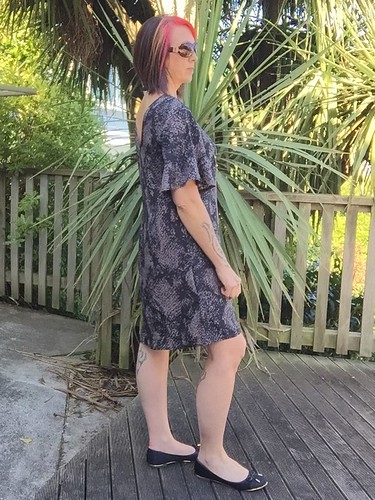
The fabric falls so beautifully with the full lining, and the sleeves ... what can I say, they just add that special touch to what is a pretty simple dress.

Flutter Dress

Flutter Dress

I am totally in love with this dress and have worn it constantly this summer.

More photos on my Flickr -->


Saturday, 3 October 2015

The Adventures of B5882 (Part 1)

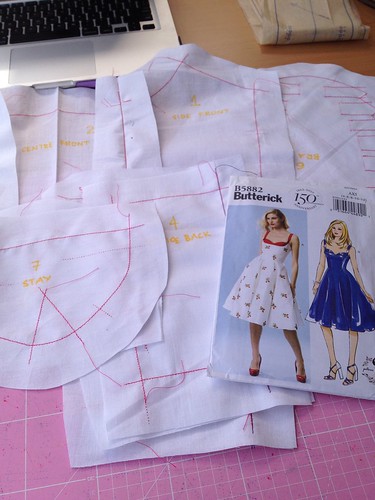
A wee interweb search of B5882 will quickly reveal the challenges that this pattern has provided - but who doesn't like a challenge right!  However, I didn't realise this until after I had committed to making two of them for daughter #1.

B5882 B5882

As always I started with a muslin anyway, so no biggie, I would just work out all the fit issues at that stage and then enjoy the construction.

B5882

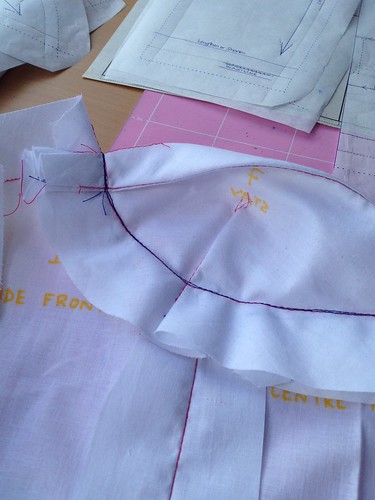
I started by cutting out a size 12, but reduced seam allowances down to 3/8" rather than the recommend 5/8".  It all went together pretty well, except for where the cup hit the top of the side front. The pattern says "turn down upper end of bra along fold line, as shown, baste."  The picture below mimics what the pattern illustration shows - but how bloody weird is that!

B5882

So I pretty much ignored that part of the instructions - although in truth I only used the instructions as a general guide rather than following them step by step.  So rather than turning the bra/cup under I extended the side front up to the top of the bra/cup - as you can see in the photo below, the red line was the original stitch line.

B5882

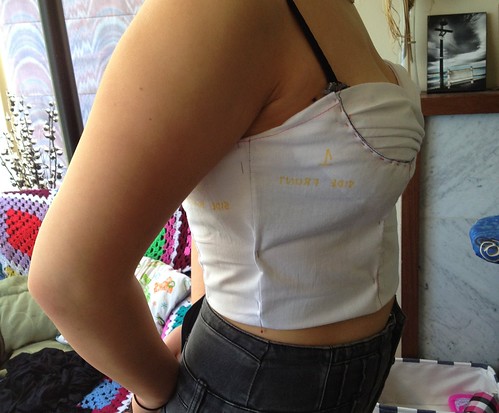
Actually the lifting of the side front to meet the top of the bra/cup side gives a much better look, and snugs up under the arm for a better fit as well.

B5882

I had to make a bunch of adjustments to the front pieces to get better portions and have the princess seams hit the apex, as they should.

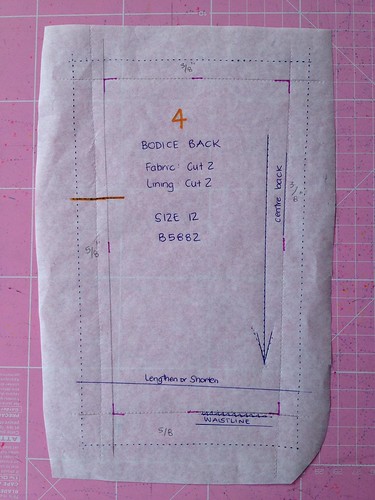
Please note that I always work with the stitching line rather than the cutting line of a pattern - for all these adjustments I've identified the stitch line by working from the cut line. So the blue dotted line is the cutting line of the original pattern (size 12) and the pencil/pink pen indicate the stitching line that I will be sewing along (sorry if this is a bit confusing - it all made perfect sense at the time!)

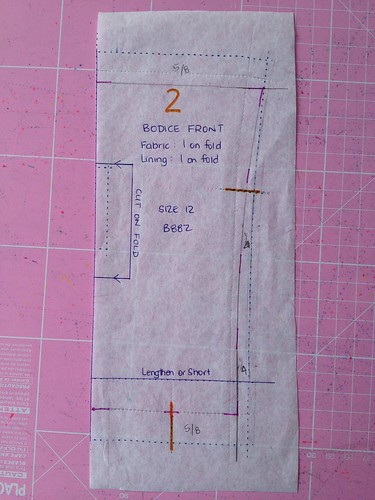
Let's start with the centre front ...

B5882
  • The stitch line for the top and bottom are 5/8" in from the cut line.
  • Only came in 1/4" from the cut line at the bottom and curved it up to the existing cut line at the top - meaning that I had to add a full 5/8" to the top. This resulted in moving the princess seam out towards the armhole, to be more in line with the apex.
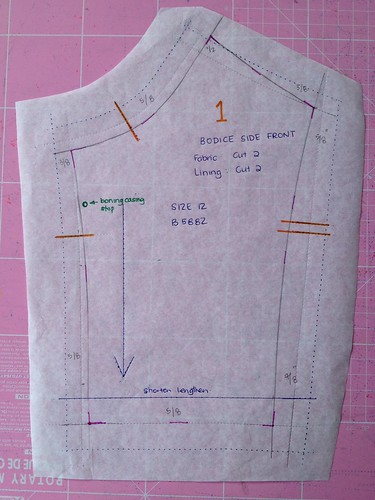
Next the side front ...
B5882
  • Added the 1/2" to the top side of the bra/cup, from the previous stitch line.
  • Reworked the side seam by adjusting where the stitch line would be from the original cut line - at the top of the side seam I allowed for a 5/8" seam allowance and at the bottom is moved the stitch line in by 7/8".
  • Reworked the princess seam to also have a 3/8" seam allowance at the apex end and a 5/8" seam allowance at the bottom.
The side back also needed quite a bit of adjusting at the side seam ...

B5882
  • reworked the side seam so the stitch line would be in 5/8" from the cut line at the top and 7/8" at the bottom.  
  • The back princess seam stitch line would also be 5/8" in from the cut line.
  • The bottom would be same as the front with 5/8" seam allowance and 3/8" at top.
The centre back pattern piece also had to have the seam allowances adjusted.

B5882

  • The princess seam stitch line would come in 5/8" form the cut line
  • The centre back would only come in 3/8" from the cut line
Once all the stitch lines for each piece were identified I was away!

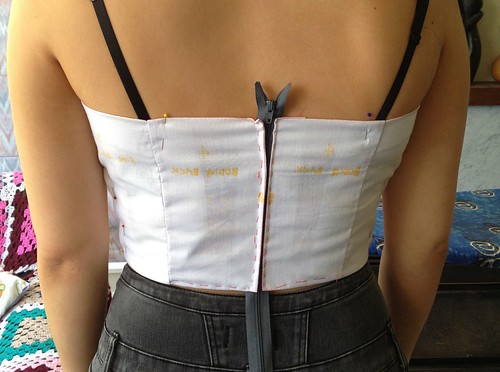
After the adjustments the back was a much better fit and the straps that would be attached at the princess seam mark pretty much fell in line with bra straps. Yay!
B5882

All adjustments done and muslin fitting nicely it was time to start with the real fabric :-)  I started with the red and white version first.  The outer shell fabric was a cotton voile that required an interfacing as well as the lining.  The interlining and the lining would be the same fabric - a cotton lycra in an off-white.  This is the same fabric that we'd planned to the be contrast colour for the second dress.

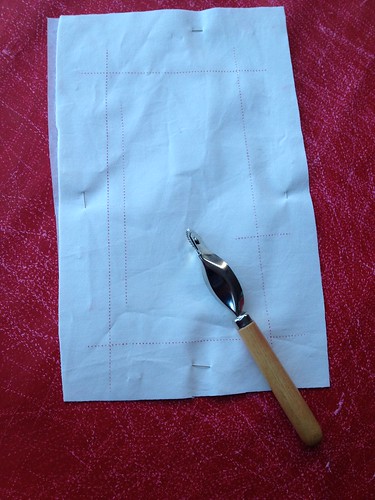
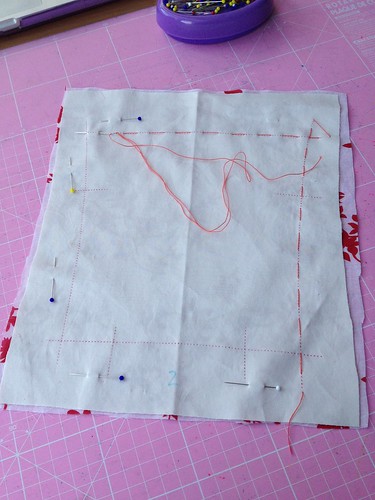
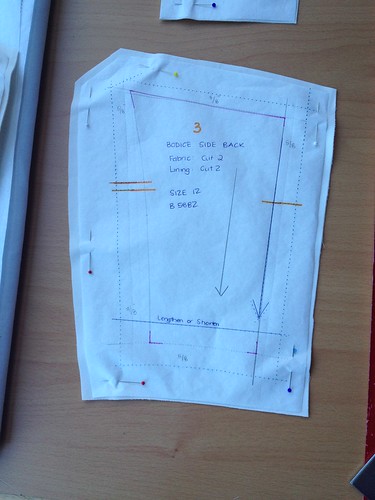
I pinned each pattern piece to the interlining and traced off the STITCH LINE, and the grainline plus all notches.  All these trace marks would end up on the inside, hidden by the lining, so it didn't matter that I did this with red tracing paper.

B5882

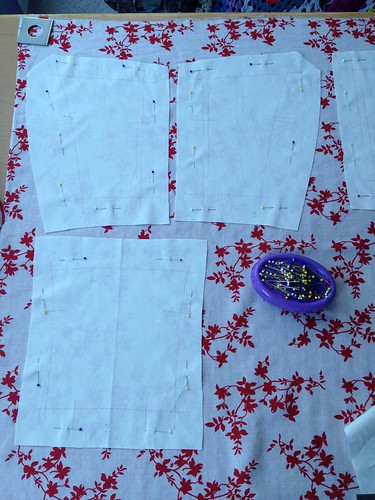
I cut the outer shell fabric in a single layer, as the outer layer and the interfacing would all be hand basted together.

B5882

B5882

With the construction - the basted line on each pattern piece is where the two pieces will be sewn together. For me this provides a much more accurate fit in the end and is well worth all the additional work.  As you can see the seam allowances are big and random, they really no longer matter.

Well I think that's enough reading for one post - I'll continue on in my next with the construction, where it will start to look like a dress :-)  Hopefully this is helpful if you are considering making this dress.

More soon -->

Saturday, 29 August 2015

The Knit Shift Dress

I've never really thought about where I fit into the style spectrum, I just make and wear what appeals. Oh yes, I've done the whole "what's in fashion now" thing, then look back at old photos and wonder what on earth I was thinking at the time?!

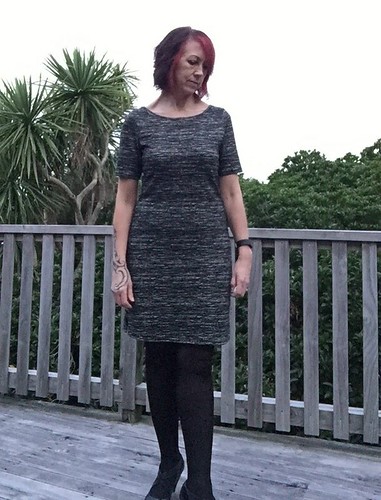
Now that I've done 2.5 years of ready to wear fasting I look at my wardrobe and realise that the shift dress, or variations of it, is a 'thing' for me. This probably explains why I've made two knit shift dresses in a month.

Mesa Dress

This is Mesa, one of the patterns issued with the June 2015 edition of Seamwork. It is described as "The flirty knit shift that's as stylish as it is comfortable", and I agreed 100%. Apparently it should only take 1 hour to make. It took me longer than that but that probably because I decided to line it.

I picked up 1.5 metres of this medium weight jersey double knit from Fabric Barn specifically for this dress.  The pattern suggested light to medium weight knit fabrics with at least a 25% 4-way stretch. Personally, I think that a light weight jersey would show all the 'lumps and bumps' underneath - No Thanks!


Mesa Dress

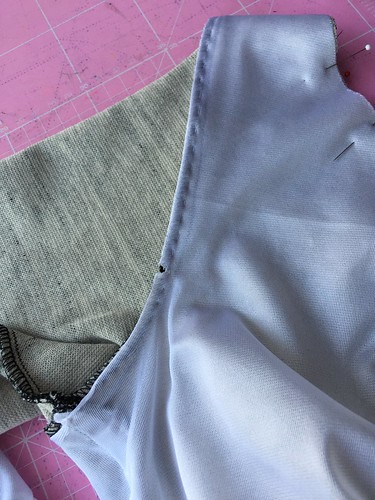
Because it's winter and I wanted to wear stockings for warmth but didn't want it cling, so I picked up some knit tricot to line the body. This stuff is so light weight that you barely notice its there but the difference it makes is incredible. In my opinion, so much better than having to wear a slip underneath that constantly keeps riding up.  After I sewed up the side and shoulder seams of the tricot I pinned it to the shell at the neck before attaching the neck band. I attached it to the armscye with a simple running stitch.

Mesa Dress

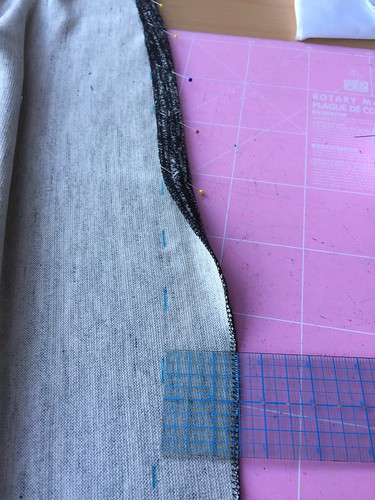
I didn't clearly fit into one size on the body measurement chart so decided to select my size based on my waist/hip measurement and made a size M (8-10).  Looking at the sample photos on the Seamwork site the dressed looked to be quite short and I'm taller than the average so went ahead and cut the length to the 3XL pattern length, 2" longer than the size M. This is the perfect length for me, falling just above my knee.

Mesa Dress

The hem, I just overlocked the raw edge, folded it up by 3/4" and stitched it down with two rows of straight stitch.  I also added 1" to the length of the sleeve - a short sleeve just didn't seam right.

There's a couple of things I noticed after wearing it a few times. The neckline at the front is a bit loose, so the neck band could be a little bit more snug, I could really do with an additional 1/2" around the hips and a bit more room across the shoulder blades.

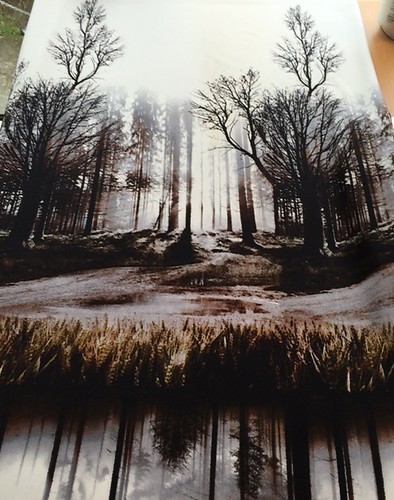
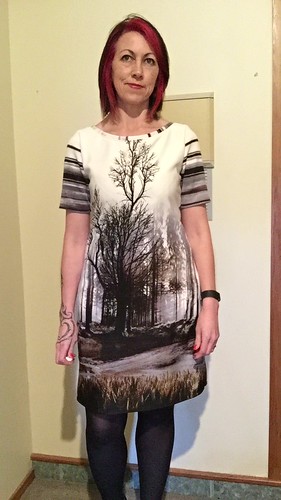
I wasn't planning on making another Mesa immediately but my WSBN friends spotted this fabulous panel print at The Fabric Warehouse and as all good sewing friends do, sent me a picture and said "this has your name all over it". Having been fabric enabled I was down at the shop within the next 24 hours buying 1.5 metres of it.

Mesa Dress

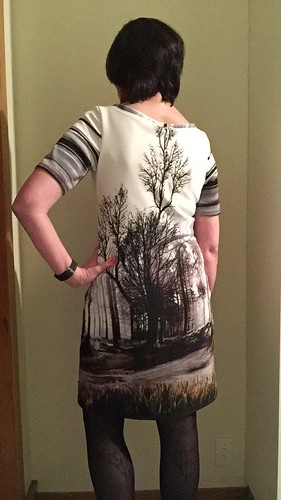
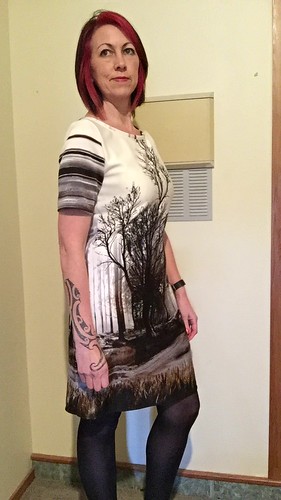
After looking at the print for a while I decided that it best that the tall part of the tree should go up to the neckline at the front and back. I had just enough fabric to pattern match and get just the right part of the panel placed where I want.

Mesa Dress


Mesa Dress

I cut the reflection off the panel so the dry grass ended at the hem, so I could successfully wear some dark stockings with the dress without it looking odd.

I made a few changes to the pattern before I cut this version:
  • moved the shoulder seam forward 1/2"
  • dropped the front neckline 3/8"
  • widen the back at the shoulders by moving the armscye out by 1/8" on the back pattern piece
  • widen the hip by 1/4" on each pattern piece, blended down to top the top of the split and up to the armhole.
Mesa Dress


Two super comfy dresses that I've been wearing non-stop for the last couple of months :-)

More photos on my Flickr -->
Monday, 19 January 2015

Summer is for Maxi Dresses

It's no secret that I'm a sucker for a maxi dress ... so when Named Clothing released their latest collection 'Ritual' the Ama Cowl Neck Frock was immediately on my MUST HAVE list.

Ama Cowl Frock

I'm not a fan of an elastic waist band but the back of the dress bodice is 'killer'!  I've not seen this before in any other pattern, so the uniqueness of the design was also a big attraction for me.

Ama Cowl Frock
Ignore the bra straps that poke out from the top - they are not part of the frock!

What I didn't realise, well actually I didn't read the outline of the pattern correctly and missed that it said "Wear with the Shadi Knit Skirt", which was the indication that the skirt wasn't lined.  That would be why I couldn't find the skirt lining pieces in the box! I just assumed that it was because you just use the skirt pattern pieces for the lining as well - normal right :-)

I traced off the two skirt pieces and shortened so the lining would come just above my knee.

Ama Cowl Frock

But when I got to the instructions on attaching the bodice to the skirt I was really confused on how the casing for the elastic was created and that is because I had an extra piece of skirt lining fabric that the instructions didn't. Now the penny drops!

Anyway, fudging it included attaching the skirts to the outside layer of the bodice leaving the bottom of the bodice lining unattached.  I then folded the bodice lining seam allowance under and attached that by sewing in the ditch on the seam I just created sewing the bodice to the skirt.  I then sewed another row of stitching above that, into both layers of the bodice for the elastic casing. Gee I hope that makes sense!  All fudging is covered by a belt anyway :-)

I didn't do a muslin for this dress.  I figured that it wasn't too fitted and I could get away with fitting as I went.  Named Clothing design for a tall woman, so knowing this I didn't have to make any alterations to the length of the bodice or the skirt.  It is the perfect length when I wear with flats - I would probably only wear it with flats.

Ama Cowl Frock

I did alter the width of the hem of the skirt, reducing both the front and back by 7", making a total of 14" from the circumference of the hem.  The pattern suggests leaving the side seams open all the way to the waist if wearing a skirt underneath, but I thought that would be really weird if caught in a gust of wind (not unusual for Wellington), so I sewed the side seams closed 18" down from the waist - about in line with the lining.

Ama Cowl Frock

The shell of the dress is a poly/tencil/viscoe that I picked up from the Fabric Warehouse pop-up sale in September 2013 for just $3 per meter.  It was a breeze to sew and it's lovely to wear. The drape of the fabric is perfect for the soft cowl of the Ama.

Ama Cowl Frock

This is a really lovely dress that is super easy to wear.  I would consider making another one, shorter (to the knee), to wear to the beach.  It would be so easy to throw over the swimwear.

More photos on my Flickr -->