Showing posts with label Colette. Show all posts

Friday, 26 May 2017

Moleskin Duffle for Winter 2017

Kia ora! This is kinda exciting ... well I'm excited anyway. I was flattered when I was contacted by Hawes and Freer to see if I was interested in participating in the launch of their new website. Now, little did they know that I often stalked their website drooling over the beautiful wool coating and while I wanted to say yes, I really had to think carefully about whether I could commit the time.

As you can see I said yes!
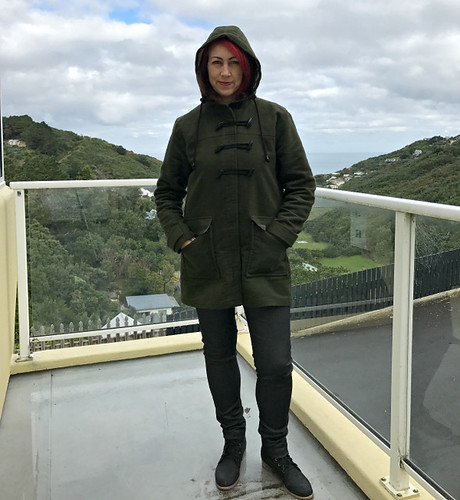
Photo moleskin2

I was planning to make another Albion Duffle coat this winter, so this was the perfect opportunity when I was shown the beautiful range of lightweight moleskin available from Hawes and Freer. What colour to choose???? After changing my mind over and over I settle on the olive green, with a army gingham for the lining. It all arrived beautifully packed and labeled.
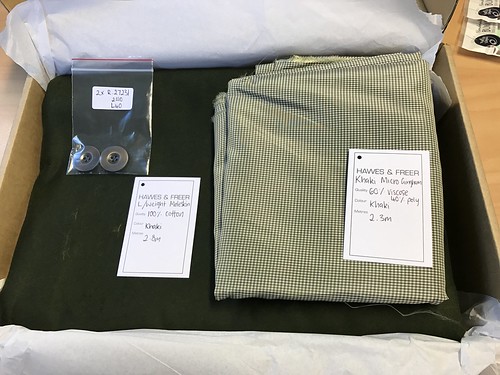

Photo moleskin17

I had previous made the Albion Duffle for my son, who only wore it a handful of times before he grew out of it! I couldn't bare the thought of all that work just sitting on the hanger, so for the last couple of years I've been wearing it as my main winter coat and have loved it, despite the shoulders being too big.

This time I traced off a size small with a couple of slight alterations
  • I inserted a centre back seam and created a slit in the back to create a bit more freedom when I sat in the car. I also shaped it slightly so it curved in at the waist - ever so subtle.
  • Same with the side seams I created a slight curve in at the waist, nothing dramatic so you probably don't even notice it.
  • I added another pocket over top of the patch pocket which is more for putting my hands in than putting stuff in!
  • I played with the hood a little as well, but I tell you about that soon.
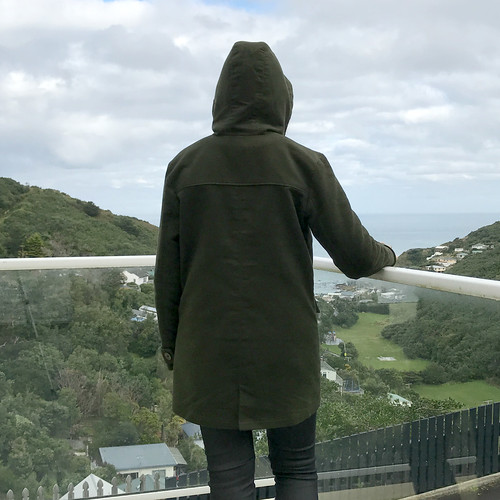
Photo moleskin8

Other than the hood I constructed the coat according to the instructions.

I knew I wanted to have a zipper in this version, but my brain couldn't work out how I insert the zip with the machine during the construction, ahhhhh! So I opted to just sew the zipper in by hand. Actually I sewed it in twice ... initially I bought and inserted a bottle green zipper but after I had put it in I decided it didn't look right so ripped it out and bought a black zipper instead.
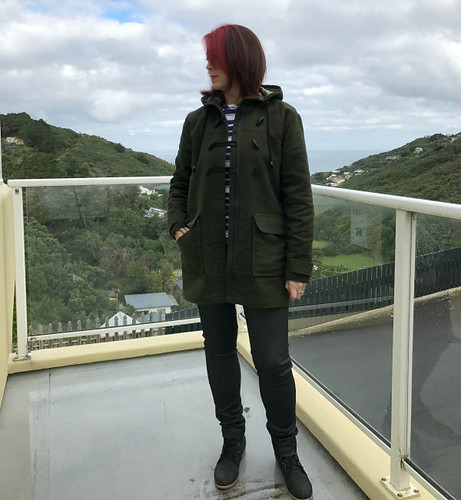
Photo moleskin3

Now the hood ... I really like it when I have something that comes up and covers my neck, it makes me feel warmer and protected from the wind. This was all a bit of trial and error, but I drafted the hood to extend to the edge of each front piece and extended up, best just look at this photo rather than me explain any more.
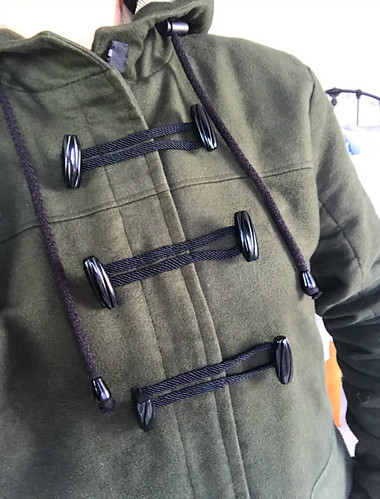
Photo moleskin13

It's not perfect but I'm pretty happy with how it turned out and gives me just the little bit more protection from the wind that I wanted. Talking about wind, this moleskin is amazing, it's perfect for keeping the wind out! Believe me that is a must when you live in Wellington.
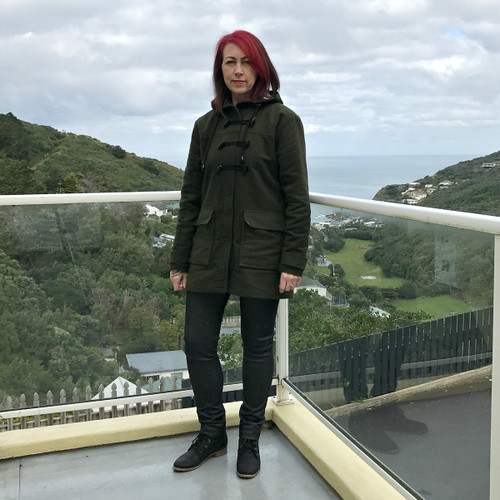
Photo moleskin1

To finish the coat and give it a bit of decoration I created three button thingys across the chest. I bought some cord (the proper name escapes me right now) and created loops by hand sewing them to the right front.  The buttons on the right are just decoration but the buttons on the left are functional. I'm pretty happy with how they balance out the pockets.

Oh and one last thing - I created a slight high-low hem, again ever so subtle.
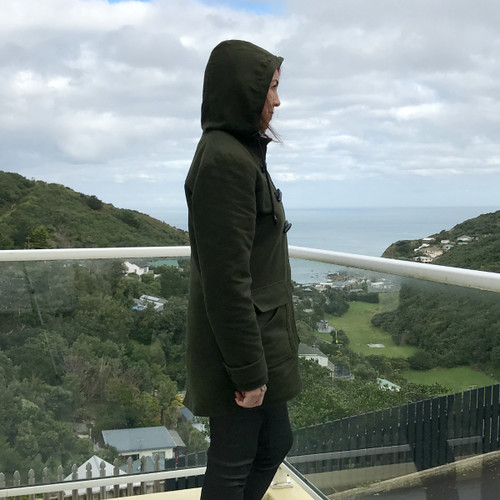
Photo moleskin9

I've worn this every week since I finished it at the end of April. Winter has set in here and going outside without a coat is no longer an option. I think its going to be a long cold winter this year.
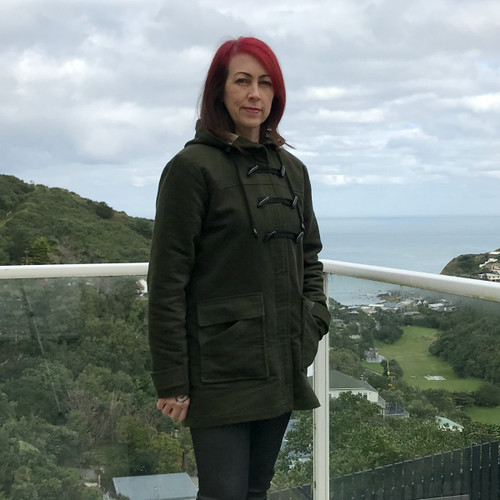
Photo moleskin10

To conclude, the moleskin was an absolutely dream to sew and the gingham lining was the perfect match. Hawes and Freer provided me with the moleskin the gingham lining and the two cuff buttons in return for a blog post to coincide with the launch of their new website. I have the freedom to express my own thoughts and opinions, but honestly I can't talk highly enough about the quality of the fabric I received.

Initially I was a little disappointed that there wasn't more of a fabric selection on their new website but Hawes and Freer have assured me that there will be more fabric being loaded to the website, so people like me that can't get to their bricks and mortar shop will have more of a selection. I'm looking forward to that.

More photos on my Flickr -->

Saturday, 29 August 2015

The Knit Shift Dress

I've never really thought about where I fit into the style spectrum, I just make and wear what appeals. Oh yes, I've done the whole "what's in fashion now" thing, then look back at old photos and wonder what on earth I was thinking at the time?!

Now that I've done 2.5 years of ready to wear fasting I look at my wardrobe and realise that the shift dress, or variations of it, is a 'thing' for me. This probably explains why I've made two knit shift dresses in a month.

Mesa Dress

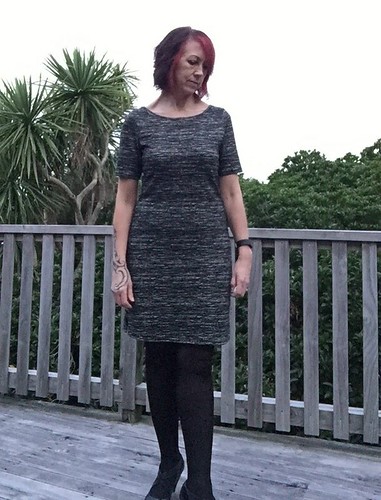
This is Mesa, one of the patterns issued with the June 2015 edition of Seamwork. It is described as "The flirty knit shift that's as stylish as it is comfortable", and I agreed 100%. Apparently it should only take 1 hour to make. It took me longer than that but that probably because I decided to line it.

I picked up 1.5 metres of this medium weight jersey double knit from Fabric Barn specifically for this dress.  The pattern suggested light to medium weight knit fabrics with at least a 25% 4-way stretch. Personally, I think that a light weight jersey would show all the 'lumps and bumps' underneath - No Thanks!


Mesa Dress

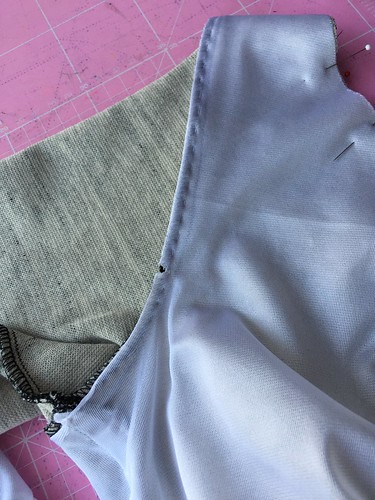
Because it's winter and I wanted to wear stockings for warmth but didn't want it cling, so I picked up some knit tricot to line the body. This stuff is so light weight that you barely notice its there but the difference it makes is incredible. In my opinion, so much better than having to wear a slip underneath that constantly keeps riding up.  After I sewed up the side and shoulder seams of the tricot I pinned it to the shell at the neck before attaching the neck band. I attached it to the armscye with a simple running stitch.

Mesa Dress

I didn't clearly fit into one size on the body measurement chart so decided to select my size based on my waist/hip measurement and made a size M (8-10).  Looking at the sample photos on the Seamwork site the dressed looked to be quite short and I'm taller than the average so went ahead and cut the length to the 3XL pattern length, 2" longer than the size M. This is the perfect length for me, falling just above my knee.

Mesa Dress

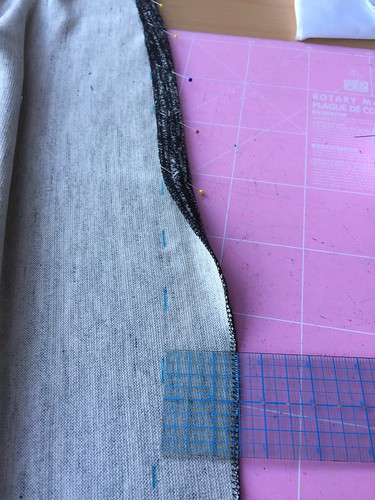
The hem, I just overlocked the raw edge, folded it up by 3/4" and stitched it down with two rows of straight stitch.  I also added 1" to the length of the sleeve - a short sleeve just didn't seam right.

There's a couple of things I noticed after wearing it a few times. The neckline at the front is a bit loose, so the neck band could be a little bit more snug, I could really do with an additional 1/2" around the hips and a bit more room across the shoulder blades.

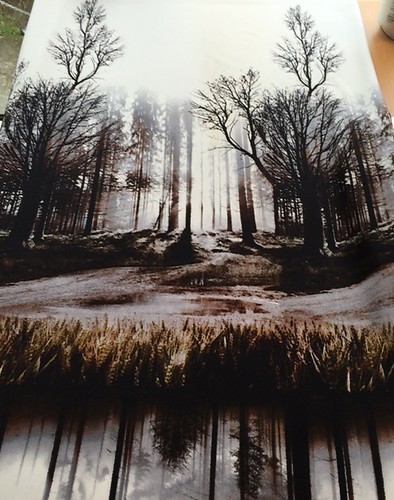
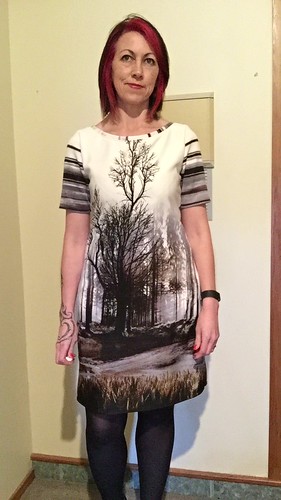
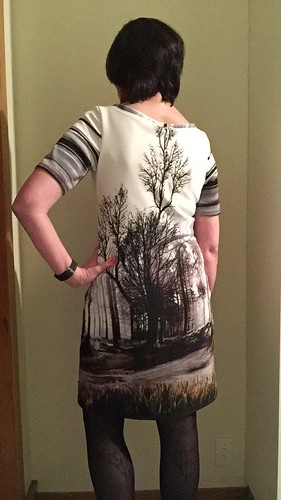
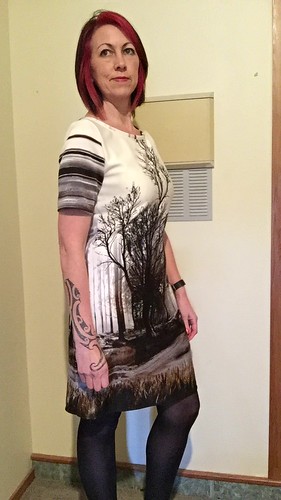
I wasn't planning on making another Mesa immediately but my WSBN friends spotted this fabulous panel print at The Fabric Warehouse and as all good sewing friends do, sent me a picture and said "this has your name all over it". Having been fabric enabled I was down at the shop within the next 24 hours buying 1.5 metres of it.

Mesa Dress

After looking at the print for a while I decided that it best that the tall part of the tree should go up to the neckline at the front and back. I had just enough fabric to pattern match and get just the right part of the panel placed where I want.

Mesa Dress


Mesa Dress

I cut the reflection off the panel so the dry grass ended at the hem, so I could successfully wear some dark stockings with the dress without it looking odd.

I made a few changes to the pattern before I cut this version:
  • moved the shoulder seam forward 1/2"
  • dropped the front neckline 3/8"
  • widen the back at the shoulders by moving the armscye out by 1/8" on the back pattern piece
  • widen the hip by 1/4" on each pattern piece, blended down to top the top of the split and up to the armhole.
Mesa Dress


Two super comfy dresses that I've been wearing non-stop for the last couple of months :-)

More photos on my Flickr -->
Sunday, 12 October 2014

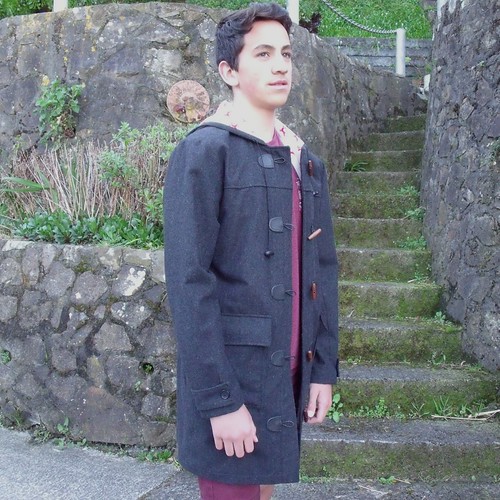
Duffle Coat

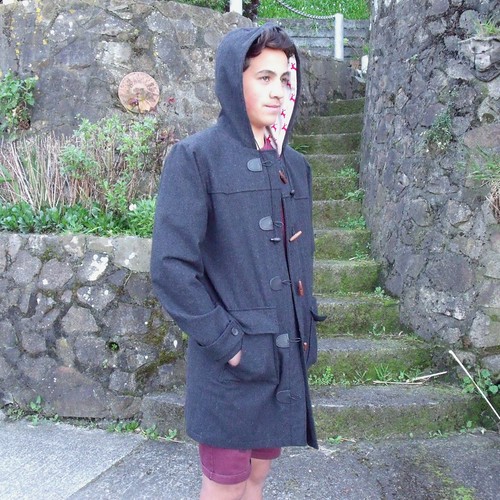
This one has been coming for a wee while.  It was my son's birthday back at the beginning of May and he was keen for me to make him a winter coat ... after a bit of coercion :-)

Duffle Coat

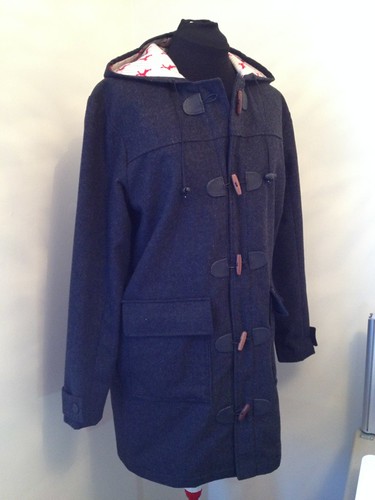
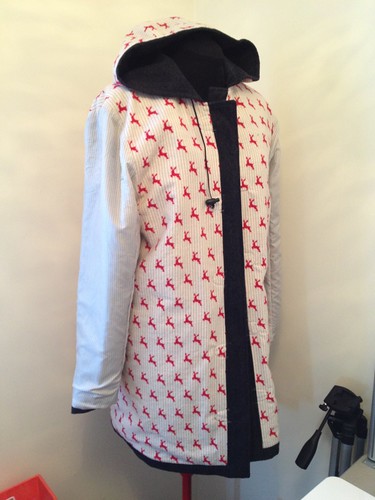
We went shopping together and got this fabulous wool coating from The Fabric Store - perfect for a men's coat.  Finding an appropriate lining wasn't so easy.  Originally we picked up some striped acetate, but after a bit of deliberation I realised that it wasn't going to add any warmth to the coat and that it would be useless for the Wellington winter.  So the hunt was on for some flannelette.   At Spotlight I found a similar coloured stripe with red stags - boy appropriate I thought!

Duffle Coat

I only put the flannelette on the back and fronts to add warmth and used the original acetate in the sleeves, so it would be easy to put on and take off, sliding over the usual winter hoodie.

The pattern is Albion by Colette Patterns.  My son is much taller than the average 13 year old and swimming gives him a triangle shape, making things a little interesting.  His measurements placed him in a size Medium across his shoulders and a size Small around the chest.

Duffle Coat

The fabric wasn't cheap, so I decided that it was best to do a muslin first and work out how I was going to blend the two sizes together. I cut the front and back yokes and the upper sleeve in a size medium, the under sleeve and body pieces in a small.  Although where the yoke and the body pieces meet I left as a size medium and then blended down to a size small at the underarm.

This gave the perfect fit across the shoulders with a bit of spare room for growth!

Duffle Coat

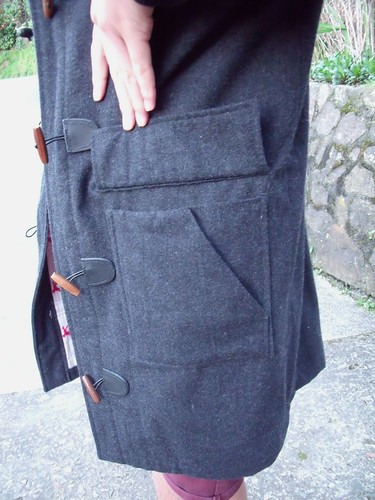
I omitted the side seam pockets - cause I just don't like them.  I lined the patch pockets before attaching them - I little bit of added warmth is a good idea.  Then when we were in town one day we came across some RTW duffle coats - one feature I found really interesting was the double patch pocket.  A second pocket stitched over the first, but with an angle for easy access by the hand.

Duffle Coat

Although I had already finished the pockets, luckily I hadn't sewn the lining closed.  So I drafted the second pocket with a 1" self facing and attached over the same seam lines as the original patch pocket.

While the buttons look great, they were a real b*!#h to put on.  I used a 90/14 needle on the machine, but turning around the curved edges was a real struggle.

The pattern was a pleasure to sew.  The instructions were clear and easy to follow and would definitely be a pattern I would sew up again.

Duffle Coat

More photos on my Flickr -->
Friday, 7 June 2013

Sewing Indie in June

This month I am joining The Curious Kiwi and Macskakat for Indie Pattern Month.


It just so happens that my next project was going to be the Cordova Jacket by Sewaholic - good timing girls :-)
I had purchased a piece of fabric at the Fabric-a-brac which I thought would be ideal for the Cordova - more on that later.

My stash of indie patterns current contains quite a few from Sewaholic - Tasia's style just appeals to me although I am a rectangular body shape rather than a pear.  A small reduction to the hips and I'm done which is proving easier than having to adjust the waist and hips out-ward when sewing one of the big 4.

Recently I have added others to my list (more parcels in the mail - fun)
Tiramisu Dress by Cake Patterns
Rooibos by Colette Patterns
April Pant by Stylearc
Go Anywhere Dress by Sewn Square One

I also purchased Newcastle Cardigan PDF download from Thread Theory, which I thought would be fun to sew for either my husband or son.

I'm not going to get all these patterns sewn up this month but I'm looking forward to each and every one of them.

A Good Wardrobe hosts an extensive list of Indie Patternmakers which is like my own little index to sewing fabulousness!  Thanks Lizz.

For now back to my the sewing machine to progress my Cordova.  I'm posting progress on Instagram (http://instagram.com/sandra_stitch) if you want to follow along.