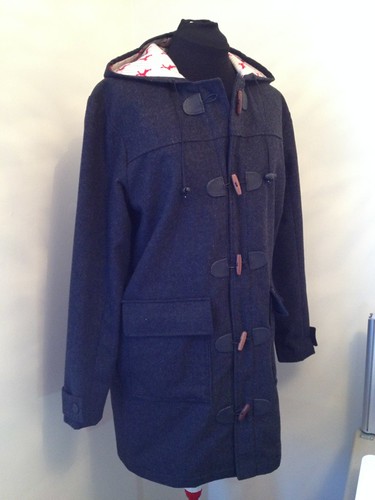
This one has been coming for a wee while. It was my son's birthday back at the beginning of May and he was keen for me to make him a winter coat ... after a bit of coercion :-)
We went shopping together and got this fabulous wool coating from The Fabric Store - perfect for a men's coat. Finding an appropriate lining wasn't so easy. Originally we picked up some striped acetate, but after a bit of deliberation I realised that it wasn't going to add any warmth to the coat and that it would be useless for the Wellington winter. So the hunt was on for some flannelette. At Spotlight I found a similar coloured stripe with red stags - boy appropriate I thought!
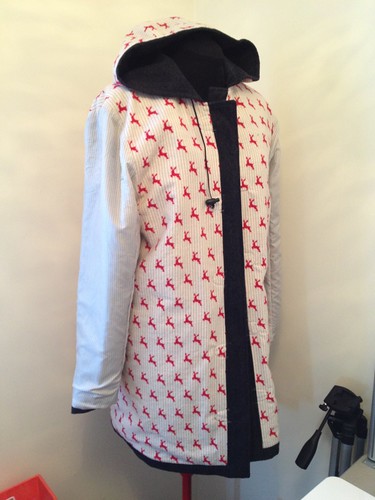
I only put the flannelette on the back and fronts to add warmth and used the original acetate in the sleeves, so it would be easy to put on and take off, sliding over the usual winter hoodie.
The pattern is Albion by Colette Patterns. My son is much taller than the average 13 year old and swimming gives him a triangle shape, making things a little interesting. His measurements placed him in a size Medium across his shoulders and a size Small around the chest.
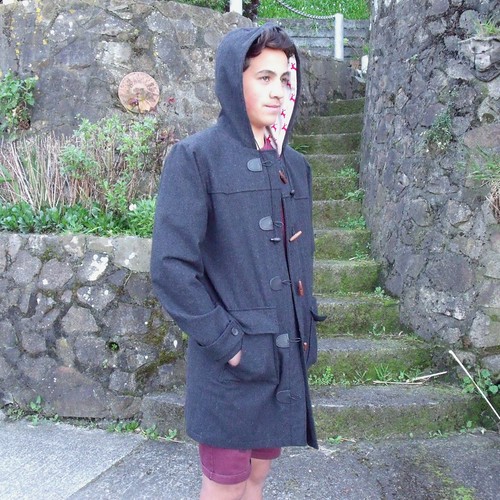
The fabric wasn't cheap, so I decided that it was best to do a muslin first and work out how I was going to blend the two sizes together. I cut the front and back yokes and the upper sleeve in a size medium, the under sleeve and body pieces in a small. Although where the yoke and the body pieces meet I left as a size medium and then blended down to a size small at the underarm.
This gave the perfect fit across the shoulders with a bit of spare room for growth!
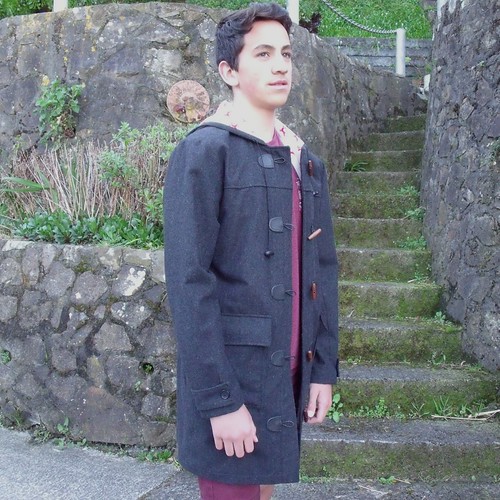
I omitted the side seam pockets - cause I just don't like them. I lined the patch pockets before attaching them - I little bit of added warmth is a good idea. Then when we were in town one day we came across some RTW duffle coats - one feature I found really interesting was the double patch pocket. A second pocket stitched over the first, but with an angle for easy access by the hand.
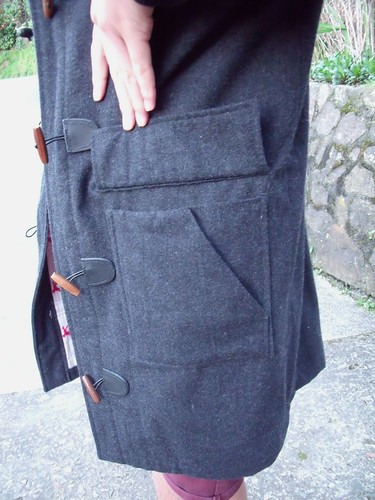
Although I had already finished the pockets, luckily I hadn't sewn the lining closed. So I drafted the second pocket with a 1" self facing and attached over the same seam lines as the original patch pocket.
While the buttons look great, they were a real b*!#h to put on. I used a 90/14 needle on the machine, but turning around the curved edges was a real struggle.
The pattern was a pleasure to sew. The instructions were clear and easy to follow and would definitely be a pattern I would sew up again.
More photos on my Flickr -->
Showing posts with label pocket flaps. Show all posts
Sunday, 12 October 2014
Monday, 30 September 2013
Taller than average
I can't described how super stoked I am to know how to make jeans. I no longer have to put up with RTW that aren't quite long enough!
Back in June I made my first pair of jeans with the much loved Jalie pattern. After wearing those jeans for a wee while I was keen to make small adjustments and try different styles.
Here's the list of adjustments for this pair
This is only the second time I have sewn a fly front! It was much better than my first, but still has some improvement to do. I might need to make a skirt with a fly front!
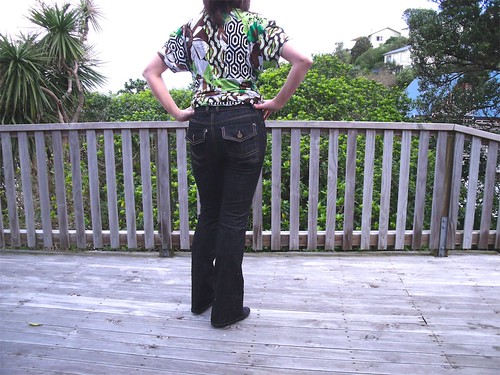
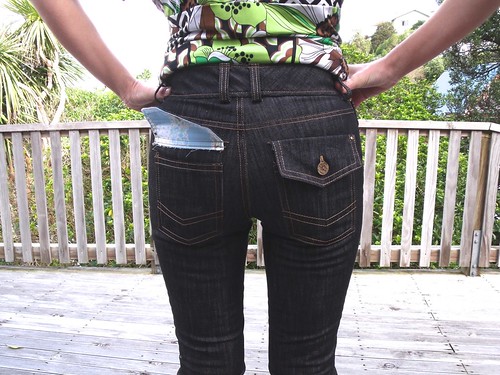
For the back pockets I drafted pocket flaps using the shape of the bottom of the pocket and then lined them with some cotton (received in the Winter Swap), ideal match if you ask me. I also used the same fabric for the front pocket lining. haha have you spotted that I am missing a button!
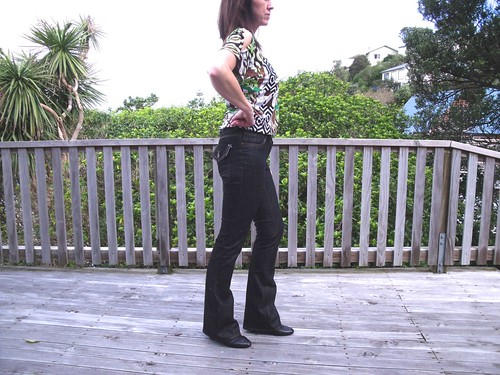
I'm calling these my high heel jeans, as I can only wear them with high heals, or a boot as in these photos. Something I've never been able to do before - RTW can only be worn with flats because of the lack of length!!!
My next is a pair of skinnies :) I made further adjustments (more like tweaks) to the pattern immediately that I finished this pair, while it was still fresh in my mind. I got the fabric at the last Fabric Store sale ... so I'm good to go, just need a splash of time!
More photos on my Flickr -->
Back in June I made my first pair of jeans with the much loved Jalie pattern. After wearing those jeans for a wee while I was keen to make small adjustments and try different styles.
Here's the list of adjustments for this pair
- lengthen the pattern by 5"
- narrowed the bootleg - not straight but not as flared as the pattern
- added depth to the waistband
- cut 1/4" off the CB yoke at the wasit only and tapered down
- drafted a flap for the back pocket and lowered the pocket placement
- lowered the curve of the front pockets
- added a coin pocket to the right front pocket - which didn't work that well!
This is only the second time I have sewn a fly front! It was much better than my first, but still has some improvement to do. I might need to make a skirt with a fly front!
For the back pockets I drafted pocket flaps using the shape of the bottom of the pocket and then lined them with some cotton (received in the Winter Swap), ideal match if you ask me. I also used the same fabric for the front pocket lining. haha have you spotted that I am missing a button!
I'm calling these my high heel jeans, as I can only wear them with high heals, or a boot as in these photos. Something I've never been able to do before - RTW can only be worn with flats because of the lack of length!!!
My next is a pair of skinnies :) I made further adjustments (more like tweaks) to the pattern immediately that I finished this pair, while it was still fresh in my mind. I got the fabric at the last Fabric Store sale ... so I'm good to go, just need a splash of time!
More photos on my Flickr -->
Subscribe to:
Posts (Atom)