Showing posts with label Couture. Show all posts

Friday, 19 January 2018

Couture Sewing School with Marfy 3507

Kia ora and happy New Year! As I sit on the plane returning home after eight intense days in Melbourne I thought I would share the amazing experience that is a couture masterclass with Susan Khalje.

I arrived to class on day one looking forward to not only meeting Susan but also to meet Melanie aka Poppykettle. It was so surreal meeting them both - isn't it funny how social media and the internet can make us feel like we already know someone without having met them in real life.

After settling into the sewing table next to Melanie we all gathered for some introductions. As it turns out most of the others in the class were returning for a second year of couture sewing under Susan's guidance, but we all very quickly got to know each other and spent the week in awe of each other's work.

When I left home I was a little unsure what I was going to make to take full advantage of my time with Susan. Option number one was Marfy 3507, a coat-dress. I'm in love with the collar and zippers of this pattern.


The second option was a jacket with a lace insert panel at the back. Marfy 3791. Again the collar was the feature that caught my eye.


Before I left home I made a toile/muslin for both patterns and hoped that by the time I turned up to class I would have a definite preference. But it was the class who helped me make the decision in the end with the coat dress clearly the winner :-)

Day one was all about the toile/muslin. Watching Susan work her magic and do fittings for all the different body shapes with all the different garments was truly magical. Unfortunately I was so engrossed in the day that I didn't take one photo :-(  I've done a few fitting classes on Craftsy and read a few books but I still struggle with fitting, so for Susan to talk through what she was doing with each one - I learnt sooooo much.

After all the adjustments were marked up on the toile it was pulled apart and used as pattern pieces.

Day two was all about tracing the toile onto silk organza and wax tracing all the markings. Then taking all the silk organza pattern pieces and laying them onto the fashion fabric and thread tracing each piece. Day two was a productive day, feeling as though I had achieved quite a bit by the end of the day.


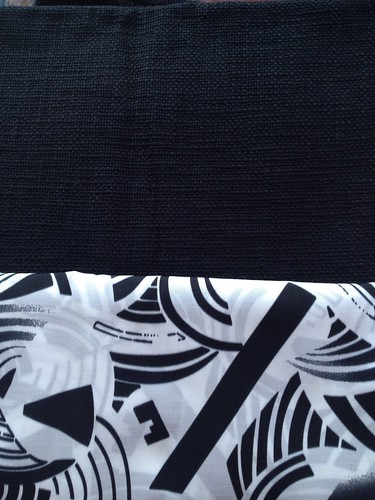
In June last year I treated myself and purchased two pieces of fabric from Mendel Goldberg in New York. When a place opened up in Susan's class I knew that I wanted to use the Mendel Goldberg fabric and luckily enough all the stars aligned and I had just enough fabric to make the coat-dress, because I definitely didn't buy it with this pattern in mind.

… and then there was day three *sigh*. It started off really well, I attached both side back pieces to the centre back, matching up all the lines perfectly *happy dance*.


But then for the next six hours I only managed to sew four seams, two for each side front attaching to the centre front pieces. Most of that time was spent counting stupid lines and trying to work out why the lines didn't go perfectly around the body, I was doing some very loud screaming in my head. So after some expert assistance from Susan I finally worked out that adjustment was needed in a couple of places. I was glad to see home time that day.

Day four and it was beginning to look like a dress and I could do my first fitting and make some initial style decisions. Thanks to Roz (the keeper of all things) the decision on the zipper was a no brainer. She had this black metal zipper with gorgeous rose gold teeth - I was instantly in love. So with that Roz took a few of us off to Jimmy Buttons, and well that is a whole separate story!


As you can see from the pattern there are pocket flaps, but with this lofty fabric I decided that the flaps sitting above the box pleat would just be too much bulk so we opted for a couple of buttons instead. Thanks to Susan who found the perfect option in among the ciaos at Jimmy Buttons. The zipper went in by hand, stripe matching all the way. However my stripe matching wasn't that great first time round so I had to unpick one side and do it again. This time I closed the zipper in small sections so I could match the other side as I went.

Day five - it was time to put together the front facing and upper collar. I needed to draft a back facing so everything would sit better and I could hide all the collar joins. I machine stitched from the start of the collar roll (top of the zipper) all the way around the collar to the other side. Once again paying attention to those dang stripes! Can you see the corner seam where the collar attaches to the dress?

Just before the end of the day I was able to have the sleeves fitted, alterations marked, silk organza marked and fabric cut.


Day six was all about fitting those sleeves. Susan very kindly fitting one sleeve then sent me away to fit the other one. While I got all the stripes lined up Susan still had to undo the stitches and adjust the amount of fabric in and out of the seam so it was a much smoother fit. Hopefully I've taken that all in and can replicate that next time. She makes it look so easy.

I'm still coming to grips with the fact that I had six days of nothing but sewing and I didn't finish, but that is couture sewing. I return home to stitch in the sleeve zippers, under-stitch the facing on the inside of the front zipper, tidy up armholes, hem and put in the lining. Here is a sneak peek of the progress to date.


Head on over to Susan's Instagram to check out what others in the class made. I'll do an updated post once I've finished and got some decent photos.

Happy sewing everyone :-)

Wednesday, 17 December 2014

Little French Jacket No.2 (and a big fat fail)

I've been beavering away at my second Little French Jacket for the past couple of months...
LFJ 2

and I was making good progress until I was side-tracked by the release of the Holly Jumpsuit, which jumped to the front of the blog (here), before my other finished projects.

I was so pleased with the first Holly, I made the wee adjustment to the back crotch curve, went fabric shopping especially and picked up this lovely viscose for a long pant version.  In the weekend just gone, I got it all stitched up enough for a quick fitting .... and then this


That my friends is my freshly created UFO! There is just too much wrong with this #viscose #hollyjumpsuit that I don't know if I can be bothered #sewcialist

This pile, my friends, is my first UFO in a long time!  I believe it has got everything to do with the fabric choice.  It is too big, the crotch almost hangs down to my knees and it looks like a sack!  So for now I'm gonna consider this a big fat 'fail' and move on with my Little French jacket.

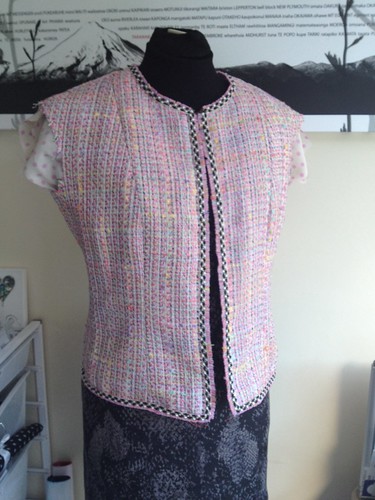
I'm not far away from finishing - I've just got the pockets to attached and the sleeves to set in.  With this Jacket I've decided to put four pockets on, like this ... the bottom pockets need bringing up by about 1/4 inch.

LFJ 2

LFJ 2

The fabric is like a cotton boucle, that I picked up off Trade Me (NZ version of eBay) from a sewer that was having a clean out.  When it arrived I really wasn't sure if I liked it or not, so I put it away in the stash and never thought much more about it. 

When I was ready to attempt my second Chanel inspired jacket, I still didn't think I was ready to cut into my really nice wool boucle, summer was coming and this cotton jumped to the top of the 'reasons why' list.  If it didn't work out then I wouldn't cry for days! 

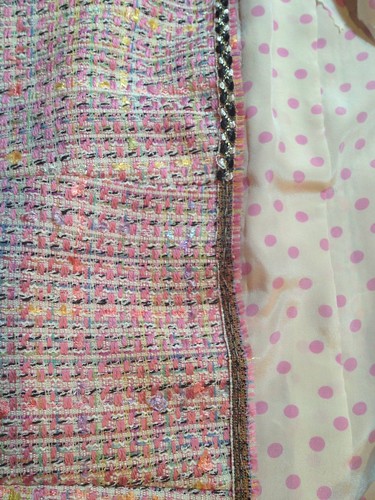
What do ya know, it has actually begun to grow on me... when I started I didn't have the lining or the trim so I didn't really have a clear vision in my head of what it would look like.  When it was time for the lining, I must have looked at every possible lining option in The Fabric Store before it became obvious that this pink polka dot crepe de chine was perfect.  I'm not a polka dot person, so mentally I think I counted it out before I actual picked it up and placed it with the swatch I took with me.  It was the perfect match - don't you just love it when you surprise yourself with fabric choice!

LFJ 2

I cut all the selvage from the fabric to use as trim ... note to self: cut off all trim after placing pattern on fabric and before cutting them out.  Why you may ask, because instead of two long continuous pieces of trim I had a few odd lengths and had to look at joining them in discrete places on the jacket.  Finding trim was another major shopping expedition with fabric swatch in hand.  I picked up this lovely black, white and gold trim, that was the perfect width to go over the selvage, from Made Marion 

So at this stage I'm feeling a lot happier about this jacket than I am about Holly the sack!  I think it will be the perfect colour to wear with a nice pair of jeans ... hmmm I can see it fitting into my wardrobe now :-)


Saturday, 5 April 2014

Marfy Free Jacket Pattern - Part 1

This is the garment that I've been most looking forward to, the Marfy Jacket 1756 - one of the three free patterns made available this year.

I began by selecting a size 46.  Traced the pattern and cut my muslin.  Now here's were it get's interesting as there are no construction instructions.  The only thing that you have to go on is the artist impression and markings on the pattern pieces.


I started by sewing up the centre back seam and then attached the side back pieces to give me a complete back - easy!

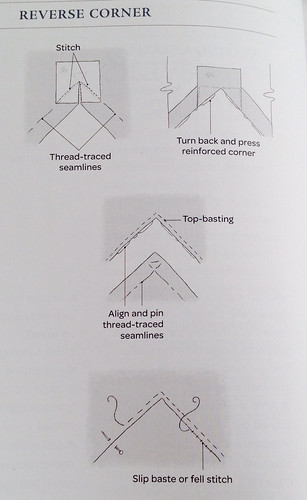
Then I thought, attach side front to centre front.  This would be straight forward if they were princess seams, but not!  The side front is an inset corner ... I've only ever sewn one of these before on my Mila Dress, and while it worked out okay, it was a bit of hit and miss.  I went to the trusty internet looking for a technique, this is what I found - Shirley Smith is a goddess!


This is so easy and the end result is, OMG, perfection! There is also a wee section in the book "Couture Sewing Techniques" by Claire Shaeffer on seams with reverse corners.  This is a very similar technique to that demonstrated by Shirley in the video but using hand stitches instead of machine stitching.

Reverse corner technique

Next, I sewed the shoulder seams, then the centre back of the collar before attaching that to the back - tricky little corners, and actually I might try the above technique on those corners as well. I sewed the centre back collar of the front facing then pinned and sewed the front lining to the jacket in one continuous sewing line.

I learnt a good tip from Stephanie Lincecum ... about sewing in the corner of collars to avoid the 'blow-out' ... stop about one stitch before the corner, place the foot at a 45 degree angle to the line of stitching just sewn, sew one or two stitches, turn again to sew the next  seam.  It's the little things that matter!

Finish muslin, deciding length
Make-up free face of concentration!!
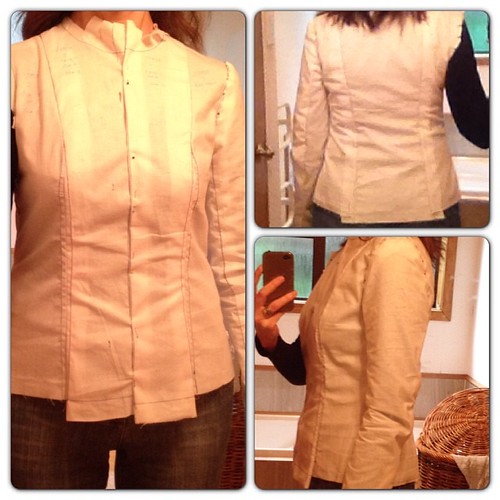
I'm pretty happy with the final muslin fit - it only took me 5 weeks!  The first muslin fit was too big around my body, but shoulder width and waist location all seemed to be okay, so I tore the first muslin apart and reduced all vertical seams down to a size 44.  There is room to move and enough room to wear some winter layers of clothing underneath. 

I was surprised at how long the jacket is given the description of the pattern reads "This short, tight-fitting jacket closes edge-to-edge with hooks".  I've removed 3inches from the length so it will sit on my high hip.

Now I need to think about the construction of the actual jacket.  I think it might be a combination of a tailored blazer and a french jacket.  Thinking, thinking ....


Wednesday, 5 February 2014

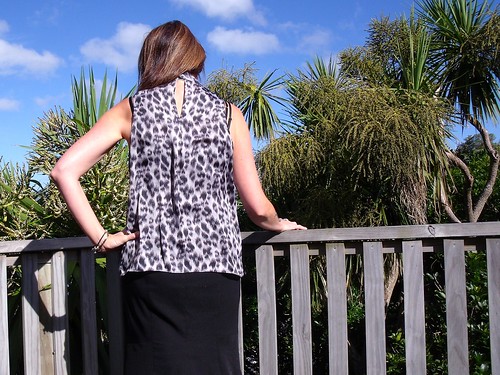
Jungle Marfy

I recently got introduced to Marfy patterns, quite by accident.  Carola posted a question on the 2013 RTW Fasters FB page back in September, wanting to know if anyone had sewn a Marfy pattern, because they don't come with instructions.  What?!  No instructions, who are these people ... internet research revealed they are an Italian indie pattern designer that hand cut all their patterns before despatching.

As the LFJ sew-along got going there were loads of Marfy patterns posted to the inspiration board, this is when I started to look closely at them.  Then in December Leisa announced that she would be hosting a sew-along with the free Marfy patterns - a top, a skirt and a jacket.  Without hesitation I signed up (really I'm not a free freak, but what better way to get introduced to a new pattern brand).  Anyway enough reading, let me show you some pictures....

Jungle Marfy

Jungle Marfy

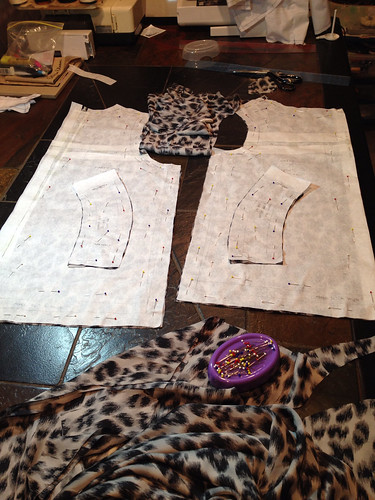
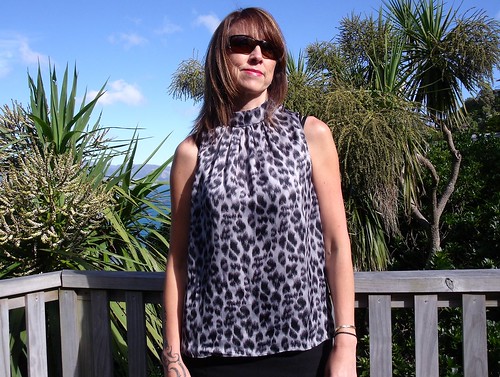
The suggested fabric by Marfy is jersey, crepe de chine, chiffon or satin.  I had a few pieces of fabric in my stash that would have worked perfectly but seen everyone in the blogisphere was stepping out for Jungle January I settled on this polyester satin.  I picked this up on Trade Me (NZ version of EBay) maybe 12-18 months ago and thought it would be great for lining.  I figured that if it all turned to custard I hadn't lost anything.

I must admit I was a little nervous about sewing this fabric because it just moves everywhere!  Determine to conquer I carefully folded the fabric and pinned, pinned, pinned and pinned again (my silk pins are definitely my BFF).

image

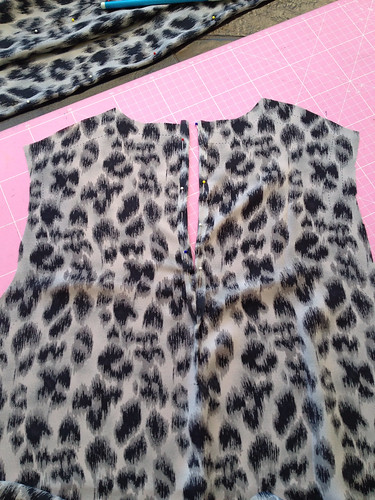
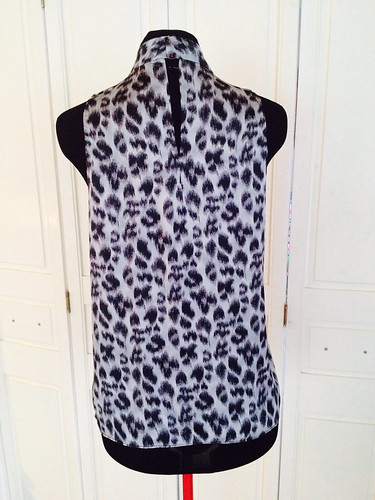
I sewed this together using a combination of regular 'ol sewing machine seams and couture techniques.  Leisa consulted with Susan Khalje who shared this fantastic couture technique for creating the back opening - the back pattern piece is cut on the fold.  I can see that look of confusion on you face!  Have a read of this and all will become clear - I think it's brilliant and easy enough to create.

image

I lined both pieces of the collar with silk organsa and machine basted them in place.  It was just the right amount of structure for the collar to sit up but not be rough on my neck.  Look at this - I was so happy with the result.

image

I applied the collar to the top with the sewing machine, around three sides, but then hand-stitched the back of the collar to the top so there wasn't a line of machine stitching visible at the bottom of the collar.  It also just feels better!

I tried a hairline seam for the shoulder seams and a french seam for the sides.  I did a machine rolled hem around the bottom and half machine, half hand-stitch rolled hem for the armholes.

I made a couple of pattern adjustments:
  1. Lengthen the body above the armpit.  Although now I'm not sure that I needed to lengthen as much as I just needed to slightly reshape the armhole so it didn't cut into the crease where my arm meets my body in the front.
  2. Added 3/4" (2cm) to the bottom.
  3. Cut and spread 1/2" (1.2cm) just off centre back to allow for the opening technique. 
  4. Curved in the side seams slightly to give a little shape to the top
I feel next time I could take 1/2" (1.2cm) off the side seam of the front and back and it would still have enough room.  Oh, I cut a size 46 - patterns are available from sizes 42-58.

Looking at the design sketches it appears that elastic has been put into the bottom so when worn out the bottom sits on hips and behaves.  I decided not to put elastic in mine, so I could wear tucked in with a skirt or out with a pair of skinnies (maybe?)

Jungle Marfy

Jungle Marfy

Again I have learnt so much from the very talented Leisa over at A Challenging Sew and I'm looking forward to putting the jacket together in March.  This Marfy pattern was well drafted and actually quite easy to put together, with a bit of thought.

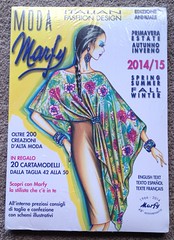
IMG_3767My pattern-a-holic self could help herself and ordered the 2014/15 Marfy catalogue. 

One part of me was curious as to what other detail was provided in the catalogue to help guide the sewing decisions, the other part of me couldn't pass up the 20 free patterns included.   The Marfy pattern pricing isn't any different from other indie patterns that range from NZ$25-$30 and for that matter we pay NZ$30 for a Vogue pattern.  

It's the postage that's the killer, but even so the cost per pattern included in the catalogue works out to be just NZ$4.75 - what a bargain right!?  Bonus - the catalogue is beautiful.

After the sew-along has finished I'm looking forward to challenging myself with a few of these patterns - going solo if it were (scary!)

More photos on my Flicr -->

Sunday, 8 December 2013

Two months, 38 hours and counting

Back in October I embarked on construction of My Little French Jacket and it has been a bit of a journey.  I started with a hiss and a roar and was ahead of the game, each week waiting anxiously for the next sew-along post to come out - but then came the sleeves and a pile of other sewing that I wanted to do.  So when I picked it up yesterday, determined to conquer the sleeves I realised that it had been three weeks since I did any work on it!  Just as well I was ahead of the game, because after successfully getting those sleeves in I'm back on track, yay!  So I thought I would share a bit about the journey so far ....

Fabric & Lining

I chose this cotton boucle and silk lining - both purchased from The Fabric Store here in Wellington.

LBJ #LBJ muslin finished, now to tidy it up

Muslin pieces all traced and thread traced.  I selected a pattern size according to my bust measurement and made the muslin without any adjustments.  The upper body of the muslin was a great fit, but I had to let out the princess seams in the front for my waist and hips.  Minor adjustments in the scheme of things.

LFJ

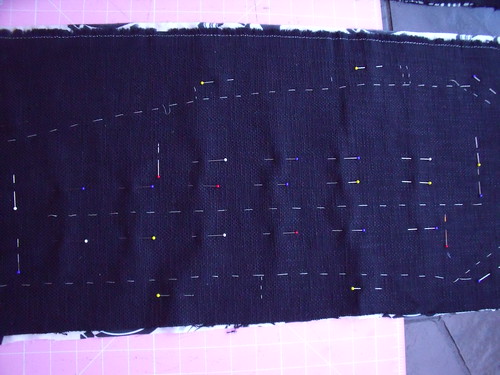
All the pattern pieces are thread traced on the stitch line.  The grainline is also thread traced.  The fabric is then placed over the lining and pinned on - this is where the grainline on the fabric is super useful.

The lining is then attached to the fabric by quilting lines.  This is the very first time I had heard or seen this technique.  I was super curious about how this wouldn't be visible from the outside - but it just get lost in the fabric, almost like magic!

Untitled

I marked my quilting lines with pins.  Oh and this is where a walking foot on the sewing machine comes into its own - the best investment I ever made!

LFJ

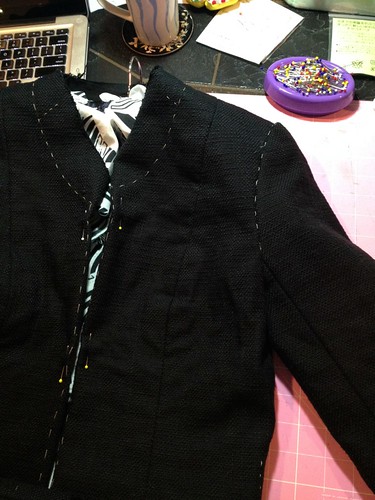
The seams of the fabric are then all sewn together and pressed open.   Those seams are sewn by machine but to ensure accuracy the seams are basted together first and then put under the machine foot.  The seams of the lining are then trimmed and hand stitched in place using a small fell stitch.  My fell stitches got better and better - the pic below is my sleeve which is looking pretty if I do say so myself :-)

Untitled

Now the sleeves are also set in my hand. This was a first for me and a little daunting but once I just followed all Leisa's wonderful instructions it was a breeze. 

Untitled

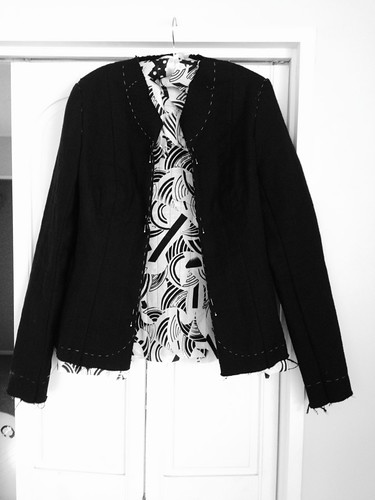
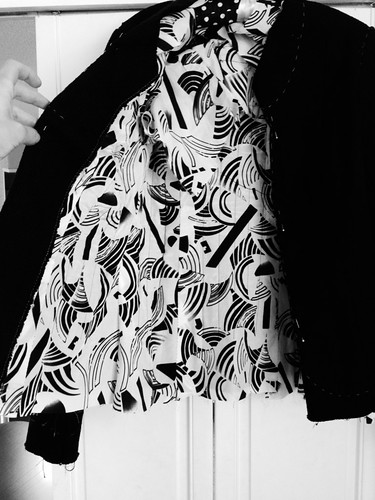
And here is where I'm at right now ... these two pics are both B&W :-)
Untitled

Untitled

Next, I need to work on closing the lining around the sleeve inset then it will be the hems, the trim and pockets.  I feel like I'm on the home straight now ....

Total time to date = 38 hours.

Sunday, 6 October 2013

My Little Black Jacket

I am super excited about my next sew-along.  This is being hosted by A Sewing Challenge and thewallinna with mentor Susan Khalje.  The Chanel inspired little french jacket!

Thewallinna

This wee 2 minute video was produced by Chanel in 2012 and shows an overview of the making a "Little Black Jacket".  It is so inspiring.


Susan Khalje's Couture Dress Class was the first Craftsy class I ever signed up for and it remains my most watched.  I refer back to it all the time - there are an enormous amount of techniques and valuable information in every lesson.  That class was like a revolution for my sewing. So when Inna announced she had done Susan's Chanel Jacket class (in person with Susan!) and would be hosting this sew-along - it was like all my dreams came true.

LBJ Pink tones

I had already purchased some wool boucle from The Fabric Store and had a pattern all lined up.  But first there were a few other projects I just had to get out of my system (appearing on the blog soon) before I felt that I could immerse myself in making a jacket.

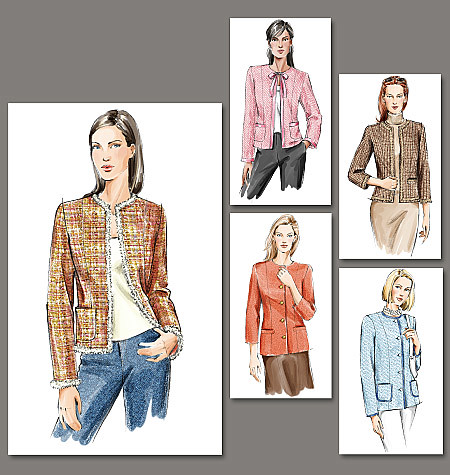
I have since decided that this fabric won't be my first jacket but probably my second once I've got the couture jacket sew-along done.  So I've been and purchased a new pattern V7975, because of it's simple lines and classic style and black cotton boucle from The Fabric Store.

V7975

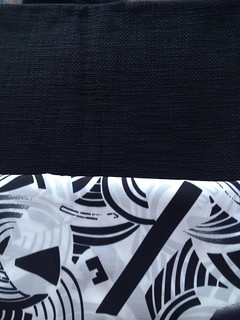
The lining is a black and white silk (blend I think) that I picked up at The Fabric Warehouse sale earlier this week.  I just have to decide on the trim and buttons.

Fabric & Lining

Anyway - super excited about this sew-along which starts 7 October.

Sunday, 31 March 2013

Cotton Eyelet Couture

I feel in love with this cotton eyelet fabric on one of my visits to Global Fabrics.  I wasn't too excited about it being brown but immediately found this dark chocolate cotton lycra blend - it just seemed perfect for my next couture dress using my skills acquired from the Craftsy Couture Dress class. 
The end result ... a beautiful fitting dress that I absolutely love - the only question now is what shoes to wear!


However, I must fess that I only put the silk organsa interlining on the top and midriff band.  I felt the cotton lycra fabric I used for the skirt was already heavy enough that it just needed a lining.   Doing this also balanced the weight in the two fabrics. The inside of the dress is also two toned. 
I inserted the lining completely by hand - although this takes longer it gives me far more control than trying to machine it in ... and far more satisfying (for me anyway).

Both were taken from my fabric stash.  The top lining was left over from my pattern morphing top and the bottom, I'm not sure what I originally bought it for!

The pattern is this Vogue Options Misse's Dress V8633.  Because I'm more of a rectangle shape I had to make adjustments to the midriff band and skirt.  While the pattern isn't recommended for the rectangular body shape I think that it has given my body some shape and gives the illusion that I do have a waist!
 
More photos - just 'cos I can
(shoes are undecided so none at this stage)
Love the stand up collar
The shape of the sleeve balances up the hips
When it gets a bit cooler I can pair this with my Minrou Jacket :-)