Showing posts with label Little Black Jacket. Show all posts
Sunday, 2 February 2014
My Little French Jacket #1
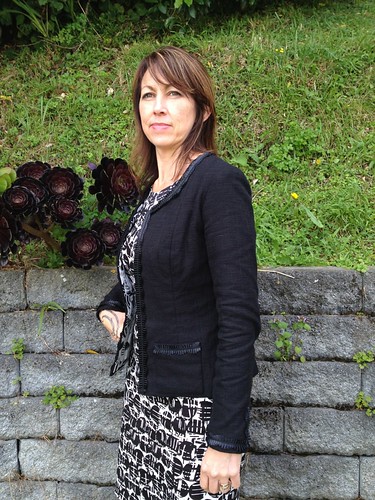
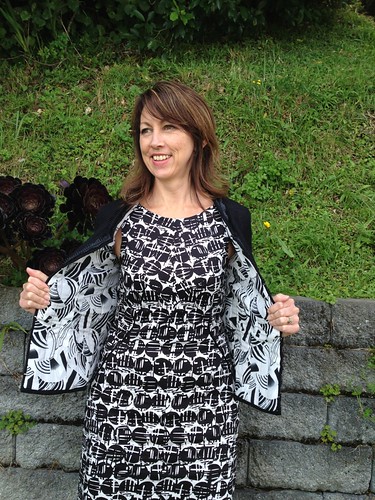
Say hello to my very first Little Black French Jacket! Total hours to completion 55, which I'm pretty happy about, because before I started I expected it would take about 75!
In December when I was at 38 hours I made this progress post if you want all the details before now. When I last left off I had just set-in the sleeves ... well, let me tell you, I had real problems getting the inside lining to sit just right on these suckers! After wrestling with it for a few hours and reading Leisa's post over and over and over, I decided it was time for a different approach and consulted Claire Shaeffer's DVD "The Couture Cardigan Jacket" - I decided her method was a winner and final got it all in place, not as pretty as I would have like, but none the less the sleeves were in and the lining closed - who's gonna see it anyway, as long as the sleeves don't fall off while being worn, right?!
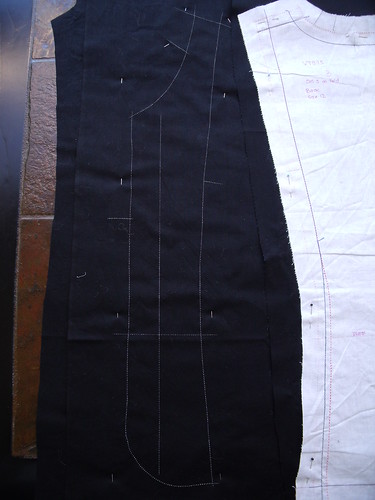
I finally made a decision about the bottom front. Initially I drafted a rounded edge as you can see below, but as the jacket came together, I just wasn't sure. In the end I went with my gut instinct and advice from follow sewcialists and squared it off.
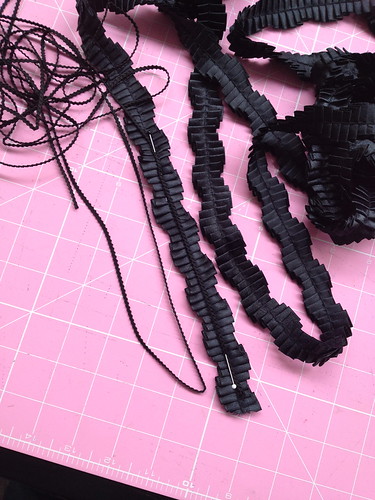
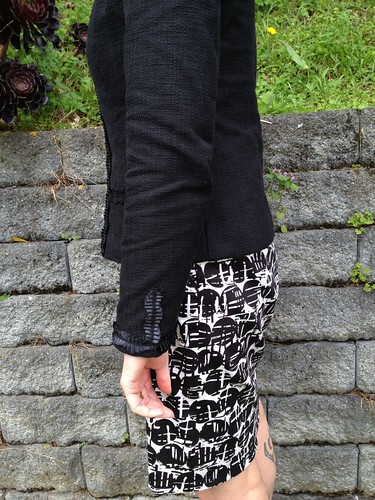
The trim I found at The Fabric Warehouse - some pre-pleated satin ribbon, over which I laid some tiny gimp. I love that the ribbon is 'wavey' and not just a simple straight line.
I also decided not to apply the trim around the bottom of the jacket, probably a bit OTT!
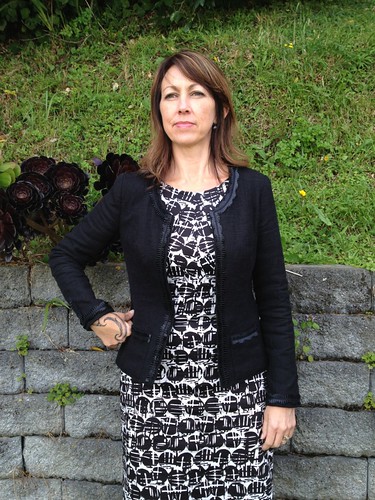
The Vogue pattern I used only provided for a two piece sleeve which meant no sleeve vent, synonymous with the LFJ. I was okay with this for my first jacket, but thought a faux vent would do the trick. A three piece sleeve has a seam that runs from the top of the sleeve, where it joins the shoulder seam, straight down to the cuff which is where the vent is constructed. My faux vent is located in exactly the same place with a strip of trim running perpendicular to the cuff.
I made a few booboos along the way, like cutting the lining inside out - but luckily the lining was almost identical on the right and wrong sides, so you can't really tell. I used a broadcloth as an interlining - I thought this would give the jacket some stability that I was looking for. Oh it has definitely done that, but way more than necessary. I should have just used it for the centre front pieces. On the up side, it is super warm to wear. I would set-in the sleeves differently next time and follow the Claire Shaeffer method to the letter - it is the last thing she does after closing the jacket and adding all the trim. I think this would work better for me.
I must give a HUGE thank you to both Inna and Leisa for the sew-along - the amount of information shared by both was just invaluable and totally enjoyable.
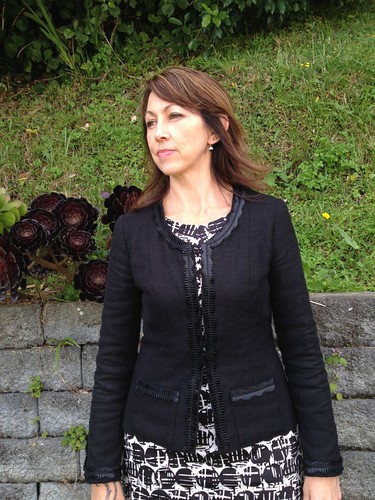
I love my LFJ and have worn it at every opportunity since it was finished in early January. Now that I've got all my rookieness (that is totally a word!) out of the way I'm really looking forward to making my next one using the free Marfy pattern, starting in March. For now I'm sewing pants for The Monthly Stitch 'Smarty Pants February'. You can join me on Instagram for up to the moment progress and hopefully I can get all three complete.
More photos on my Flickr -->
Sunday, 8 December 2013
Two months, 38 hours and counting
Back in October I embarked on construction of My Little French Jacket and it has been a bit of a journey. I started with a hiss and a roar and was ahead of the game, each week waiting anxiously for the next sew-along post to come out - but then came the sleeves and a pile of other sewing that I wanted to do. So when I picked it up yesterday, determined to conquer the sleeves I realised that it had been three weeks since I did any work on it! Just as well I was ahead of the game, because after successfully getting those sleeves in I'm back on track, yay! So I thought I would share a bit about the journey so far ....
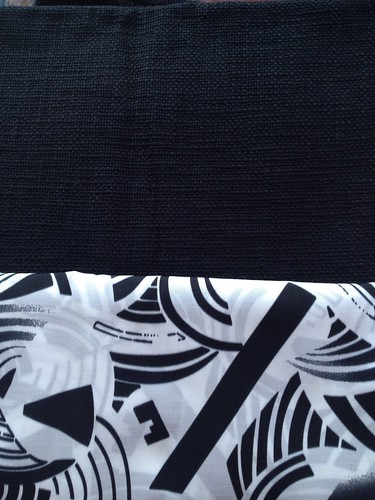
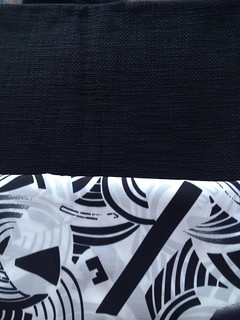
I chose this cotton boucle and silk lining - both purchased from The Fabric Store here in Wellington.
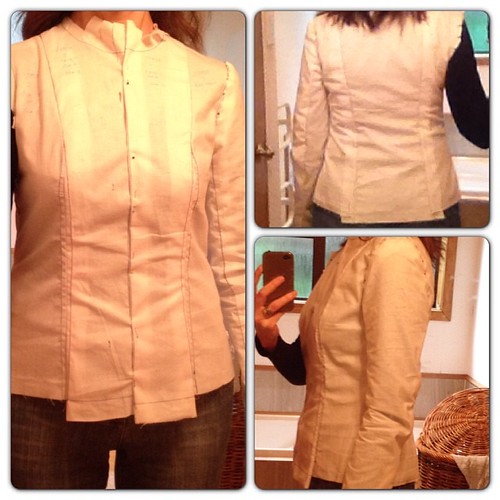
Muslin pieces all traced and thread traced. I selected a pattern size according to my bust measurement and made the muslin without any adjustments. The upper body of the muslin was a great fit, but I had to let out the princess seams in the front for my waist and hips. Minor adjustments in the scheme of things.
All the pattern pieces are thread traced on the stitch line. The grainline is also thread traced. The fabric is then placed over the lining and pinned on - this is where the grainline on the fabric is super useful.
The lining is then attached to the fabric by quilting lines. This is the very first time I had heard or seen this technique. I was super curious about how this wouldn't be visible from the outside - but it just get lost in the fabric, almost like magic!
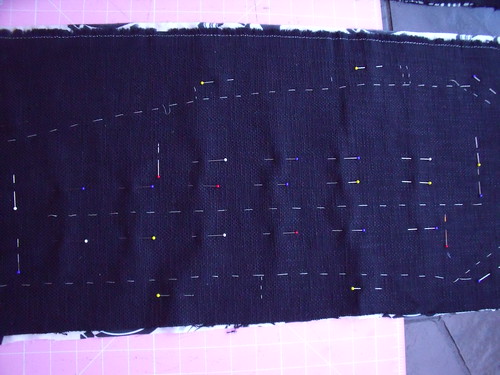
I marked my quilting lines with pins. Oh and this is where a walking foot on the sewing machine comes into its own - the best investment I ever made!
The seams of the fabric are then all sewn together and pressed open. Those seams are sewn by machine but to ensure accuracy the seams are basted together first and then put under the machine foot. The seams of the lining are then trimmed and hand stitched in place using a small fell stitch. My fell stitches got better and better - the pic below is my sleeve which is looking pretty if I do say so myself :-)
Now the sleeves are also set in my hand. This was a first for me and a little daunting but once I just followed all Leisa's wonderful instructions it was a breeze.
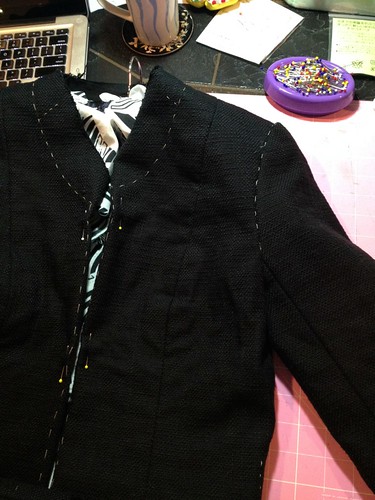
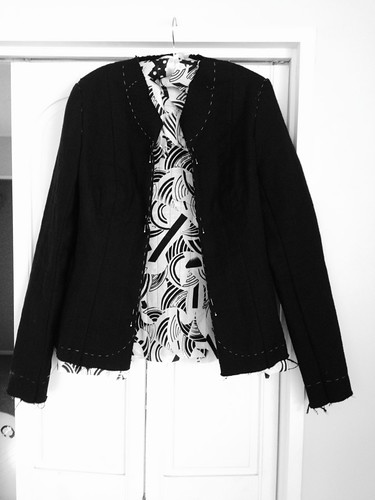
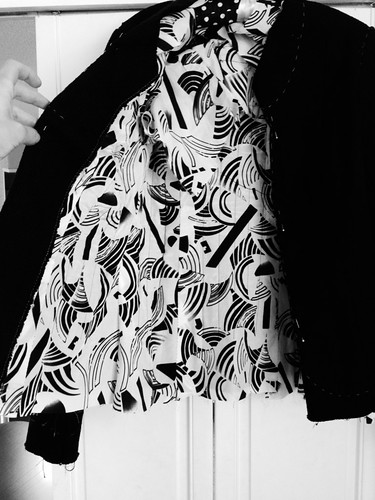
And here is where I'm at right now ... these two pics are both B&W :-)
Next, I need to work on closing the lining around the sleeve inset then it will be the hems, the trim and pockets. I feel like I'm on the home straight now ....
Total time to date = 38 hours.
I chose this cotton boucle and silk lining - both purchased from The Fabric Store here in Wellington.
Muslin pieces all traced and thread traced. I selected a pattern size according to my bust measurement and made the muslin without any adjustments. The upper body of the muslin was a great fit, but I had to let out the princess seams in the front for my waist and hips. Minor adjustments in the scheme of things.
All the pattern pieces are thread traced on the stitch line. The grainline is also thread traced. The fabric is then placed over the lining and pinned on - this is where the grainline on the fabric is super useful.
The lining is then attached to the fabric by quilting lines. This is the very first time I had heard or seen this technique. I was super curious about how this wouldn't be visible from the outside - but it just get lost in the fabric, almost like magic!
I marked my quilting lines with pins. Oh and this is where a walking foot on the sewing machine comes into its own - the best investment I ever made!
The seams of the fabric are then all sewn together and pressed open. Those seams are sewn by machine but to ensure accuracy the seams are basted together first and then put under the machine foot. The seams of the lining are then trimmed and hand stitched in place using a small fell stitch. My fell stitches got better and better - the pic below is my sleeve which is looking pretty if I do say so myself :-)
Now the sleeves are also set in my hand. This was a first for me and a little daunting but once I just followed all Leisa's wonderful instructions it was a breeze.
And here is where I'm at right now ... these two pics are both B&W :-)
Next, I need to work on closing the lining around the sleeve inset then it will be the hems, the trim and pockets. I feel like I'm on the home straight now ....
Total time to date = 38 hours.
Sunday, 6 October 2013
My Little Black Jacket
I am super excited about my next sew-along. This is being hosted by A Sewing Challenge and thewallinna with mentor Susan Khalje. The Chanel inspired little french jacket!

This wee 2 minute video was produced by Chanel in 2012 and shows an overview of the making a "Little Black Jacket". It is so inspiring.
Susan Khalje's Couture Dress Class was the first Craftsy class I ever signed up for and it remains my most watched. I refer back to it all the time - there are an enormous amount of techniques and valuable information in every lesson. That class was like a revolution for my sewing. So when Inna announced she had done Susan's Chanel Jacket class (in person with Susan!) and would be hosting this sew-along - it was like all my dreams came true.
I had already purchased some wool boucle from The Fabric Store and had a pattern all lined up. But first there were a few other projects I just had to get out of my system (appearing on the blog soon) before I felt that I could immerse myself in making a jacket.
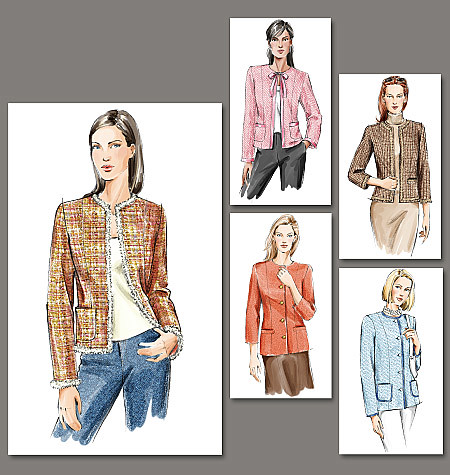
I have since decided that this fabric won't be my first jacket but probably my second once I've got the couture jacket sew-along done. So I've been and purchased a new pattern V7975, because of it's simple lines and classic style and black cotton boucle from The Fabric Store.
The lining is a black and white silk (blend I think) that I picked up at The Fabric Warehouse sale earlier this week. I just have to decide on the trim and buttons.
Anyway - super excited about this sew-along which starts 7 October.

This wee 2 minute video was produced by Chanel in 2012 and shows an overview of the making a "Little Black Jacket". It is so inspiring.
Susan Khalje's Couture Dress Class was the first Craftsy class I ever signed up for and it remains my most watched. I refer back to it all the time - there are an enormous amount of techniques and valuable information in every lesson. That class was like a revolution for my sewing. So when Inna announced she had done Susan's Chanel Jacket class (in person with Susan!) and would be hosting this sew-along - it was like all my dreams came true.
I had already purchased some wool boucle from The Fabric Store and had a pattern all lined up. But first there were a few other projects I just had to get out of my system (appearing on the blog soon) before I felt that I could immerse myself in making a jacket.
I have since decided that this fabric won't be my first jacket but probably my second once I've got the couture jacket sew-along done. So I've been and purchased a new pattern V7975, because of it's simple lines and classic style and black cotton boucle from The Fabric Store.
The lining is a black and white silk (blend I think) that I picked up at The Fabric Warehouse sale earlier this week. I just have to decide on the trim and buttons.
Anyway - super excited about this sew-along which starts 7 October.
Subscribe to:
Posts (Atom)