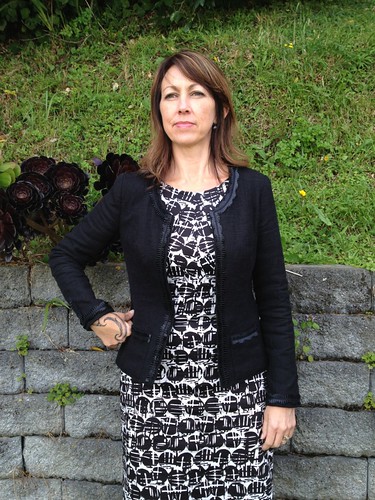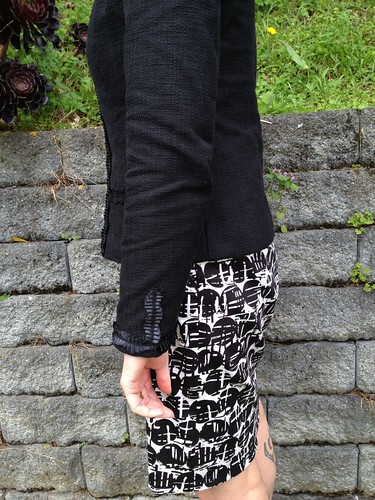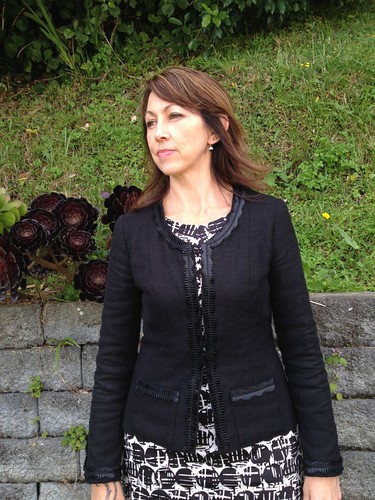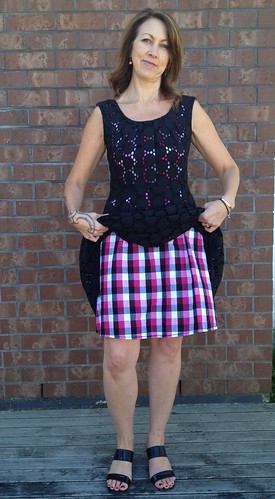
I've been beavering away at my second Little French Jacket for the past couple of months...
and I was making good progress until I was side-tracked by the release of the Holly Jumpsuit, which jumped to the front of the blog (here), before my other finished projects.
I was so pleased with the first Holly, I made the wee adjustment to the back crotch curve, went fabric shopping especially and picked up this lovely viscose for a long pant version. In the weekend just gone, I got it all stitched up enough for a quick fitting .... and then this
This pile, my friends, is my first UFO in a long time! I believe it has got everything to do with the fabric choice. It is too big, the crotch almost hangs down to my knees and it looks like a sack! So for now I'm gonna consider this a big fat 'fail' and move on with my Little French jacket.
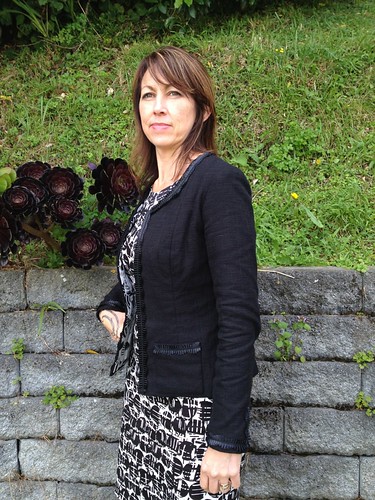
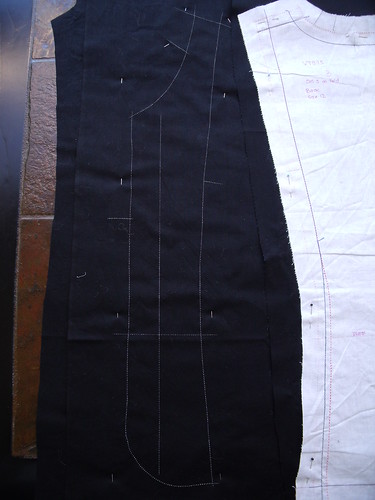
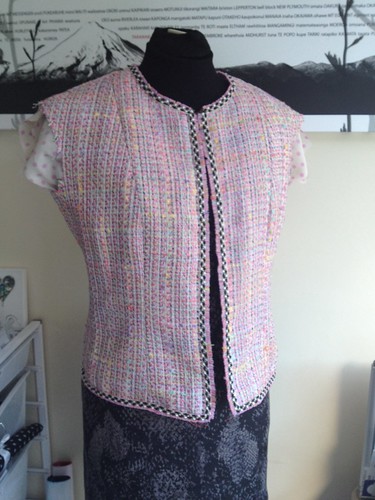
I'm not far away from finishing - I've just got the pockets to attached and the sleeves to set in. With this Jacket I've decided to put four pockets on, like this ... the bottom pockets need bringing up by about 1/4 inch.
The fabric is like a cotton boucle, that I picked up off Trade Me (NZ version of eBay) from a sewer that was having a clean out. When it arrived I really wasn't sure if I liked it or not, so I put it away in the stash and never thought much more about it.
When I was ready to attempt my second Chanel inspired jacket, I still didn't think I was ready to cut into my really nice wool boucle, summer was coming and this cotton jumped to the top of the 'reasons why' list. If it didn't work out then I wouldn't cry for days!
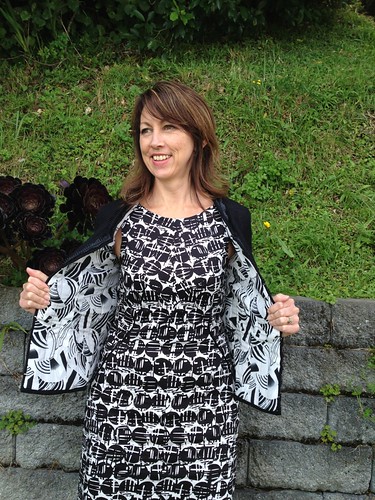
What do ya know, it has actually begun to grow on me... when I started I didn't have the lining or the trim so I didn't really have a clear vision in my head of what it would look like. When it was time for the lining, I must have looked at every possible lining option in The Fabric Store before it became obvious that this pink polka dot crepe de chine was perfect. I'm not a polka dot person, so mentally I think I counted it out before I actual picked it up and placed it with the swatch I took with me. It was the perfect match - don't you just love it when you surprise yourself with fabric choice!
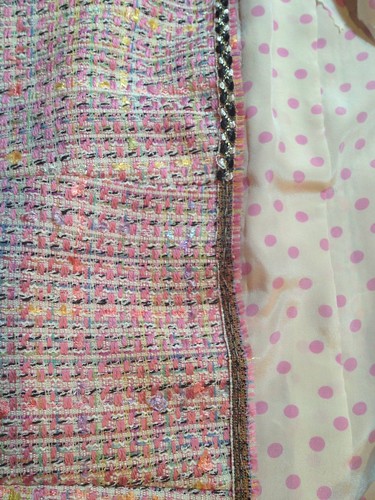
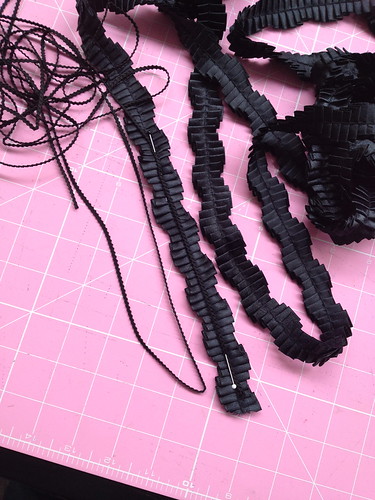
I cut all the selvage from the fabric to use as trim ... note to self: cut off all trim after placing pattern on fabric and before cutting them out. Why you may ask, because instead of two long continuous pieces of trim I had a few odd lengths and had to look at joining them in discrete places on the jacket. Finding trim was another major shopping expedition with fabric swatch in hand. I picked up this lovely black, white and gold trim, that was the perfect width to go over the selvage, from Made Marion
So at this stage I'm feeling a lot happier about this jacket than I am about Holly the sack! I think it will be the perfect colour to wear with a nice pair of jeans ... hmmm I can see it fitting into my wardrobe now :-)
Showing posts with label Vogue. Show all posts
Wednesday, 17 December 2014
Sunday, 2 February 2014
My Little French Jacket #1
Say hello to my very first Little Black French Jacket! Total hours to completion 55, which I'm pretty happy about, because before I started I expected it would take about 75!
In December when I was at 38 hours I made this progress post if you want all the details before now. When I last left off I had just set-in the sleeves ... well, let me tell you, I had real problems getting the inside lining to sit just right on these suckers! After wrestling with it for a few hours and reading Leisa's post over and over and over, I decided it was time for a different approach and consulted Claire Shaeffer's DVD "The Couture Cardigan Jacket" - I decided her method was a winner and final got it all in place, not as pretty as I would have like, but none the less the sleeves were in and the lining closed - who's gonna see it anyway, as long as the sleeves don't fall off while being worn, right?!
I finally made a decision about the bottom front. Initially I drafted a rounded edge as you can see below, but as the jacket came together, I just wasn't sure. In the end I went with my gut instinct and advice from follow sewcialists and squared it off.
The trim I found at The Fabric Warehouse - some pre-pleated satin ribbon, over which I laid some tiny gimp. I love that the ribbon is 'wavey' and not just a simple straight line.
I also decided not to apply the trim around the bottom of the jacket, probably a bit OTT!
The Vogue pattern I used only provided for a two piece sleeve which meant no sleeve vent, synonymous with the LFJ. I was okay with this for my first jacket, but thought a faux vent would do the trick. A three piece sleeve has a seam that runs from the top of the sleeve, where it joins the shoulder seam, straight down to the cuff which is where the vent is constructed. My faux vent is located in exactly the same place with a strip of trim running perpendicular to the cuff.
I made a few booboos along the way, like cutting the lining inside out - but luckily the lining was almost identical on the right and wrong sides, so you can't really tell. I used a broadcloth as an interlining - I thought this would give the jacket some stability that I was looking for. Oh it has definitely done that, but way more than necessary. I should have just used it for the centre front pieces. On the up side, it is super warm to wear. I would set-in the sleeves differently next time and follow the Claire Shaeffer method to the letter - it is the last thing she does after closing the jacket and adding all the trim. I think this would work better for me.
I must give a HUGE thank you to both Inna and Leisa for the sew-along - the amount of information shared by both was just invaluable and totally enjoyable.
I love my LFJ and have worn it at every opportunity since it was finished in early January. Now that I've got all my rookieness (that is totally a word!) out of the way I'm really looking forward to making my next one using the free Marfy pattern, starting in March. For now I'm sewing pants for The Monthly Stitch 'Smarty Pants February'. You can join me on Instagram for up to the moment progress and hopefully I can get all three complete.
More photos on my Flickr -->
Tuesday, 14 January 2014
Plaid Peek-a-Boo Party
The December challenge over at The Monthly Stitch was "The Party Dress" (I know we are just about half way through January and I'm just getting this to the blog!)
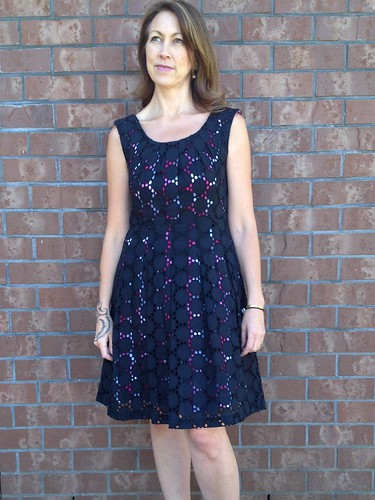
I did start a formal party dress, but I've got fit issues with the bodice that I have to fix, so instead I made a completely new dress, one that I could wear on Christmas Day ... because I always, always wear a new outfit on Christmas Day. This was most definitely one of those sew like crazy projects that I started just two days before needing to travel.
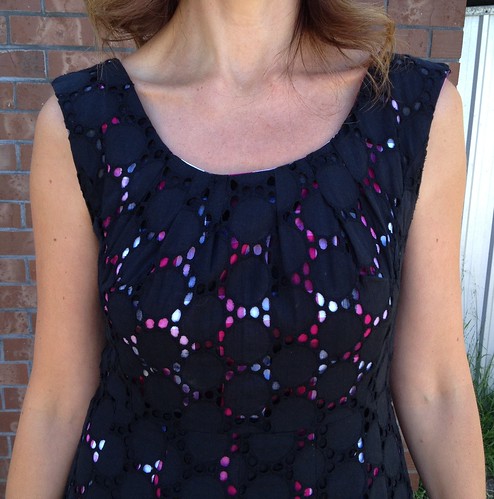
Earlier in the year I purchased two yards of this beautiful circle eyelet fabric from Gertie's Etsy Shop. The original plan was to line a dress with black siri purchased at the same time. I love the fabric so much that I've been too scared to commit it to an actual pattern - believe me I've had many dresses made from this fabric in my head! Eventually I settled on the Kay Unger Vogue 1353 pattern that I'd made before here.
Up until the point that I had constructed the eyelet layer of the dress did I change my mind on the lining. I had laid a pattern piece on top of my muslin role, in one of those "I'll just put you over there for a moment" thoughts, and the contrast was like a sparkle in my eye. At that moment I knew I just couldn't line this dress with black! From my stash appeared this plaid ....
I know, crazy right! And believe me I did put it away a few times and tried other options, but I just kept coming back to this one. I picked this up for $3 a metre at the summer Fabric Warehouse sale - and I have like six metres of it, so why not use it as lining?!
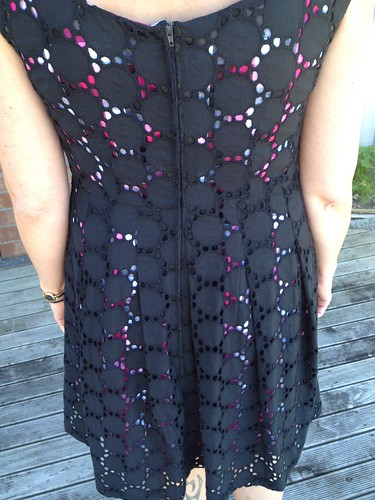
I do love the way that you can't tell it is a plaid, it's just like the party of colour playing peek-a-boo through the holes.
The construction was exactly the same as my previous Retro Geektastic make, but I ran out of time and had to leave home with one whole seam un-sewn! Well, I did intend to sew it before I left but I got side tracked and then forgot. So the seam of the lining from the bottom of the zipper to the hem has been hand-sewn using a back-stitch. Then the raw-edges have been holded back and stitched down with a running stitch, the seam pressed open and catch stitched in place - there is no chance of fraying now!
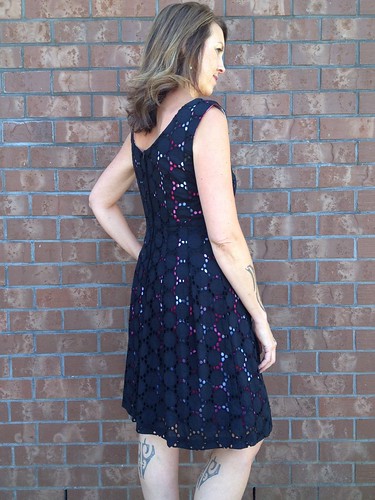
The hem of the lining I would have usually turned up and machine stitched, but no sewing machine meant that it was turned up and secured with a catch-stitch. I wasn't sure what to do with the hem of the eyelet, so on Christmas Day I just wore it un-hemmed. After wearing it for a day I decided that I did need to hem it and purchased some bias binding tape, turned the bottom of the dress up about 15cm and sewed the bias tape on the inside to hide the draw edge of the fabric.
The pattern provides for a really deep hem facing, which I understand gives the hem of the dress some body which helps accentuate the design of the dress. Without the hem facing I thought I might loose that design feature, but now that I look at the photos, I think not!
Perhaps this dress should be the Crazy Party dress!
More photos on my Flickr -->
I did start a formal party dress, but I've got fit issues with the bodice that I have to fix, so instead I made a completely new dress, one that I could wear on Christmas Day ... because I always, always wear a new outfit on Christmas Day. This was most definitely one of those sew like crazy projects that I started just two days before needing to travel.
Earlier in the year I purchased two yards of this beautiful circle eyelet fabric from Gertie's Etsy Shop. The original plan was to line a dress with black siri purchased at the same time. I love the fabric so much that I've been too scared to commit it to an actual pattern - believe me I've had many dresses made from this fabric in my head! Eventually I settled on the Kay Unger Vogue 1353 pattern that I'd made before here.
Up until the point that I had constructed the eyelet layer of the dress did I change my mind on the lining. I had laid a pattern piece on top of my muslin role, in one of those "I'll just put you over there for a moment" thoughts, and the contrast was like a sparkle in my eye. At that moment I knew I just couldn't line this dress with black! From my stash appeared this plaid ....
I know, crazy right! And believe me I did put it away a few times and tried other options, but I just kept coming back to this one. I picked this up for $3 a metre at the summer Fabric Warehouse sale - and I have like six metres of it, so why not use it as lining?!
I do love the way that you can't tell it is a plaid, it's just like the party of colour playing peek-a-boo through the holes.
The construction was exactly the same as my previous Retro Geektastic make, but I ran out of time and had to leave home with one whole seam un-sewn! Well, I did intend to sew it before I left but I got side tracked and then forgot. So the seam of the lining from the bottom of the zipper to the hem has been hand-sewn using a back-stitch. Then the raw-edges have been holded back and stitched down with a running stitch, the seam pressed open and catch stitched in place - there is no chance of fraying now!
The hem of the lining I would have usually turned up and machine stitched, but no sewing machine meant that it was turned up and secured with a catch-stitch. I wasn't sure what to do with the hem of the eyelet, so on Christmas Day I just wore it un-hemmed. After wearing it for a day I decided that I did need to hem it and purchased some bias binding tape, turned the bottom of the dress up about 15cm and sewed the bias tape on the inside to hide the draw edge of the fabric.
The pattern provides for a really deep hem facing, which I understand gives the hem of the dress some body which helps accentuate the design of the dress. Without the hem facing I thought I might loose that design feature, but now that I look at the photos, I think not!
Perhaps this dress should be the Crazy Party dress!
More photos on my Flickr -->
Saturday, 12 October 2013
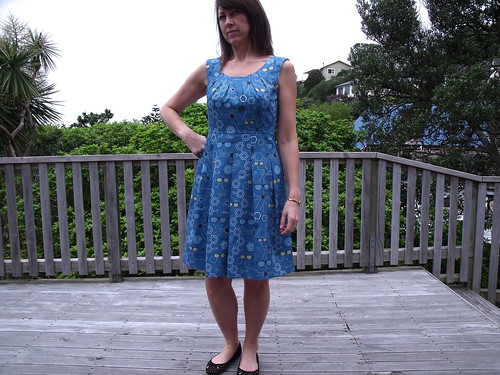
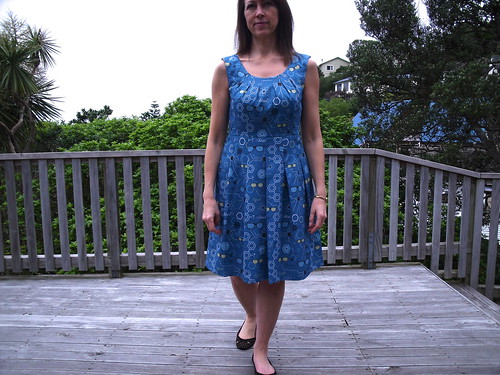
Geektastic marries Vogue
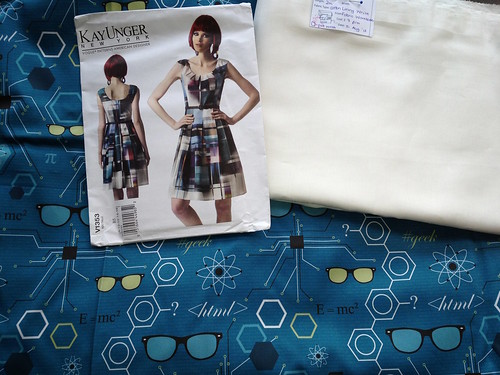
I have been hanging out to make this dress for what seems like ages. I purchased the pattern early this year but put it away thinking that when summer arrives I will get it out again. Then I discovered Spoonflower!
I can't remember what month but this fabric was the winner of the geek contest on Spoonflower. The colour was amazing and it just spoke to me. Now ... I don't usually go for novelty prints but this, well I just had to have it.
At the first sign of Spring this dress just had to jump the que and be first onto the sewing table for Frocktober.
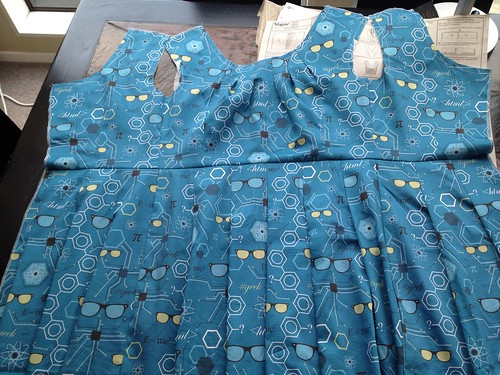
I put together a muslin first and just as well cause the waist was just too small, so a bit of math later and I'd worked out that each pleat, and there are 10 of them, had to loose 0.7cm which would give me the extra 7cm in circumference that I needed. I also had a hell of a time with the princess seams in the bodice - they weren't true princess seams because the pattern also has a bust dart. Anyway after much faffing it all came together.
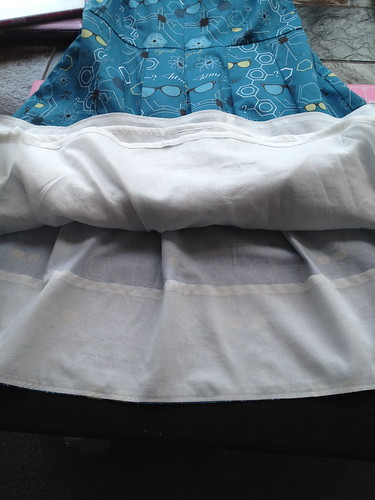
I got some cotton batiste (well that's what I think it is anyway) from The Fabric Warehouse to line the dress, so it would feel wonderful against my skin in the summer heat, without sticking to me.
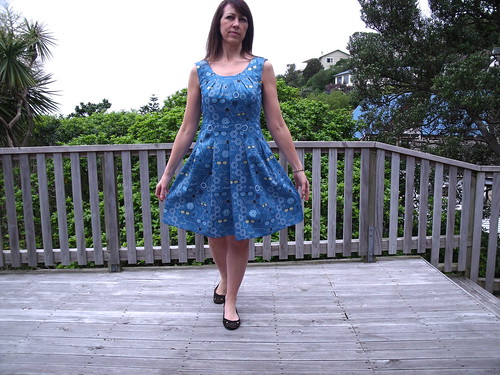
The dress provided for a hem facing. This is the first time I've done one of these - very easy I must say. I couldn't really workout why a facing and not just a hem, but as soon as I put the dress on I immediately knew why - it helps give the skirt some fooff and helps maintain the overall shape of the dress when worn - very cleaver if you ask me!
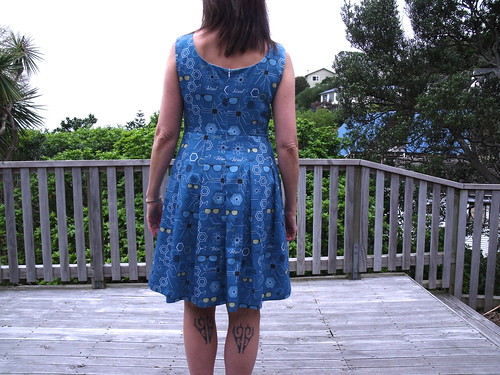
Look at the shape of the dress - isn't that so pretty?
My invisible zipper went in like a dream. No pattern matching here, as you can tell!
More Photo on my Flickr -->
I can't remember what month but this fabric was the winner of the geek contest on Spoonflower. The colour was amazing and it just spoke to me. Now ... I don't usually go for novelty prints but this, well I just had to have it.
At the first sign of Spring this dress just had to jump the que and be first onto the sewing table for Frocktober.
I put together a muslin first and just as well cause the waist was just too small, so a bit of math later and I'd worked out that each pleat, and there are 10 of them, had to loose 0.7cm which would give me the extra 7cm in circumference that I needed. I also had a hell of a time with the princess seams in the bodice - they weren't true princess seams because the pattern also has a bust dart. Anyway after much faffing it all came together.
I got some cotton batiste (well that's what I think it is anyway) from The Fabric Warehouse to line the dress, so it would feel wonderful against my skin in the summer heat, without sticking to me.
The dress provided for a hem facing. This is the first time I've done one of these - very easy I must say. I couldn't really workout why a facing and not just a hem, but as soon as I put the dress on I immediately knew why - it helps give the skirt some fooff and helps maintain the overall shape of the dress when worn - very cleaver if you ask me!
Look at the shape of the dress - isn't that so pretty?
My invisible zipper went in like a dream. No pattern matching here, as you can tell!
More Photo on my Flickr -->
Sunday, 1 September 2013
Spring calls for Group Sewing
Today is the first day of spring and to kick it off I am participating in a couple of group sewing activities. Luckily I can sew one garment for both - oh year love that!
I love sewing dresses and who doesn't like a good cotton fabric, but I don't usually sew vintage! Athough now vintage includes the 1980s I probably have a few patterns from that era in my statsh! Anyway my intuition must have known something I didn't, because about three months ago when sewingpatterns.com had a Butterick sale I acquired this Butterick Retro '51 pattern. The dress to the left particularly caught my eye.
This pattern wasn't even on my sewing 'to do' list, then all of a sudden it is first out of the box for September - don't you love how a good group activity changes things :-)
Last week I took a wee detour to The Fabric Store hoping to get some inspiration for fabric. I was hoping to find a cotton voile or similar light weight cotton that would have a transparent nature. Next thing I knew I was at the counter with this fabric!
Now this is sooooo far removed from my comfort zone, but the purple and blue combination found a soft spot and intuition said 'BUY IT'. So what is a girl to do ... follow her intuition of course!
To keep inspired and gain some confidence in my selection I joined the Fall for Cotton Flickr group - check it out there are some great patterns and amazing fabrics to google over.
Check out this fabric! I ordered this from Spoonflower, not long after I discovered the awesomeness of custom made fabric.
Two yards of cotton sateen - devine! At the time I ordered it all I knew was that I wanted to make a dress with it, one with a fullish skirt. Then along came this pattern from Kay Unger in the Vogue collection, the perfect combination.
On my way past the Fabric Warehouse yesterday I called in to pick up some lining, 100% cotton batiste, which is lovely and soft to match the cotton sateen, knowing that this pattern would be at the top of my sewing list soon now that it is Spring ;-)
It feels like Spring is my permission to start sewing summer dresses - well that's what I'm telling myself anyway. That's not to say that I've finished my winter sewing list yet - still two pairs of jeans to make and a nice wool blazer! There is no doubt that they will get loads of wear before summer is truly here.
I love sewing dresses and who doesn't like a good cotton fabric, but I don't usually sew vintage! Athough now vintage includes the 1980s I probably have a few patterns from that era in my statsh! Anyway my intuition must have known something I didn't, because about three months ago when sewingpatterns.com had a Butterick sale I acquired this Butterick Retro '51 pattern. The dress to the left particularly caught my eye.
This pattern wasn't even on my sewing 'to do' list, then all of a sudden it is first out of the box for September - don't you love how a good group activity changes things :-)
Last week I took a wee detour to The Fabric Store hoping to get some inspiration for fabric. I was hoping to find a cotton voile or similar light weight cotton that would have a transparent nature. Next thing I knew I was at the counter with this fabric!
![]() |
| The pin in the centre will give you a sense of the size of the pattern. |
Now this is sooooo far removed from my comfort zone, but the purple and blue combination found a soft spot and intuition said 'BUY IT'. So what is a girl to do ... follow her intuition of course!
To keep inspired and gain some confidence in my selection I joined the Fall for Cotton Flickr group - check it out there are some great patterns and amazing fabrics to google over.
Check out this fabric! I ordered this from Spoonflower, not long after I discovered the awesomeness of custom made fabric.
Two yards of cotton sateen - devine! At the time I ordered it all I knew was that I wanted to make a dress with it, one with a fullish skirt. Then along came this pattern from Kay Unger in the Vogue collection, the perfect combination.
On my way past the Fabric Warehouse yesterday I called in to pick up some lining, 100% cotton batiste, which is lovely and soft to match the cotton sateen, knowing that this pattern would be at the top of my sewing list soon now that it is Spring ;-)
It feels like Spring is my permission to start sewing summer dresses - well that's what I'm telling myself anyway. That's not to say that I've finished my winter sewing list yet - still two pairs of jeans to make and a nice wool blazer! There is no doubt that they will get loads of wear before summer is truly here.
Sunday, 31 March 2013
Cotton Eyelet Couture
I feel in love with this cotton eyelet fabric on one of my visits to Global Fabrics. I wasn't too excited about it being brown but immediately found this dark chocolate cotton lycra blend - it just seemed perfect for my next couture dress using my skills acquired from the Craftsy Couture Dress class.
The end result ... a beautiful fitting dress that I absolutely love - the only question now is what shoes to wear!
However, I must fess that I only put the silk organsa interlining on the top and midriff band. I felt the cotton lycra fabric I used for the skirt was already heavy enough that it just needed a lining. Doing this also balanced the weight in the two fabrics. The inside of the dress is also two toned.
I inserted the lining completely by hand - although this takes longer it gives me far more control than trying to machine it in ... and far more satisfying (for me anyway).
Both were taken from my fabric stash. The top lining was left over from my pattern morphing top and the bottom, I'm not sure what I originally bought it for!
The pattern is this Vogue Options Misse's Dress V8633. Because I'm more of a rectangle shape I had to make adjustments to the midriff band and skirt. While the pattern isn't recommended for the rectangular body shape I think that it has given my body some shape and gives the illusion that I do have a waist!
More photos - just 'cos I can
When it gets a bit cooler I can pair this with my Minrou Jacket :-)
The end result ... a beautiful fitting dress that I absolutely love - the only question now is what shoes to wear!
However, I must fess that I only put the silk organsa interlining on the top and midriff band. I felt the cotton lycra fabric I used for the skirt was already heavy enough that it just needed a lining. Doing this also balanced the weight in the two fabrics. The inside of the dress is also two toned.
I inserted the lining completely by hand - although this takes longer it gives me far more control than trying to machine it in ... and far more satisfying (for me anyway).
Both were taken from my fabric stash. The top lining was left over from my pattern morphing top and the bottom, I'm not sure what I originally bought it for!
The pattern is this Vogue Options Misse's Dress V8633. Because I'm more of a rectangle shape I had to make adjustments to the midriff band and skirt. While the pattern isn't recommended for the rectangular body shape I think that it has given my body some shape and gives the illusion that I do have a waist!
More photos - just 'cos I can
| (shoes are undecided so none at this stage) |
| Love the stand up collar |
| The shape of the sleeve balances up the hips |
Subscribe to:
Posts (Atom)