Showing posts with label Silk. Show all posts

Tuesday, 14 April 2015

Silk Granville Shirt

Silk Granville Shirt

After finishing my wearable muslin (which I haven't blogged yet, oops! but will explain more soon...) I immediately made the following changes to the pattern pieces of the Sewaholic Granville Shirt:
  • moved the side dart and waist down 1/2" using the cut and slash method above the bust on the front pieces and the two back pieces.
  • I didn't want to change the length of the shirt, so I removed 1/2" at the high hip on all three pattern pieces.
  • I added 1/8" at the waist by the front and side back pieces, created an additional 1/2" of ease all round.
  • I added 1" to the original sleeve pattern piece.
This shirt is a little difficult to get a true read on fit because the silk is so mobile, but it is feeling like the changes worked.

To keep the silk under control while sewing I used some starch spray, ironed it in and then left it overnight to set. Not sure that you need to let it set, but once it was dry the silk had a wee bit more control.
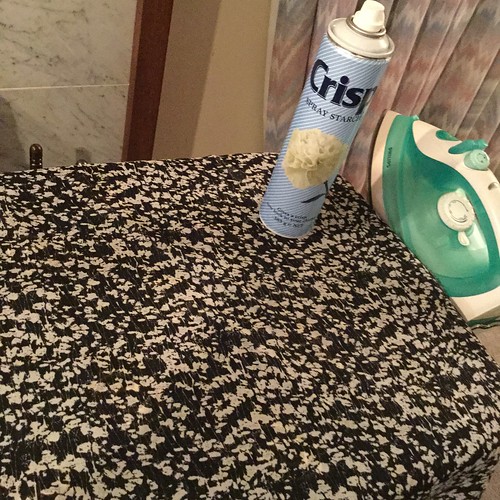
Makings of a silk Granville Shirt

I wanted to add some structure to the collar, collar stand and cuffs - so rather than using a really heaving interfacing I elected to use some silk crepe de chine on the underside of these pieces. I applied the interfacing to the crepe de chine pieces so the silk would move loosely over top . I love the end of result of this.

I think I should have used the crepe de chine for the sleeve plackets because constructing these with the silk was just a real pain in the arse! They are not pretty!!!
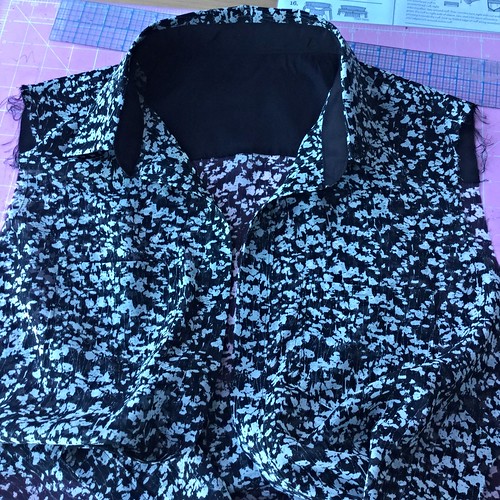
Makings of a silk Granville Shirt

Silk Granville Shirt

I finished all the seams with the french seam technique including setting in the sleeve. This is the first time I've used the french seam to set in the sleeve and I was so nervous about sewing it the wrong way I must have triple checked it twice over, each time.  It was relatively easy to do and the finish around the sleeve is now just as pretty as all the other seams.

Because the silk was so delicate I used a 70/10 needle in my machine and purchased some machine embroidery thread which is much finer than the standard polyester thread. I would definitely recommend it - I'll be using it again for other fine silk / chiffon fabrics. I also put my walking foot on my machine to minimise the movement of the fabric.  A combination of all these bits and pieces made sewing the silk very enjoyable.

I used the hairline hem technique which I've used more than once before, but this time it's a bit of a mess - not sure what I did wrong this time, but really wish I'd done a rolled hem by hand!!

You can't see in the pictures but there are pockets on both sides of the front. I probably didn't need to put them on because the fabric is so busy you can't see them, but I know they're there.

Silk Granville Shirt

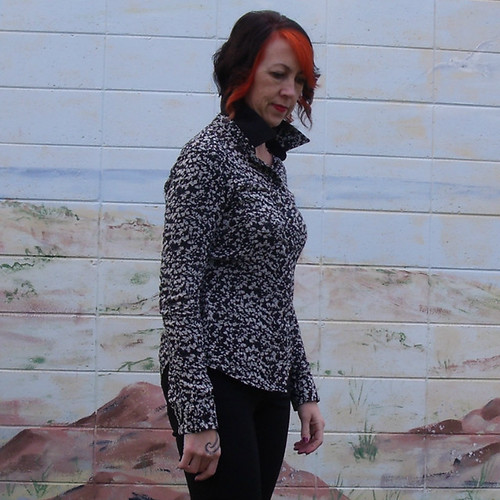
This time round I made a much better job of the collar stand. I drafted a collar stand template like Tasia recommended in her tutorials, marked the stitching line on the fabric and then followed on the machine. The silk was easy to tuck out of the way, resulting in the ends of the collar stand looking identical. Whoop, whoop!

The sad part is that the weather in this part of the world has just turned terribly cold - you know coat and gloves cold!  So my lovely silk shirt will probably have to hang in the wardrobe until the end of the year then the warmer weather rolls around again.  I had to put a merino on underneath to take these photos!
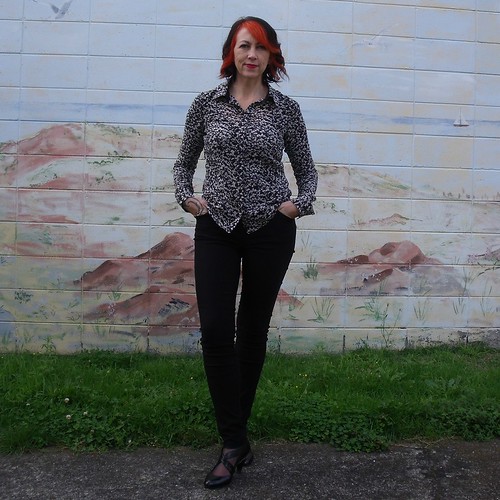
Silk Granville Shirt

Anyway more about why I've blogged my lovely silk version before my muslin version of the Granville Shirt ... well you know that the Wellington Sewing Bloggers Network (WSBN) get up to all sorts of sewing fun that also includes fabric enabling and pattern shopping :-)  The Dreamstress put this idea to the group: "Could the Wellington Sewing Bloggers Network create a linking chain of sewing creations, where each person’s creation shares a fabric or pattern with the next person’s creation?"  And so the 0Degrees of Sewing Separation Challenge was born.
Sew Along

This was probably the hardest challenge we've had so far, it took a few months to sort out our connections and how they would link into a chain, but we got there in the end.  I am second in the chain matching the Granville Sewaholic pattern to Silly Billy Sewing who ended up being twinsees with Two Random Words.  The chain continues with Fifty Two Fancies using the same fabric as me to make a pattern shared with another.  You get the picture right!  For the month of April we are unraveling our 0Degrees of Sewing Separation with a blog tour.  If you are interested in reading about our antics head over to The Dreamstress who is updating her blog daily with each reveal.
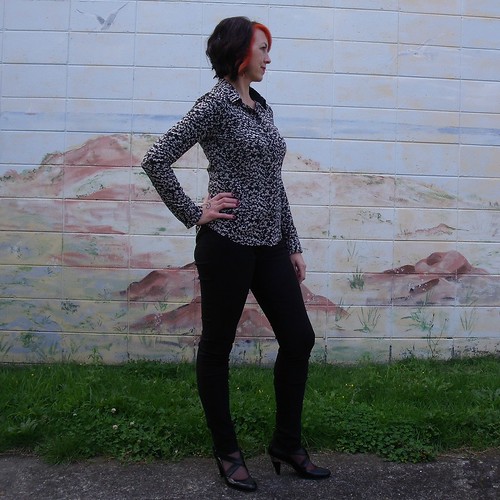
Silk Granville Shirt

More photos of my Silk Chiffon Granville over on my Flickr -->

Monday, 1 September 2014

Marfy Free Jacket Pattern - The End!

Back in April this year I wrote Part 1 of the Marfy Free Jacket Pattern.  It is now officially Spring and I'm finally at the end - writing the blog post!

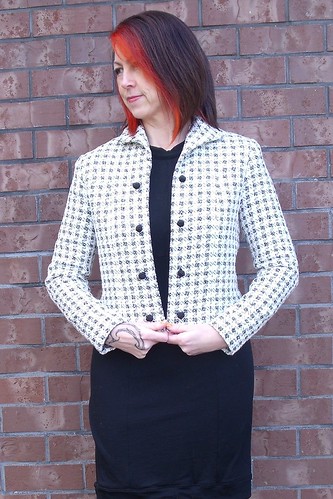
After I got the muslin fit to where I was comfortable - that alone was a 5 week journey, on 25 April I got to cut my real fabric.  While that sounds quite straight forward, sadly not because of my fabric choice.  I bought this lovely wool coating from The Fabric Store - it's so soft and bouncy with a medium weave - so it easily frayed but not so much that it was uncontrollable.

Begin thread tracing

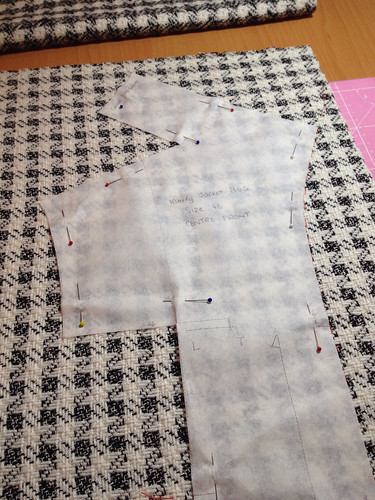
I cut all pieces on a single layer, carefully ensuring I had all the squares in the right places for each piece.  While this was a little time consuming it wasn't too hard - the pattern pieces didn't have any seam allowances, so where the pattern piece fell was indeed the stitching seam.

Untitled
Pattern matching at centre back

After I thread traced and cut the fabric it then sat on the shelf for weeks while I tried to decide how I was going to construct it.  I couldn't decided to make a quilted Chanel inspired jacket (LFJ) or whether to take a more tailored approach.  This was my too hard point - I couldn't see how my fabric could be tailored but I could see how it would work as a LFJ; but I couldn't see how the collar would work if it wan't tailored ... *brain explode*

Finally, I decided to wait for the sew-along to get to this point, and take some wise direction from Leisa.  There it was, tailor the jacket!  Part of me was jumping up and down because I could sew the lining together using the machine and then insert, rather than having to hand-stitch each seam of the lining as is required for a LFJ; another part of me was still unsure how the pile of this fabric would behave.  What the hell ... just do it!

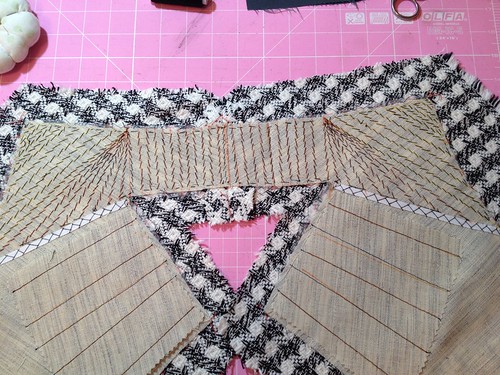
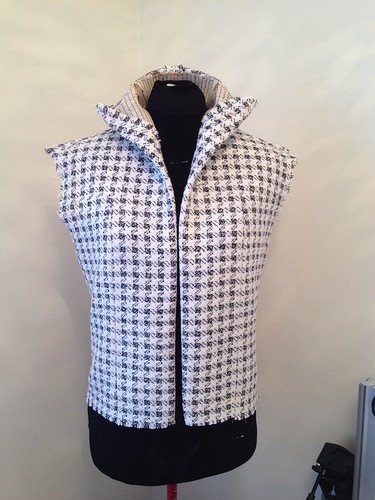
Leisa wrote this amazing post about pad stitching the collar.  This was like a light bulb moment!  The collar would behave differently depending on the direction of the stitches.  I decided that I wanted the back of my collar to stand up and the front to have a beautiful soft roll.

Untitled
Pad stitching a stand up collar
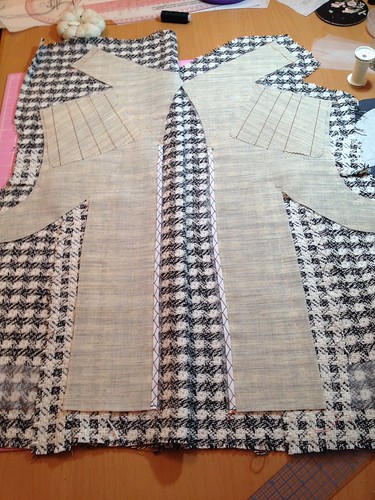
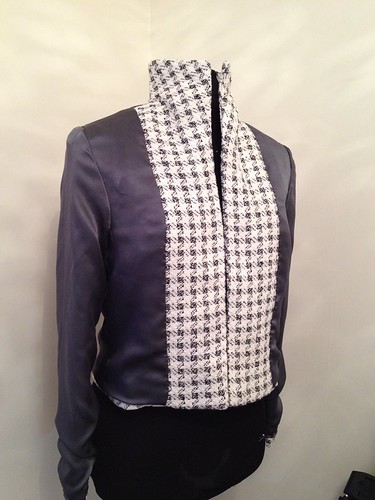
The rest of the jacket came together pretty nicely from here.  I used a medium weight hair canvas for the front and collar which followed through to the bottom of the arm pit.  The shoulders are reinforced with a second layer of hair canvas and the bottom of the jacket has a 2" lining of silk organza.  I also draft a back stay from some scrap cotton lawn that I had lying around (sorry no pictures of that one).

Untitled

Untitled

The sleeve of the jacket is a one piece, which is okay, but next time I would definitely convert to a two piece and add some elbow ease.

Untitled
inside of jacket
For the lining I chose this lovely silk satin from The Fabric Store - yeah it was pricey but the weight of the lining matched the jacket beautifully.  I constructed the lining using the sewing machine but then inserted it into the jacket by hand - a lovely wee fell stitch :-)

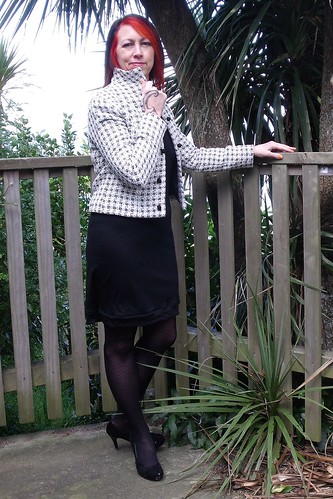
Now it is 29 June and I'm finished the construction of the jacket, only to be faced with my next dilemma ... what trim to use.  I initially thought I would use a sold black grossgain or satin ribbon and attach very close to the edge.  I bought enough of both to try, but once I pinned it in place I didn't like it - it was just too heavy for the jacket.  So once more, the jacket just hung around waiting for me to make the next decision.  Finally I settled on these small round fabric bobble buttons  - they're just giant knots really.  I was going to place a loop on one side so the jacket would close, but couldn't get that to work.  I ditched the loops and just went with the buttons, so for now the jacket doesn't close and I'm okay with that.

Untitled

I also decided that the jacket didn't need the patch pockets - less is more!  I love it :-)

Untitled

I finally finished the jacket on 19 July and have worn it a few times since - I never really know how I feel about anything until I've worn it a few times.  It is super warm - most definitely a winter jacket.

Would I make this pattern again - you bet I would.  Next time I would:

  • add a wee bit more ease to the back, possibly return the princess seams on the back to the original size 46
  • widen the arm at the bicep and convert the sleeve to a two piece pattern
  • lengthen jacket to original length of pattern - this version is 3" shorter

I've never owned a jacket even remotely similar to this, so I feel real grown up when I wear it!

Way more photos over on my Flickr -->

Saturday, 23 August 2014

Silk Kielo Wrap

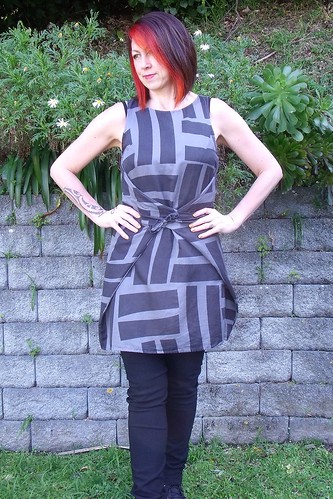
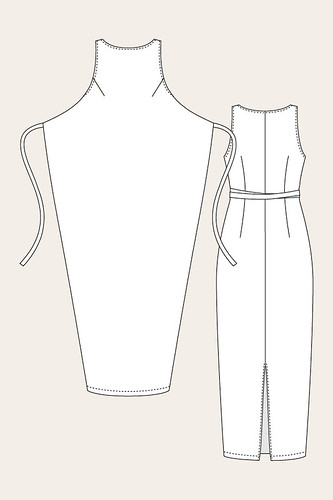
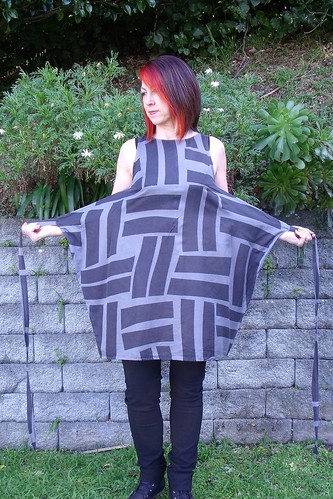
Named is a Finnish indie pattern company that is all about clean lined simplicity with some interesting design detail. The Kielo wrap dress caught might attention with it's interesting take on a wrap but without adding any bulk and remaining very feminine.

Kielo Wrap Top

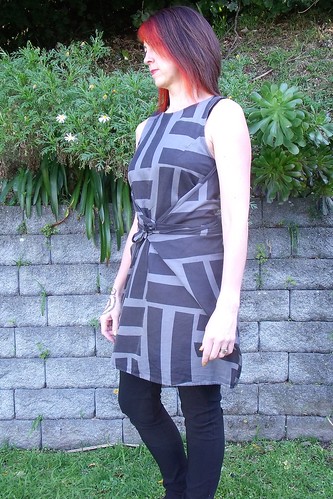
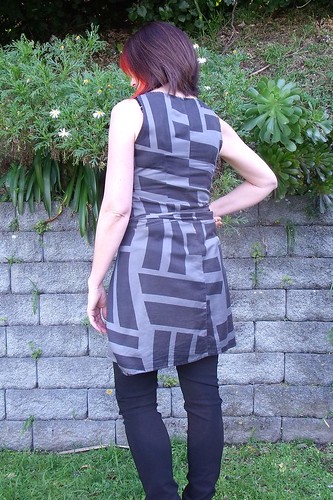
Back in April when I made this we were heading into winter down-under but I was still keen to get a Kielo into my wardrobe that I could wear at least during autumn and spring.  So rather than a maxi dress of the original pattern design, I decided on a long top that I could wear with a pair of leggings and a jacket/cardigan would be more season appropriate.

07-035-Kielo

I downloaded the PDF pattern from the Named website and assembled.  I made a couple of adjustments to the pattern:  the first was the obvious reduction in the length and the other was the dropping of the bust dart by 1/2", which is normal for me with most patterns.  I didn't do a muslin for this, but rather did a very basic tissue fit.

Based on the Named size chart I cut a size US8, purely based on the bust measurement.  This was spot on!  The top is quite fitted and is very well designed with the bust dart providing great shape to the upper body.

Untitled

Untitled

I picked up this cotton silk from The Fabric Warehouse, not particularly for this pattern but because it caught my eye while I was in store.  It was the perfect weight for this pattern, which suggests light woven or knit fabrics.  The instructions recommend finishing all the edges first, but I found that my overlocker doesn't deal with light weight fabrics very well so that wasn't a great option, especially because it slightly stretched all the edges because most are on the bias.

Untitled

With such a lightweight fabric I didn't want to add machine stitching around the neckline or the armholes so I ended up turning them over twice and and stitching them in place with a simple slip stitch.

Untitled

I love this top and have had it on a weekly rotation in my wardrobe ever since I finished it ... back in April.  It is a very simple pattern to make up and would recommend it to beginners.  I love the clean simple lines with the fitted bodice - it just feels rights.  I am definitely thinking about making a long version of the dress for summer.

More photos on my Flickr -->