

As always I started with a muslin anyway, so no biggie, I would just work out all the fit issues at that stage and then enjoy the construction.
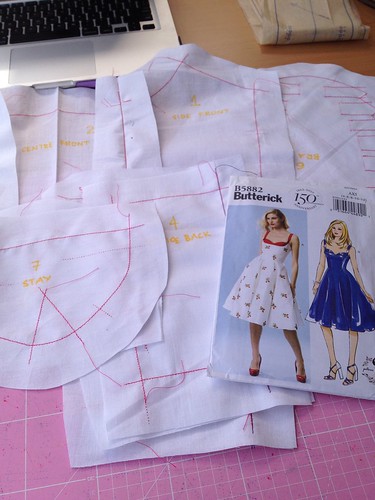
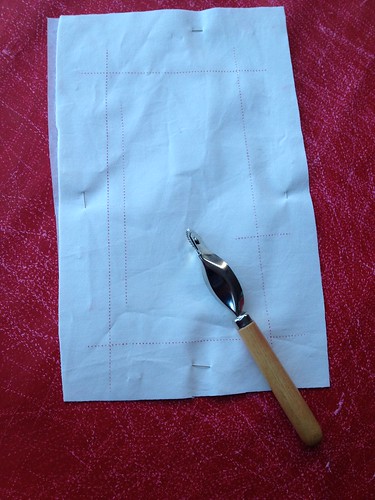
I started by cutting out a size 12, but reduced seam allowances down to 3/8" rather than the recommend 5/8". It all went together pretty well, except for where the cup hit the top of the side front. The pattern says "turn down upper end of bra along fold line, as shown, baste." The picture below mimics what the pattern illustration shows - but how bloody weird is that!
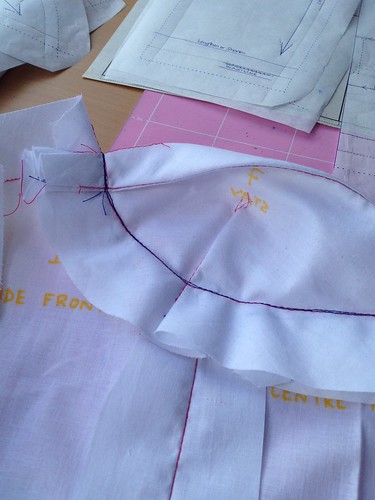
So I pretty much ignored that part of the instructions - although in truth I only used the instructions as a general guide rather than following them step by step. So rather than turning the bra/cup under I extended the side front up to the top of the bra/cup - as you can see in the photo below, the red line was the original stitch line.
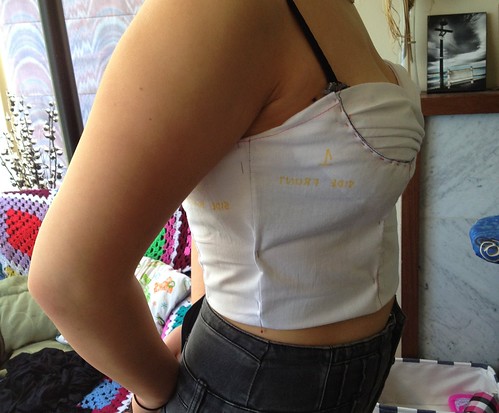
Actually the lifting of the side front to meet the top of the bra/cup side gives a much better look, and snugs up under the arm for a better fit as well.

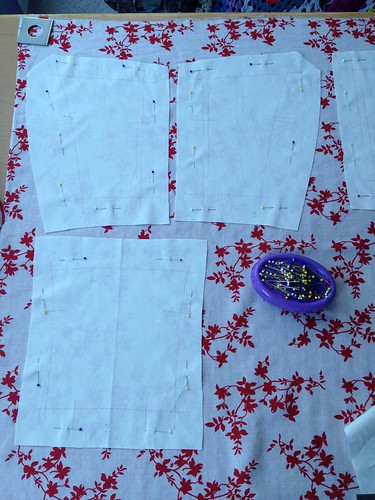
I had to make a bunch of adjustments to the front pieces to get better portions and have the princess seams hit the apex, as they should.
Please note that I always work with the stitching line rather than the cutting line of a pattern - for all these adjustments I've identified the stitch line by working from the cut line. So the blue dotted line is the cutting line of the original pattern (size 12) and the pencil/pink pen indicate the stitching line that I will be sewing along (sorry if this is a bit confusing - it all made perfect sense at the time!)
Let's start with the centre front ...
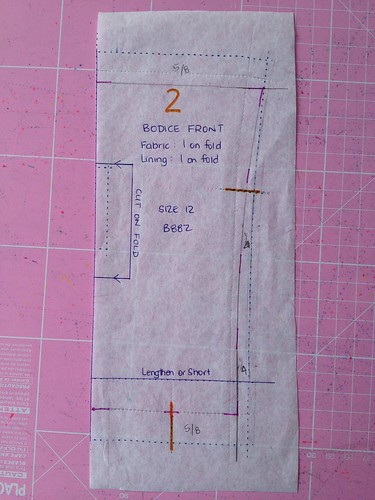
- The stitch line for the top and bottom are 5/8" in from the cut line.
- Only came in 1/4" from the cut line at the bottom and curved it up to the existing cut line at the top - meaning that I had to add a full 5/8" to the top. This resulted in moving the princess seam out towards the armhole, to be more in line with the apex.
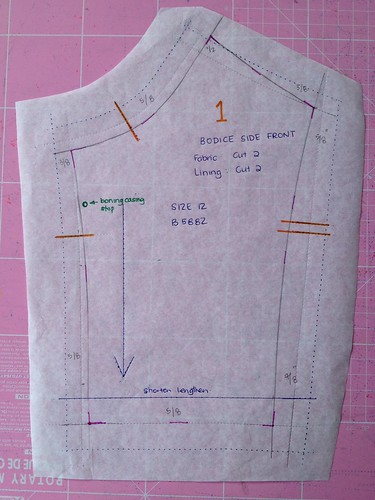
- Added the 1/2" to the top side of the bra/cup, from the previous stitch line.
- Reworked the side seam by adjusting where the stitch line would be from the original cut line - at the top of the side seam I allowed for a 5/8" seam allowance and at the bottom is moved the stitch line in by 7/8".
- Reworked the princess seam to also have a 3/8" seam allowance at the apex end and a 5/8" seam allowance at the bottom.
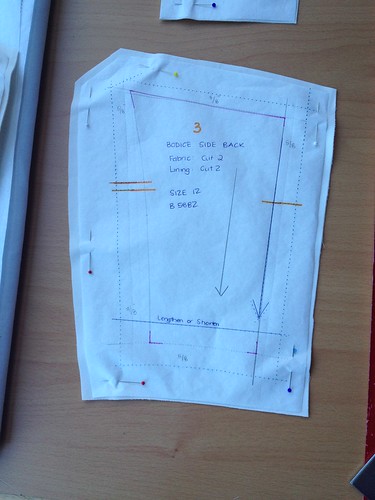
- reworked the side seam so the stitch line would be in 5/8" from the cut line at the top and 7/8" at the bottom.
- The back princess seam stitch line would also be 5/8" in from the cut line.
- The bottom would be same as the front with 5/8" seam allowance and 3/8" at top.
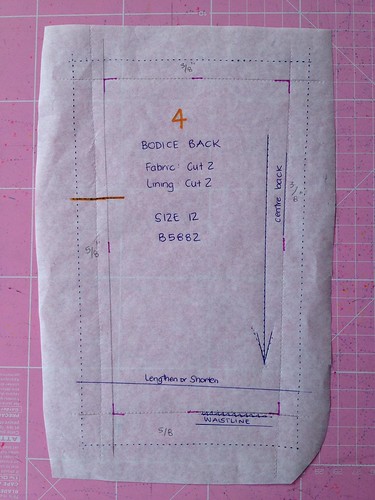
- The princess seam stitch line would come in 5/8" form the cut line
- The centre back would only come in 3/8" from the cut line
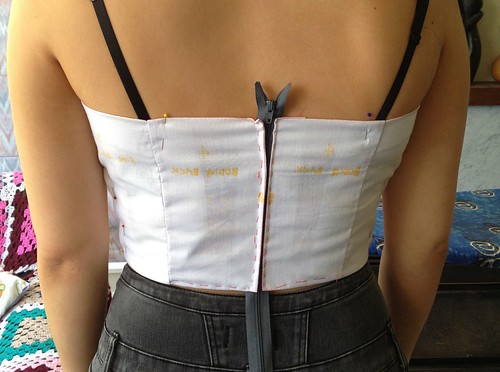
After the adjustments the back was a much better fit and the straps that would be attached at the princess seam mark pretty much fell in line with bra straps. Yay!
All adjustments done and muslin fitting nicely it was time to start with the real fabric :-) I started with the red and white version first. The outer shell fabric was a cotton voile that required an interfacing as well as the lining. The interlining and the lining would be the same fabric - a cotton lycra in an off-white. This is the same fabric that we'd planned to the be contrast colour for the second dress.
I pinned each pattern piece to the interlining and traced off the STITCH LINE, and the grainline plus all notches. All these trace marks would end up on the inside, hidden by the lining, so it didn't matter that I did this with red tracing paper.
I cut the outer shell fabric in a single layer, as the outer layer and the interfacing would all be hand basted together.
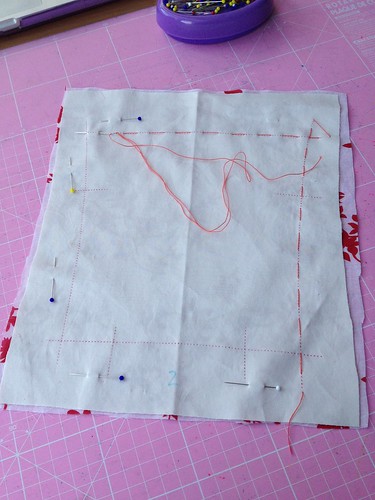
With the construction - the basted line on each pattern piece is where the two pieces will be sewn together. For me this provides a much more accurate fit in the end and is well worth all the additional work. As you can see the seam allowances are big and random, they really no longer matter.
Well I think that's enough reading for one post - I'll continue on in my next with the construction, where it will start to look like a dress :-) Hopefully this is helpful if you are considering making this dress.
More soon -->
What a fantstic fit you've created there! I bet these dresses will look fantastic! xo
ReplyDeleteThanks - I'm really happy with the final portions and fit.
DeleteAnd you're making two?! Ooooo, daughter #1! How many extra loads of dishes will this cost?
ReplyDeleteI agree, I love the look of the upper bust raised a bit to meet the cup. These are going to be beautiful!
I know right - I must have been crazy to agree to two or had a momentary loss of all my senses - cause sewing! But they have been a pleasure to sew.
DeleteI am hiding this post from DD! Still trying to fit the skinny jeans she wants - love the progress and can not wait to see the finished dress.
ReplyDeletehehehe daughters! We love them too much to say no to sewing for them, especially if they think what we make is better than RTW
DeleteThis is really helpful, as I have this dress on my todo list :-)
ReplyDeleteThis is what I was after when I was making these two, so I hope my adventures will be helpful to others. I think it's all about getting the portions right - luckily it's not too difficult with all the panels, its just fiddly.
DeleteThanks for sharing your detailed blog posts (like the site of my friend) on how to make this dress! I’d love to see the finished product. Also, did you measure the folds in the bra cup?
ReplyDeleteHi Kristine, I do try to make my blog posts useful to others, not just about what I've been sewing. The folds in the bra cup are all marked on the pattern, I just marked them well and followed the pattern guides.
DeleteThis dress will look great in a polka-dot. All the best with your adventures with this pattern, it really is great to sew once you get the fit done.
ReplyDelete